Friday, March 30, 2018

the moment of truth...

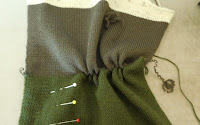
All put together, just need to figure out the collar and which colour pockets to use…I did cut a fabric collar (sorry for the black fabric – it obviously doesn’t photo with great detail but hopefully you get the idea), pinned it in place, made a few adjustments and a snip here and there on the sample piece. I drew it out on my knit contour mylar - then remembered to turn it around and draw it the way I would knit it, from the hem at the back toward the neckline!
Pinned the knitted piece in place around the neckline, tried it on (makes a difference!). Decided I wanted it a tad wider, and a bit longer on the back part. I also added about 8 rows of shortrowing to curve the bottom as it looked shorter across the back of the shoulders. Made the second version and it looks good – Here’s me impressed! I thought I'd have to make it at least three times to get it right and, was prepared to!

Now to knit a belt - 'Wendy' wore hers open in the front with the belt just tied across the back - I'm going to try that and the belt will be knit tubular in the café colour that I've decided on for the pockets.
Just a bit of final finishing and I’m almost ready to show it off – Knit Knack Shop’s Spring Fling, in Peru, Indiana (April 13, 14) here I come! Hope to see you there!
P.S. hoping it is Spring by then!
P.S.S. I'll post a real life modelling of it at a later date!

Wednesday, March 28, 2018

size does matter...

Outside patch pocket? can be quick and easy or you could put some effort into it. Here’s my effort version. This one can be a bit bigger than the inside patch pocket from ‘Pocket Change’  http://knitwords.blogspot.ca/2018/03/do-i-take-chance.html
Here, we only have to worry about the top of the pocket bagging out so I’m going with 14 cm X 15 cm (5.5  in X 6 in) and because it’s just sewn on top of the garment front, things are a lot more forgiving. 

A long while back, I told you about a breakthrough I had with a chained edging on a patch pocket http://knitwords.blogspot.ca/2011/03/fourth-times-charm.html and I tried it again with fairisle http://knitwords.blogspot.ca/2013/08/perfect-pockets.html - now I’m attempting to take it a step further. Note about waste yarn – don’t use crap – make sure it’s a good firm yarn that’s at least the same thickness as your main yarn or you’ll be digging for those stitches forever! I used Bonita 4 ply cabled cotton that is slightly heavier than the 4 ply wool I’m using for the main yarn and knit the waste yarn tighter – go with T6 – it will make the main yarn stitches pop up better.
That chain is going to go around the entire patch if I’ve figured this right. Based on my gauge, for the chain, I will need 38 sts for the width and (60 rows divided by 2) 30 sts for each side. To be able to keep track of this, I place the actual pocket  on #19-0-19 ns. Add 30 to the left and 30 to the right for each of the sides #49-0-49 ns. Measure out 6X width of ns in work and double that so you have main yarn double stranded, chain across, going fairly loosely for part that is sides of pocket – you need to build in some room for the drop and then do it a little more snugly for the width parts. Main yarn single strand, main tension +2, knit 1 row. Break yarn. Remove 30 sts at left on WY. Remove another 30 sts at right on waste, leaving 19-0-19 sts in work for pocket. RC000. CAR. Main yarn, main tension, K1R. At right, pick up stitch from chain closest and hang on #20, Pick up #19, move to #20 and take both back to #19. Make sure #20 is out of work. K1R. This puts chain stitch on knit side of pocket edge. Repeat on left, hanging new chain st on side opposite carriage, continuing up to RC060. Each side should be finished now and CAR. Using tail at right and the main yarn from carriage, hand knit a loose row with double strand and chain off.  

Saturday, March 24, 2018

re-boot...

After making the two different pockets, I decided I did like the ‘willow’ colour on the Left but maybe with the stripe proportions of the Right Front. I hate unravelling and I wanted to save the top portion to look at again and compare but don’t need to save the yarn to re-use. The stripes do make it easier to know just where you are. I wanted to take it back to just below where I joined in the ‘café’ brown colour – you may have noticed the width of my stripes at this point were somewhat based on the underarm shaping – I wanted to be able to shortrow it all in one go…

Back to the taking apart. I knew I had 10 more rows of the olive here than on the other pieces before starting the café and just to be sure, I counted them using long pins to mark each 10 rows to find the 70th row of olive. I then snipped the thread of the first row of café at the centre side, knowing I had the tail of that row on the other side. Pulling a little at a time from the tail side, snipping as you need and pulling back on the puckers to get the new end, draw  out the entire row. Note, I had steamed/pressed this well, so the stitches aren’t going anywhere.
Now there are 10 rows of olive left. I unravel 8 rows so there are 2 to play with. Take it to the machine and rehang the main bed stitches, picking up the row below – it’s easier than trying to poke the tool into the actual loops of the last row. Then, pull out that unhung row. Add some claw weights and put the fabric between the beds. Bring up the rib bed and position it to the one notch lower than fully engaged to allow some room to manoeuvre. Hang the longstitch band working gently and one stitch at a time. There is one row left to unravel – pull it out, ensure there are no split stitches from the rehang, ready to proceed with new plan!

Friday, March 23, 2018

kinda busy here...

Let’s analyze the situation. Look how I’m including you in this ;-)! I don’t like that large patch of ‘willow’ (gray) on the front above the olive/waist area. I was going to use that colour for the patch pocket…maybe the pocket will tie it in better? maybe have to change that? Actually, the more I look at it, it seems the pockets and belt of the AON coat are fabric but I’m not going there!  And who knew that 2 RTRs could/would change the width of a stripe? Why didn’t I know that? Ar-r-r-g-g-gh!
Issues with the collar are also sneaking in – I know you’re probably not going to like this, but my version of the collar (sort of like a sailor collar) is going to be that khaki circular hem, straight across at the back, the width of the shoulder line, and then black, with the longstitch facings at each edge, coming up around the neck to meet up with the facings from the fronts (which overlap slightly in the centre) and it will look like a vee or shawl collar turn-back when attached to the collar – the part I think you won’t like is the back/purl side of the collar will be showing as the outside but I’m okay with that.
What I’m going to do here is finish/redo(?) the fronts (they will match each other), do some seaming, fit the sleeves in, then try it on. I’ll cut a collar mock-up from fabric that I can pin in place and use to get the right size/feel for it – tell you more later! Good thing I got a lot of yarn!
I can’t remember the last time I was so excited about a project! Master class coming up!
P.S. Notes for knitting stripes: for stockinette, make your yarn changes at opposites sides. End one colour, say at the right. Yarn tail at right. Do a free pass and start next colour from left. This way, you won’t have to darn in ends over top of each other. However, when in longstitch mode, make yarn changes on the side opposite longstitch so you won’t have ends to darn in on the open/facing side. XO

Thursday, March 22, 2018

plan D...

I knit the Back, doing all those RTRs quite happily, blissfully even. My dilemma with the Back was whether to shape the waistline, which I did – most everything I’ve made recently has been quite A-line and I felt it was time to get back to shape. I love the final look and hardly paused before jumping right into knitting the Front.
In my mind, all I needed to do was to take the 8-stitch ribber longstitch facing off on waste yarn manually, turn the main bed work with the garter bar and rehang the ribber facing sts at the other side for the 12 rows of the stripe. In reality, the ribber stitches were now behind the main bed side of the purl stitches – no place to hang them! I know you’re laughing now and it doesn’t matter.
I calmly took it off again, turned it back around, figuring I could just reform the stitches to purl side manually after they were knit on the main bed. I messed around with that and wasted the good part of an hour before facing the fact this was an exercise in futility. Though I did learn how best to unravel a row that was reformed, as I abandoned that tactic, you don't need to know how because it was futile! Go ahead and laugh louder - get it all out of your system! I don't mind - I just here to entertain!  I rethought the situation – I was going to go through hell and back to make two purl side stripes in the front that were then going to be mostly covered with a patch pocket in another colour – wow! What was I thinking? It will be just another design feature!
But that longstitch facing does look good!
I did the next best thing, went to my granddaughter’s hockey game. There’s always another day!

Wednesday, March 21, 2018

swatch hack...

 Grabbed several cones and made a quick swatch!
Cast on 25-0-25 sts on the main bed. Put #21 needle on each side out of work – this will mark the centre 40 sts all the way up without having to hang yarn marks. Did a quick, hung hem. I am using T7, based on my vast (;-)) general knowledge – I know the gauge will be 29-30 stitches and 39-40 rows to 10 cm - and I want the narrow stripes to be about one inch, so, picking the colours randomly, knit 10 rows of each. This eliminates the need to make marking rows to keep track of the 60 rows to measure for the row gauge – just count off 6 stripes. All the yarns are Forsell Pure New 4 ply Wool, except the tweedy one which is my favourite here – it is an oldie, NLA of course, called Rutland Tweed (also by Forsell) and it will knit at the same gauge as the plain wools. I chose it because it has the little flecks of khaki, grey and black that I think will tie all these colours together.
My vision has khaki for the bottom edges and I see it as a circular hem, meaning that it looks like plain stockinette but it’s done on the double bed. Much quicker, no waste yarn, no rehanging stitches, just transfer up to the main bed at the end. I do have another reason for opting for the double bed technique – the front bands are going to be the automatic long stitch facings that I love and since you need the ribber for that, may as well get it going from the beginning.
I find that knitting up stripes like this gives a better perspective of how the colours blend and mix together and if there is a colour you don’t like, it’s easy to fold that stripe out of the swatch and put other colours side by side without having to reknit it all.
I got so excited, couldn’t resist jumping right in. You know it, I made the Sleeves while I mull over what I want on the Back. I looked up an old bell-sleeve pattern (KW# 35, Made to Fade) that I knew would serve (not too big or exaggerated) and put that sleeve schematic in my KR11.
The circular hem is beautiful and so easy! I wanted one stripe of the tweed on the narrowest part of the sleeve and here’s the thing – I always like the purl side of this tweed better – the little blobby spots show up more, and I thought, why not? Never one to shy away from an RTR or two, I took it off, turned it, knit the tweed, turned it back and finished off with the olive. It's adds another dimension and I like the added detail of the little dotted line from the first RTR. This may come back to bite me as the fronts will have the long stitch facing but I’ll deal with that tomorrow!

Tuesday, March 20, 2018

searching...

I paged through the episode, hunting for shots of Wendy’s sweater coat. I’m not sure what attracted me - the stripes (rather random, not matching), the colours (olive, grey, khaki, black, I thought), the shape (belted in back, long-ish, bell-sleeved, open front and is that a sailor collar?), the fact I was sure there was a ribbed, long stitch facing on the fronts or, the pockets (block, patches)? I may never know but I spent the weekend thinking of it and then today,  punched ‘laura linney ozark sweater coat’ in Google and got a ton of stuff. Wading through all the images – there were pages and pages of stuff - I finally found this!
OMG! It was from Anthropologie, sold out, of course, called ‘Angel of the North’ and it actually said that Laura Linney/Wendy Byrde wore it on ‘Ozark’. It said it was wool knit, green, yellow, navy (???), 32.5 inches long with a removeable belt and had been $169 – I liked it better on the show, but it gave me more of a starting point. Believe it or not, I have a fair stock of wool in the brown, slate, khaki, gold -ish tones, some full cones, some leftovers...

Friday, March 16, 2018

silver lining...

So glad I made that mis took the time to knit that prototype of the collar! It was way too big! I had the cardigan all put together, shoulders and side seams joined and sleeves on – so I put that on and then held the collar around my neck and I could better judge the actual size needed. Took 10 stitches off each side, reknit the whole thing, (placing the N1 correctly ;-)) and it’s perfect! Added bonus, I could use the longer edging from the outside of the first collar to judge how many stitches needed for the front bands.
OMG! You’re not going to believe this, but I re-purposed that band. I kept holding it up to the front and measuring and it seemed like the exact length that I would need for the button band. I pulled off the lace part until there were 2 rows of stockinette left above the ribbed edge that I had before beginning the lace patterning. I rehung into the row below which worked perfectly because everything was well steamed, and stitches set, leaving one full row of stockinette across the entire piece. I removed the last row, did an RTR and knit a row so I had that nice garter stitch ridge, took it off on the garter bar, hung the left front, turned the band and rehung it and presto! my button band! I did do a swatch of the buttonhole and I went with the 15mm (smaller), 2-stitch hole rather than the 20 mm, 3-stitch hole. I thought it suited the size/width of the band better than the larger one.
 BTW, you know how I like to name my projects, this one is called ‘Pocket Change’.
P.S. I'm watching 'Ozark' on Netflix - I'm really liking it and I'm becoming obsessed with a long cardigan that the Laura Linney character is wearing in the 7th episode - watch this space!

Tuesday, March 13, 2018

just between you and me...

I saw one of those makeover spots they do on daytime television and they were featuring a long cardigan and the stylist said that short girls should wear these too, don’t be afraid and the longer the better! Just to know I’m on trend feels good!
I’m doing the collar now and I’ve used this technique many times – basically knitting a rectangle, starting off with the edging, in this case, the ribber trim. I don’t want it too heavy looking, paired with the lace, so I’ve deleted a couple more rows from the pocket top and the trick to have the same edging for the ends of the collar, you cast on more than needed for the width of the collar, enough extra on each end to pull around 90 degrees and handstitch to finish off the ends. Sounds more complicated than it really is, but it works! 92-0-93 needles is what I cast on, knit the ribber trim, take off 22 sts at each end on waste yarn (for the end trim), switch to lace and knit the depth of the collar (8 cm). I tried something extra here – I added a little bit more for the back neck area, so the collar would fold over and lay better, hopefully. I got to about row 10 of the lace and it dawned on me I forgot to put in the N1 cam to centre the stitch pattern. Take a couple of days off and it all goes to hell in a handbasket!
I knit a few more rows just to be certain that it wouldn’t look right – the ends of the collar come together, right under your face – who’s not gonna notice that? I debated whether to rip out the lace and start again but decided it wasn’t worth it - I could say this is a prototype to make sure it wasn’t too large/too small. That’s my story and I’m sticking with it!  

Friday, March 9, 2018

i had a lump in my throat...

I found another one of those ‘editorials’ – this one was in KNITWORDS #32 – I am preparing for a few new classes for some upcoming seminars and one of my topics is ‘up-dating old classics’ – there were some great designs back in the early issues and I am exploring how best to tell knitters to go about re-sizing, particularly  sleeves, for a closer-fitting garment. Back in 1997 we were wearing over-sized things with 4-inch ease. A few years later, styles were changing, and store-bought stuff was becoming much more fitted. I was looking through the old magazines to find what I called the `first shoulder pad-free issue` and it was No. 32, Spring 2005. Previous to this, I went to the photoshoots armed with at least 4 pairs of shoulder pads in varying sizes and I remember Bill, our photographer, noticing halfway through the shoot that I was no longer shoving in the pads and adjusting everything accordingly! It was a banner day!
My editorial, as it appeared:

Of all the tasks of my job as editor of Knitwords, this one is usually the hardest and I always save it for last. The time when I sit down and talk to you, one on one. I think of you as friends, some of whom I’ve never met. Many of you I’ve spoken to, when you call to renew your ‘prescription’ or ask a question. I always get such a kick out of hearing, Is this really Mary Anne? What are you doing answering the phone? Like, I’m only supposed to knit or write or edit. I can cook too, you know! In fact, one of these days, I’m going to put in a recipe or two and see if anyone notices.
I like getting photos of your family, dressed in ‘our knits’ with little notes indicating who’s who. ‘Here’s my granddaughter in the pink poncho. The guy is my husband.’ I get postcards from your holiday travels and I know you took KNITWORDS because you had the correct address! Your renewal forms have nice little notes jotted around the edges and on the back. I put these treasures on my fridge door, just like moms do with the kids’ drawings and school work. My family and friends have fun checking out the new stuff posted on the fridge ‘bulletin board’ along with my hopeful lottery tickets.
The delivery of this, our 32nd issue, will complete eight years of KNITWORDS. Back in our first issue, I listed my reasons to knit:
-To learn more about the operation of my machine.
-To make garments that complement my lifestyle.
-To develop techniques that produce a good-looking finished product.
-To combine an interesting technique with a new shape.
-To change the old rules.
-To design garments to inspire other machine knitters to explore their machines
- And most of all, to enjoy myself.
Well, eight years later, I look at that list and I could have written it yesterday. And I’m still having fun!
Thanks to all of you for your continued support and for being my inspiration.

OMG! This is 2018 and I think it all pretty well still applies!

Tuesday, March 6, 2018

it went to my head...

 The success of that pocket! So, this morning, I powered through the left front, anxious to confirm my technique and get the same result from my pocket notes. Marked the pocket opening, remembered all my 10 cm yarn marks, got the front off the machine and just as I was going to start steaming it, realized that I only knit to the underarm when I took it off the machine! Now I have to go back, rehang it, find the correct row of lace patterning…never pays to get too cocky! How to figure it out? Well, I know I was at RC240 when I ended and I started with row 1. The stitch pattern is 38 rows by 24 sts, so keep adding 38 rows until you get close to below 240 and at 228, I can see there are 12 rows to RC240. That should mean I am going to knit row 13 of the pattern. Give that a try and hope to heck I had my point cams and N1 cam where I thought I did (fingers crossed!)! OMG, I just got really, really lucky! It pays to keep good notes!

Monday, March 5, 2018

a pocket in lace? ...

Here I am, with the radio on, listening to a little Chris Stapleton singing about broken halos (why am I identifying with that?), and I’m at the point where I am either committing to this pocket thing or not. The method I use would be to put a manual row of ravel cord for the pocket opening only, so like 30 stitches in the middle of the row, but you need to be sure you have a clean row of stockinette below that and then again above that to be able to pick up the stitches and add the actual pocket patch and the band to finish it off  later. With regular patterning, like tuck, fairisle, slip or whatever, that just means to bring out those needles only that you want the stockinette on, knit the row and the machine will continue the patterning on either side - bringing the needles out cancels the patterning and produces stockinette only. But this is lace and you cannot bring the needles out as they would then automatically transfer on the next row and you’re screwed!
hand knit ravel cord
hold sts for later
You’ve never heard me say this and probably never will again, but it would be easier on a brother machine! Hah! I said it! Yes, on a brother machine, the lace carriage transfers only and in the space where you want the pocket opening marked with stockinette you would simply un-select those needles, pushing them back to B position and then you would get the desired stockinette. But, I’m using my beloved Silver Reed lace carriage which transfers and knits all in one pass so that does not apply. Now, I could get out the instruction manual and find extra point cams and set this up as a single motif thing but by the time I do that (and it would likely mean re-reading the row, yada, yada, yada), I’ve decided the easiest thing to do is simply lace knit the row and then un-transfer the few stitches in that 30 row space. I did that and then hand knit the ravel cord from #23-52, knit a lace row, unknit and un-transfer only the few lace stitches, reforming them to stockinette and then just continued. The actual pocket is added later.
first pick up, row below top of ravel cord
second pick up
both attached, inside garment
Before getting to this point, I made the patches (ewrap bottom edge, knit 52 rows and take off on waste, reserving a tail of main yarn to cast off with later) and the pocket tops/bands, each/both 32 needles wide so there would be an extra stitch on each side of both the patch and the band, compared to the opening. For the bands, I made the hem to just after the first set of racks is done and then transferred it all up to the main bed, knit a row of stockinette, and then an RTR (remove, turn, rehang) and another row (this will make a nice garter stitch row that shows on the outside, making a nice dividing line between the band and the lace fabric),then took it off again on the small piece of the garter bar, reserving a tail of yarn about 4 times the width that should be enough to do the attach and cast-off without adding a couple more ends to darn in. What you want to happen is to add the open stitches of the band to the row of stockinette below the ravel cord and cast it off, add the open stitches of the patch to the row above the ravel cord and cast those off. Then, if done correctly, you pull out the ravel cord to open the pocket! Ta-da! The band folds up to the front on the bottom of the opening and the patch is hanging behind with the top nicely covering everything – all you need to do now is catch-stitch the outside edges of the patch onto the back of the fabric as neatly as possible…OMG! I feel like a rocket scientist! ;-o   P.S. if you want the handout with the method for your techniques folder, email me! knitwords@shaw.ca

all done, inside
outside, finished


Friday, March 2, 2018

do i take a chance? ...

I’ve been quietly knitting this longish, lace cardigan that I mentioned a week or so ago in the medium brown wool. I started with the sleeves – I always feel this is a good thing to do – it gradually gets me and the machine in the groove for lace carriage work before the heavy stuff of knitting lace across the whole bed, like for the back. I can practise my ravel cord shortrowing on the sleeve cap http://knitwords.blogspot.ca/2017/01/life-lessons.html and think about the other details of the design. I took a chance without making a whole new swatch (kids, don’t try this at home!) and deleted a few rows from the hem band, as it seemed a little deep, two less after the circular rows and two less between the racks, so 20 rows total instead of 24 and it looks nicer.
While knitting the back, the widest piece, I took my time and broke it up into 44-row spurts – that’s my row gauge, so it reminded me to hang the yarn marks at the edges for seaming and it gave me a breakpoint for the yarn spray which I found worked better when I left it sitting on the cone for a few minutes before proceeding. https://knitwords.blogspot.ca/2013/02/addicted-to-yarn-spray.html My method: put the cone into a larger, soft plastic bag with the opening at the top. I opened the bag, gave a couple of squirts and closed the bag over it for a second or two and then went back to knitting or took a coffee break.
While knitting the back, I sorted through my initial concept and decided to break up the back with a yoke across the top, going sideways and contemplated putting pockets in the fronts. I’ve never done this in lace before, so I was going over it in my mind. After I got the back off the machine and pressed out, I knit a 4X5 inch stockinette patch that would be the inside of the pocket – I figured an inside patch would be the better option here as a bag-style can pouch out sometimes. I do have a back-up plan, to sew a small snap inside in the centre of the pocket top opening, if necessary. Where does the 4X5 inch come from, you ask? Just my own idea of how big a pocket in knitting should be, basically the width of your hand across the knuckles and the depth from fingertip to the fork of your thumb. You don’t want it too big or it will bag and sag – to me the point of a pocket is to hold a credit card/money, maybe i.d. or your hotel room key and that’s it.
I pinned the patch inside the back where it would be positioned on the front and held it up in front of me, with a light-coloured backing on, so the brown lace fabric would show up better, to the mirror and I think I can live with this! I’m going for it!
Have a great weekend!