Friday, December 30, 2016

zippered....


They arrived and guess what? In my excitement, I had placed the order before I had finished the front edges against my own advice and, of course, the 22 inch that I originally decided on is too long! I had added a
brass-teeth #5 22 inch as well but didn’t care for the look of the brass with my tobacco brown hoodie so I am attempting to adjust the length of the #3 molded plastic coffee bean one. I need to shorten this by 2 inches which is 17 teeth on each side…I’ve only gouged my knuckle once, not a big deal, I can handle it – no blood on the garment is my standard. The hardest part is prying off the metal stops at the top of the teeth. I managed this with the aid of a little flat-blade screw driver and a small pair of pliers. After fully cleaning the teeth off one side of the tape, I realized that I only needed to get them off about 3/4 of an inch above the new finished length. The easiest part was replacing the stops, using needle nose pliers. Even though I am not totally happy with the colour of the zipper, I’m going to sew this in and then re-evaluate the situation. A couple of days ago when I realized this zipper would be too long, I placed another order with zipperstop.com and I have a #3 nylon coil in seal brown coming, along with a few others I thought would be good stock to have ;-), to add to the 6 others – like this jewel green one (not) that I thought would go with the cilantro linen that I couldn’t resist the first time! Glad I still have those old pinking shears! Haven’t used them in 20 years but you never know, do you?

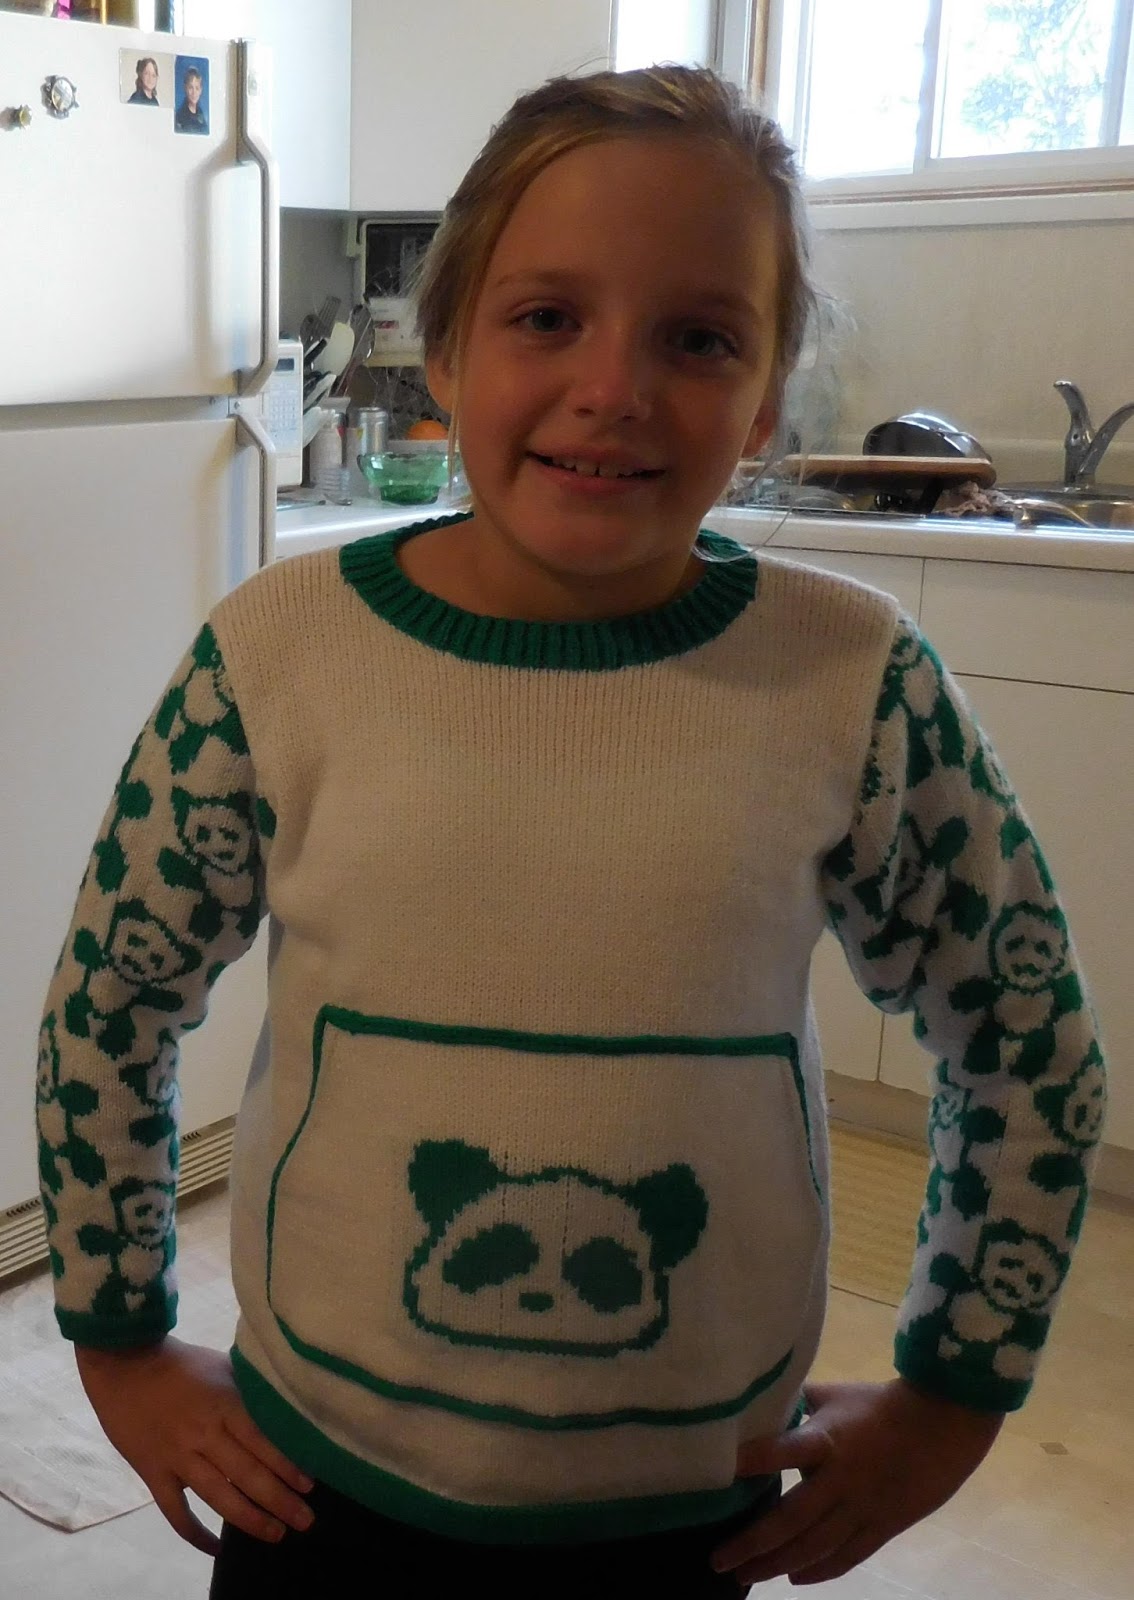
Machine knit like you know what you’re doing! ;-)
P.S. got this all done yesterday and I wore it for the rest of the day…love it! Particularly the weight and texture – can hardly wait for hot weather! And what do you know, Cathy  R. must have known – she’s invited me to do her seminar in Monroe, MI next summer – the 21st and 22 of July 2017 – more on this later!
Happy New Year to all! I’m into mottos lately, like, ‘machine knit like you stole the yarn!’ Or, how ‘bout ‘machine knit like you could write a book about it!’? ;-)

Monday, December 19, 2016

final details...


My linen One-Row-Tuck GirlFriend Hoodie is done, awaiting the arrival of the zipper - I did order it from zipperstop.com and it should be here, maybe even before Christmas! I ordered two - a nylon one that was a #3 lightweight and a #5 metal, brass coloured teeth option and I can decide which one will be best - I have not particularly liked the nylon coil ones but I thought maybe it was time to try one again - the lightweight part caught my eye! and they seemed pretty cheap so what the hay? The hoodie's all finished up, washed and dried, bands on, ready for the last thing of machine sewing in the zipper. I opted for slightly narrower hem bands than the original MFH pattern - if you go to 'Just the Flax' (KW#47), I used the same graded-tension bands, same number of stitches, but I started at T10 and went down from there by one dot per row for 7 rows and then back up - yes, there is an extra row (8) on the front side of the band - that helps it to lay flat and not curl over or under. I made the cuff narrower yet, only 5/6 rows, but again same number of stitches as the cast-on edge. I used all the same finishing techniques as the Manfriend Hoodie, with the outside seaming  and the same front edge stabilizing for the zipper installation... I'm so happy with this, I'm looking around to see what else I can use for another one and, even though it's freaking cold here and this is supposed to be warm weather wear, I won't be waiting, I'll wear it as soon as the zipper is in - we do have central heating!

Thursday, December 15, 2016

12 days of Christmas socks.....

Actually, that should say 12 days of knitting socks for Christmas but I was going for the headline ;-)! You probably knew I wouldn't be knitting Christmas-y stuff anyway!
I did plan it to see if I could keep up the pace. Now, knitting one pair of socks in a day is not a big deal but to keep it going for 12 days was the thing! And I did discover a few things along the way.
A while ago I bragged that I could get 3 pairs of ladies socks out of 2 - 100g balls of sock yarn. Well, that was when I thought a 100g ball was really 100g...I had made a pair of ladies 7s earlier from 'Tropical' and given them away without weighing them and now had a full ball and the part left over. I wound the full ball onto a cone and knit a pair of 8.5s (final weight 62g), leaving me with 2 partial cones. I originally thought I could easily make another pair of 7s but I thought the remainders looked a little on the small side. Weighed them and I only had a scant 58g and I thought, what the? Now, I have to say that I don't waste a drop! I actually start out with a tail of less than 8 inches at the beginning of the cast-on to use for seaming the rib cuff up the back of the sock and I never worry about whether I am 'matching' the stripes of the sock, I just start knitting the next sock wherever I left off with the last one. I still had 4 brand-new, whole balls, still banded, untouched. I weighted them and had a range of 92g up to 104g!! wow! that is quite a difference. I even went and got a pound of butter to check my scale - it was bang on, even measuring each stick! Now strangely, the heaviest ball was the darkest colourway, but that shouldn't matter - they are calling it 100g either way but it isn't! I did get the third pair done as a size 6 narrow...no big deal because I do have two girls who are size 5.5 shoe size - I usually go up a half size for these socks because I have found that they wear better if not too tight/short where your toes are pushing through the end all the time.
Oh yeah, and I have revamped my 'warm-up sox' pattern to include all the little changes I've made over the past few years, including size variations for both men and women...if you want it, email me...knitwords@shaw.ca...you still have time to get a few in for Christmas!

Sunday, December 4, 2016

like a one armed hooded bandit...

I was thinking that you were nipping at my heels, trying to get ahead of me in this linen 1RT GFH KAL...LOL! Now I realize you've been holding back. Probably haven't even started yet, sitting back just waiting to see if ole MAO gets into trouble or not... ha! I'm doing my happy dance! Got the hood knit on Friday - it weighed 64g. On Saturday, jumped right into making a FULL length sleeve - it took 58 gees! that means I'll have about 120g left for the bands - more than enough, no reason to sweat, no need for plan B! I could even make a matching headband! ;-)

Thursday, December 1, 2016

that blessed pocket.....

Did you know that was going to force me to choose? :-) Which side was going to be the right side, I mean! I was thinking I could knit it all and leave it to the last minute to decide if the knit side or the purl side was going to be the public side...but as I was knitting the pocket and shaping the angle at the side, I realized the look of that decreased edge was going to be the deciding factor. The pocket decrease is what I call the 'outlined 4 to 3 full fashioned decrease' and I'm not sure if I've actually put this part in writing before, but when I was doing those 1RT raglans (http://knitwords.blogspot.ca/2014/03/1rt-raglan.html) I thought I did.
I made sure there were no tuck stitches in this 4-stitch edge - I know you know how - you can cancel the patterning by simply bringing those needles out past the latches before the tuck row (but there might be someone else reading this!) (or you could change the point cams - Silver Reed/Studio). This gives that no-finish-finish - a nice plain edge that curls slightly under to the purl side and looks great from the knit side, either on a stockinette fabric or, on this 1RT fabric, without having to add a finishing band or edging later. Hence, unless I want to re-figure the pocket design (NOT!), the knit side is the right side!
I probably don't have to remind you that at the top of the pocket, remember to make sure it ends on a stockinette row that matches the same stockinette row of the front when you take the front off to rehang the pocket top before proceeding. If you're using the garter bar for this, leave the pocket stitches in the hooks - don't push them back before hanging the front (else they will knit through the stitches of the front and you don't want that creating a more distinct line on the top of the pocket), you  want to leave all stitches in the hooks since the next pattern row is tuck and the needles need to be in B position to read that row...
Back, both fronts and pockets done. 298g left. The hood is next in the line-up!

Wednesday, November 30, 2016

current plan...

Just in case you're keeping up with me, after thinking about it overnight, here's my plan (subject to change! ;-)). Usually I would knit a sleeve here - I am really tempted but you know how I hate unravelling! To be honest, actually, I would have knit the sleeves first but I'm leaving them until last because they are a big variable - can be like the original or short-ish, slightly 3/4, no cuff, push-up style or elbow length, depending on the amount of yarn remaining.
I toyed with a different pocket style, like an inside bag pocket where the pocket lining could be a different yarn or at least stockinette which would consume less yarn but ruled that out after trying on my various hoodies and confirming  that the pouch-style pocket is a very important part of why I love this hoodie style so much! And, judging from the weight of my double swatch,(48g), the 2 pockets will be slightly less than that - not a huge saving. I will scale the pocket down slightly, like an inch narrower and shorter and same with the hood.
I haven't even been tempted to order the zipper yet - will it be beige or tobacco brown? Now that I found the WCD tobacco I am favouring that for the bands/hems, but I'm open!

Tuesday, November 29, 2016

progress report and tweaks....

I have the back done and I'm very encouraged by the fact that the remaining cone looks almost the same! of course, the first thing I do is throw the back on my scale and it weighs in at 116g and that's with the waste yarn at shoulders and bottom edge! I weigh the cone and it has 424g remaining (started with 540g) so that translates to 116g for the back - not going to knitpick here and just call it 120g. I know that I had been weighing individual pieces in the past in certain projects for various reasons. On my second Omega hoodie (http://knitwords.blogspot.ca/2014/12/zipped-off.html)
I kept track - it was wool crepe deluxe (2200 yds per pound as opposed to the 1750 ypp for the linen) and a little different shape, but it will give me an idea of the ratio of the pieces. The back was 124g, back band was 20g, one sleeve with cuff was 92g, the hood was 74g and with band added it was 90g, front with pocket and band was 84g. That all adds up to 586g - take the bands out - they were all 5cm, doubled - that's about 70g for bands, so I'm very confident that I should be able to get this GFH done with pockets and hood, with contrast bands at least.
I've been thinking of you KAL-ing with me (hope springs eternal!)and figured I should add an extra consideration because this wouldn't be in the original MFH/GFH pattern as they are knit in stockinette. With the stitch pattern I am using, you may have noticed the vertical lines - there are actually 3 vertical lines separating the two reversed diamond-ish motifs. So I centred the pattern so the three lines run up the centre of the garment because that will look best but I wanted to remind you of my extra little tweak for patterns with vertical lines. After the underarm shaping is done for your size, or, actually before it is done, check and see where the vertical lines are placing in the shaping. Your finished garment will look much nicer if you can have a line (or two or three) running up the straight edge of the body after the underarm up to the shoulder (hope that makes sense). I did change mine - I made the shoulder wider by 2 stitches in order to have two vertical lines at each edge - of course, if you have chosen a stitch without vertical lines don't worry about this! :-) oh yeah and because of those three vertical lines, I added an extra stitch on one side, at the left for the back and will flip the pattern for the fronts and add the extra stitch at the right...and don't forget the yarn marks every 10 cm....oh, and I found a part cone of WCD leftover from Tobacco Road (KW#53) that is a very close match - instead of the beige linen...

Wednesday, November 23, 2016

on a mission....

I know you're dying to find out how my swatch went, so just quickly, here it is, hand washed and laid to air dry. I've settled on the T10 swatch - it is still nice and loose and airy - I hope you can see in my photo here, it's fairly see-through-ish and I like that. My final gauge is 23 stitches and 38 rows to 10 cm so quite a bit looser than the washed gauge of 28 sts and 43 rows of Linen Spin at T8 and the yarn will go further this way. I could get really anal and figure out the square inches of the swatch versus the weight and the square inches of the garment and be closer to knowing how far this yarn will take me, but that would take the thrill and suspense out of the project! I know you're going to join me and do this too but I'm just going to forge ahead and work at my own speed and you can catch up or not! BTW, I did also decide to make one size bigger than my original GFH because  looser is better for the summer...oh, and either side can be right side - I'll leave you guessing as to which one I choose!

Tuesday, November 22, 2016

fingers crossed....

There is a group of knitters in the Maritimes, Nova Scotia actually, and they are doing a Knitalong using an old pattern of mine, called Hood'sUp from Knitwords #22, Autumn 2002 - here's the link I gave you back in 2014 to their initial blogpost:
When they first asked for my permission back in 2014, they seemed to start off with a bang and then I never heard from them. http://knitwords.blogspot.ca/2014/02/remake-of-remake.html
A couple of weeks ago I got an email titled Adventures in Machine knitting and what do you know? it was those knitters resurfacing and getting going again! They now have a ton of very interesting information about swatching, cleaning your machine etc that you might find interesting. The premise is not everyone has the same machine or yarn etc and they plan to explore options and all sorts.
 Anyway it seems whenever I join a KAL, it never works out or I just get tired of waiting for everyone else to get knitting so I'm going to just pretend to do this on my own and tell you about it here...
You may recall in the past year or more I had become obsessed with hoodies or was it that stitch pattern? ;-) Anyway, I took a hiatus from both and now I ready to go again! I want a light, summer-weight hoodie that I can use as a cover-up so I've inventoried my yarn stash and came up with some options - several lightweight cottons, linen blends and linen. Now, I don't want to have to re-design the original - I want to use the same shape file and the basic techniques, but I don't need to match the gauge exactly because I'll be working with my knit radar and all I have to do is plug in my new stitches and rows. BTW, I'm using my Manfriend Hoodie ( http://knitwords.blogspot.ca/2015/06/manfriend-hoodie-pattern.html ) pattern (the girl version because this is for me!) - it is actually the updated 2015 version of Hood's Up. I ruled out the really fine stuff because it would be too complicated and have to totally be redesigned. I took the linens and the biggest problem is the amount required. I did use this yarn twice before - KW#47, Just the Flax (used 460g for the 4th size) and #49, Linen Spin (410g for 2nd size). Both of those, I used one of my one-row-tucks knit fairly loosely. Here's the link to one of my previous posts explaining 1RT: http://knitwords.blogspot.ca/2014/03/1rt-raglan.html
Now, I had initially thought of lace when I decided on a summer-weight GFH but the linen is not conducive to lace carriage (too stiff - it does soften up nicely when washed though)) and I'm really not up to another Battenburg experience!
When I was in Dallas last month, one of the really great questions I got was 'how do I know how much more yarn I will need for swatching, planning etc?' Even though I've settled on this Linen - it's from Silk City/BTYarns/Knit It Now - 100% linen, 1750 yds/lb - I have a cone of brown and one of cilantro, each weighing 540g and I have a leftover 240g of the beige. I'm calling it lightweight because I am knitting it quite loosely - I did one swatch at T9 and another at T10, washed them and will wait for it to dry before deciding which to go with. I swatched with the beige, not wanting to waste the good yarn because I will be lucky (actually, really lucky) to get a hoodie out of one colour. My backup plan is to use a different colour for the bands - brown with beige bands would be fine and I have an almost-exact-colour match in Skinny Majesty for the cilantro linen. So my answer to the question was to use some other yarn to make sure your stitch pattern is good and then hopefully use another colour leftover of the same yarn for the actual swatch and also, have a backup plan in case you still do not have enough (shorter sleeves and optional hood!)


Wednesday, November 9, 2016

disaster averted...

I decided to knit a few pairs of socks while I was mulling over what I really wanted to get going on - I did find a few balls of Regia 4ply sock yarn that I bought by mail order back in the spring. They are the 100g balls that I prefer - I think I told you that I can get 3 pairs of ladies size 7 to 8.5 from 2 - 100g balls and I like that -instead of having a bunch of random leftovers that aren't enough for anything - this way, I feel like I'm really getting my money's worth!
So, I start off to  wind the sock yarn onto cones with my electric Silver Needles Cone Yarn Winder. Ouch! Trying to get going fast, I grab the winder off the shelf one-handed because my other hand has a couple of balls of yarn and a few cones, and, the thing off-balances and falls to the floor! My heart stops! OMG!!! Cursing myself, I abandon the yarn and cones to carefully pick up the injured winder. It looks fine, no cracks or breaks visible. Gently, I take it over to the table, plug it in, flip the switch and all that happens is an awful grinding and thumping noise, nothing moving on the exterior! I feel awful! How could I be so careless? so clumsy? so dumb?? Not only was this thing quite expensive, I think they are no longer available...what am I going to do? My son who is usually my go-to-guy for anything technical has just left town and won't be back for 3 weeks. I can use my manual winder, but it does take some time to hand bomb 100g.
I take a deep breath and get out my tool kit.  Remove a couple of screws.That didn't do it...take another look-see and find another likely one. Remove it and that does the trick! I can take off the top housing and what the??? There are two chains, one intricately wound (that spins the cone) and one that should zip back and forth down the leg (attached to the guide finger that holds the yarn) - it's off the rail - and drives the other one. It looks pretty simple compared to the top complicated one.
Now, don't get me wrong. I do think I am fairly mechanical - okay, I do admit I've never changed a flat tire, but it's because I've never had to! ;-)  
I do know a bit more than how to operate a screwdriver but this looks like something that MacGyver made up! I am tempted to just put it aside and wait for my guy to get back - I know he would have this up and winding in no time, likely better than it was, but I do love a challenge. At one point I did go on the internet and check - you can still get one but it's four hundred bucks U.S.!!!  What motivation! Two hours later, success!! I felt like I needed a third hand to hold this while I poked that and nudged this, all the while, praying that I could finally get that little thing in the thing that went around the other thing! Who knew that under that smooth exterior...
PS  I felt justified enough to place another sock yarn order! ;-)


Tuesday, November 1, 2016

kick start...

I need one - I'm back from Texas. It was a great workshop! So much fun seeing knitters I remembered from before and meeting the newer crew. They all treated me so nicely, I signed a lot of autographs and we had a good time! They did a potluck for lunch and it was outstanding! Thanks to everyone!
Now, back home, my head is back to normal size, everything is unpacked, most things taken care of. Got my pile of red scarves delivered to the Aids Awareness people, and I'm spinning my wheels...I feel like I don't know what to do! Haven't knit anything in almost a month now! But what should I do? I don't have a to-do list - that's usually what I need to get me going but I feel like I don't really have a list...Oh, I know, when worse comes to worse, I can always make a few pairs of socks! I have no idea if I even have any sock yarn to work with...then again, I might just have to do something with that archaeology scarf swatch from last May - it is still intriguing me...
Actually, I know what's wrong! I just found out that Vogue Knitting Live is happening this coming weekend in Minneapolis and I'm kind of bummed out that I'm not going! and it's not like I'm this big hand knitter (I'm not really - the extent of my handknitting is garter stitch dish cloths or scarves just to have something to do in front of the TV) - how I found out? Jason Wurst from RockingHorse Farm in St Cloud, MN told me he's going - they have a booth there! and I read the on-line brochure and I got all excited, you know, bright lights, big city, lots of yarn!
So, if you're going there without me, make sure to stop and give Jason and Carole a big hello from me! And have fun!

P.S. a really big thanks to all who have bought the new book - your support has been gratifying and overwhelming!

Friday, October 7, 2016

the church cardi saga

I think I got over the excitement of launching the new book - I've been tidying up around my workroom and getting ready to pack stuff up for the Dallas/Forth Worth seminar and I realized I hadn't shown you the finished Church Cardi! never mind the pullover version!
Maybe I'll back up a bit... The church cardi, you say? Way back in April, I began working on a mid gauge version of my RTR Lace Cardi and I had gotten a real 6.5mm 7-prong adjustable tool - oh, what the heck! you can go back and read about it again if you've forgotten or maybe joined me since then...

http://knitwords.blogspot.ca/2016/04/im-pretty-excited.html
Anyway, it doesn't usually take me that long to finish a project but somewhere in there, I got the inspiration to put together the new book  - that's my excuse and I'm sticking with that story! I did say at one point that I was going to make a pullover version - I did have intentions of writing up both of these as a pattern, but one step at a time! I thought the pullover version would be a nice option for people who didn't like cardigans and actually both the cardigan and pullover were planned to offer a larger size range. The pullover has a back section that is virtually all patterned and the front/side panel of mostly stockinette allows for an increased finished width fairly easily. When I got that finished, I loved the back so much, I decided to make the pullover so I could have the back in the front, if you know what I mean, even though I very rarely wear pullovers - but this did turn out so nice, I am pretty sure I will wear this one - and now I do have something brand new to take to Dallas next week! ;-) Oh, and BTW, thanks to my friend Tom the machine knitting guy for convincing me that I really hadn't made a huge mistake (http://knitwords.blogspot.ca/2016/05/whar-not-to-do.html) - He sent me an email and told me he thought it looked very architectural - I looked at it again, steamed it out and it's one of my favourite designs - it's on the bottom of the front and back of the pullover - AND, BTW, all of these stitch patterns are included in the new book but there is no garment pattern (yet).

Wednesday, September 28, 2016

ancient history....

I am decompressing from the pressures of getting that book ready and out - I feel like I don't even want to see a knitting machine for a while. Thanks to everyone for your support!
I'm doing a bit of sewing and my latest binge-watch is the BBC production of Shetland. It is a detective/murder mystery (my favourite), set in Scotland. It takes a bit of listening to, for that Scottish dialect, but I'm enjoying it. The most recent episode that I've watched takes place on Fair Isle which is a tiny island off Northern Scotland, between Shetland and the Orkney Islands. And I keep saying to myself (there's nobody else here to tell) 'I've been there!'. The scenery is spectacular - it is known as a bird sanctuary and as the home of fairisle knitting.
Way back, in 1991, I went on a tour called 'The Wool and Wonders of Scotland', sponsored by the Rowan Yarn company. It was a fabulous 2-week trip-of-a-lifetime where we toured by bus, boat and helicopter from Aberdeen to Stornaway and Lerwick, ending in Edinburgh. There was a ton of history, everything was defined by how long ago Bonnie Prince Charlie did whatever. We had a day with local spinners and weavers; a fashion show by a designer who produced cable knits for the Japanese market; a trip to the tartan-maker to the Queen; visited crofts/homes where Harris Tweed was made; had several trips to wool brokers where we saw wool being processed from the sheep's back to the finished skein and every step along the way; the Callanish Stones (so much better than Stonehenge!), a half day at the Glenfiddich Distillery and a lot more. There was something for everyone and the highlight for me was a helicopter ride to Fair Isle for a couple of hours.
In the community centre I found a group of machine knitters using Studio/Sliver Reed punch card machines  to knit fairisle sweaters for sale. I was the only machine knitter on the tour ( all the rest were hand knitters with a couple of husbands thrown in for good measure) so I hung out there for most of the afternoon, talking with them and figuring out what they were doing. They had a machine with a ribber attached that one lady was making the 'welts' (what they called the ribs for waistbands and cuffs) and removing them on waste yarn and then they had about 4 other punch card machines set up to do the fairisle blanks of body and sleeves. I was amazed at the huge, long punchcard they had - I didn't know then that it was available on a roll so you could have a 200 row fairisle design without having to reset the punchcard every so often. Someone had to hand graft the welt to the blanks and do the seaming. I showed them how to rehang the welts directly to the punchcard machine to knit the fairisle right off that and eliminate the grafting step - they were absolutely amazed! I was a hero for a few minutes and the hand knitters looked at me with new respect after hearing that I was able to help out the Fair Isle knitters!

Wednesday, September 21, 2016

OMG!!! it's ready!!!

the book is done! and you can go to amazon.com and put it in your cart and get it by Sep 23rd!! wow! once I finally finished proofreading and fixing little boo-boos, it didn't take long! I'm so excited!!!!(big sigh!!)

The HandBook For Manual Machine Knitters

List Price: $29.95
Detailed descriptions of techniques and methods for use on manual, non-patterning single bed knitting machines and frames. Cast-ons, cast-offs, increasing, decreasing, shortrow shaping, patterning, lace, tuck, slip fairisle...Examples of where, when and why to use and why not. Instructions and charts for many hand selected stitch patterns and bands, trims and edges all done on the knitting machine, no hand knitting or crochet skills required.

About the author:

Mary Anne Oger, machine knitting designer and instructor, is well-known for her classic, wearable designs and her knack for adding common sense and humour to machine knitting. She is adept in textures and great finishing techniques which can be used by all machine knitters, any gauge, all machines. With many seminar and workshop credits all over North America, her teaching skills are undisputed. As editor/publisher of 'KNITWORDS' magazine for 13 years from 1997 to 2010, Mary Anne set high industry standards for quality work in machine knitting. She makes her home in Thunder Bay, Ontario, Canada and can be reached through her website at www.knitwords.com where you can find her machine knitting blog 'Needles to Say...', providing hints, tips, patterns and inspiration for all machine knitters.

Publication Date:
Sep 18 2016 ISBN/EAN13: 1537755161 / 9781537755168

Page Count:120 Trim Size:8" x 10" Language: English  Printed: Black and White


Monday, September 19, 2016

panda success...

just to prove that I did get that panda sweater done! and Rhiana loves it! wow, she is growing  faster than bamboo! the sleeves are only just exactly right, good thing I didn't opt for the too-short version!  ;-)


I used the semi-jacquard technique to make the larger, single panda face on the patch pouch pocket ( say that a few times!) and then sewed it to the front of the pullover - admittedly, the pocket should have been a little smaller overall but she didn't notice and she was so proud to be part of the design process!

Tuesday, August 30, 2016

the hurry-er I go...

the behind-er I get! I got that first sleeve off the machine in about 40 minutes, feeling pretty good that I had no glitches, like dropping everything off or switching the yarns wrong or something like that. After all, that's what the yarn changer is all about! LOL!  BUT, it looks suspiciously small!!! Now, I am using my KR11/knit contour/shaping device  for the size - you program in the stitch and row count from the swatch and it shows you how many stitches to cast on, when to increase and how long to make it. Usually I also have a to-scale drawing on graph paper that I can make brief notations, like how many stitches to cast-on and the row count at the underarm and top of sleeve cap so I can be sure that the next piece matches up AND usually I use the calculator to multiply the row gauge by the length of the sleeve so I should know ahead of time close to where I should be by the time the mylar feeds through to the underarm, but somehow, yesterday, I forgot this step...Sure enough, I had plugged in 63 rows to 10 cm instead of the actual 68 rows - no wonder it looks short. I briefly entertained the idea of teaching Rhiana to push her sleeves up slightly for the 3/4 sleeve look but my heart said no, you can't cheat a granddaughter!
A few notes on the knitting...
Bring the end needle out at the carriage side, at the beginning of each row. This makes sure the end needle knits properly and that both yarns/colours go to the edge of the knitting.
Increase: when the carriage is at the right side (away from the yarn changer) you have one colour at this side - bring out the next new needle and ewrap it with that colour. At the same time, do an ewrap at the left side with the unused yarn. This way you aren't fighting both yarns at the left side.
Decreases/shaping for the sleeve cap: normally I would want to shortrow the sleeve cap and then cast them all off at the end but that means holding position which will surely cause trouble because of the yarn changer. On the bad sleeve, I did go to the old method of casting off stitch by stitch with the transfer tool on the carriage side of the work. It takes more time and is rather ugly. This time, I used the ravel cord method of shortrowing - why didn't I think of that yesterday? So much better! 
BTW, that one at the bottom - no, I did NOT knit that in the opposite colours just to see what it would look like...but check out that cast-off! ;-)

Monday, August 29, 2016

talk about pressure...

I haven't been doing too much blogging or standard gauge knitting lately - I've been working on a new book of techniques for the manual machine - more on that later!
Rhiana, my nine year old granddaughter, was over on the weekend and spotted the jade green and white cones of yarn sitting on top of my standard machine and wondered if I was getting around to her panda sweater (http://knitwords.blogspot.ca/2016/05/panda-monium.html) and when did I think I'd have it ready? I promised her that it would be ready for her back-to-school which is the day after Labour Day. I was thinking that would give me 2 weeks but crikey! it's only a week away! I do have the swatch that I/we made back in May, but why can I not find any notes? I was going to start with that nice hem that I had on the swatch - it looks really good but I don't know what I did!
I thought I'd wing it...sat down and cast on with waste yarn on the single bed and then, thought, why would I do that? I need the ribber for the semi-jacquard so why wouldn't I use a ribber band and then I went DUH! It's a double bed circular hem! and it IS really nice! The 'fold' line at the bottom was what was puzzling me because it works so well and then the rest of the band is so even and neat - LOL! Well, lesson learned! If I write it in this blogpost, I'll always know where to find it, even if you don't care!
Circular Hem. Swing H5. Arrange for full needle rib, end ns on RB. Cast on WY. Knit several rows. Set to circular. T4/6, ravel cord, K2R. Move carriages to left without knitting. Bring ns all out. This will cancel the circular setting and make a zigzag row (without having to change the settings back and forth). MC, T2/2, K1R. Hang comb and one weight. RC000. T1/3, knit circular, grading tension by increasing one full number for each row to T8/10, RC014. Swing P. Transfer sts to needle arrangement desired - for semi Jacquard, all working on MB and only every 6th needle in work on RB. Swing H. Program pattern and use next row to read/select. T9/7, K1R. RC000. Set to slip.

And the book? I think of it as a resource manual for the manual machine so I wanted to call it 'The Manual Manual' but I'm working on that. It's full of techniques, the when, where and whys of what to do, and hand transferred stitch patterns and trims and edgings all suitable for non-punchcard or non-patterning machines. Rick (my layout guy) is calling it the 'war and peace of knitting'! We are on page 78 of the layout and still have probably another 35 to go - I was aiming for 75 total - he knows my other 'books' were all 28 pages and the magazine was 48 pages so no wonder! He thinks I need to get a life! Do I edit it down or go for broke?

Wednesday, August 10, 2016

salvage operation...

I'm working on a pullover version of the Church Cardi...(heavy sigh!) I took the sleeve of the cardi (plain stockinette with a lace hem) and measured it against the front panel, which is fully patterned, to see where I needed to start the patterning on this sleeve so it would match up at the underarm. Decided that I should begin with 2 repeats of the 'cross and triangle' and went ahead and knit the sleeve. When I got it off the machine, it looked suspiciously short...drat! What do I do now? I really hate too-short sleeves. I briefly consider ploughing ahead, telling myself that I probably won't wear this anyway - it's a pullover and I just don't wear pullovers. On the other hand, I could just always push them up and nobody would know. BTW, this yarn is beautiful (Cascade Ultra Pima) and the combined stitch patterns, I think, are really stunning.
I figure, oh well, what's another day in my life to knit another sleeve? It's not like this is the first time I've had to make an extra sleeve (or two or three! LOL!) I go ahead and make the second sleeve with 3 repeats at the bottom - it's perfection! Then I thought, huh! maybe I can salvage this! got nothing to lose in trying. I'm going to separate it just above the last 'cross and triangle' repeat - there are 2 rows of reverse stockinette separating each of my patterns. If I can pull the right thread and open up the piece I can add another repeat to the bottom portion and then graft it back together, duplicating the row of reverse stockinette that I had to destroy to get it apart! sounds easy when you say it fast!
I steamed the sleeve to set the stitches, took a deep breath, grabbed  the scissors and snipped the yarn in the middle of the bottom row of reverse stockinette. Now, pick at each side to get a big enough piece to get a grip on, and pull on it to draw it across to the edge, snip the excess from the centre and then carefully pick out to the end of the row, ending up with almost two inches at each side which will be enough to darn in. Take the top portion and rehang it, right side facing and I have the one purl row hanging on the needles! Waste yarn it and then hang the bottom section, wrong side facing me. Good so far! Go ahead and knit the missing 14 rows, measure out a 3X the width tail to be used (maybe for the grafting row if it happens to be on the correct side of the work!) and waste yarn this piece. Steam them both, grab my close-up glasses, a darning needle and set to work. OMG! It's working! I'm so happy I could just knit! Less than 45 minutes! 

Sunday, July 24, 2016

double dipping....

I'm here, finishing up Legacy - picture this, it's like a hundred degrees with extreme humidity - my hair is so bushy and curly, it's ridiculous! I've got my Ott light on, my newest reading glasses, my headlamp, 2 tools in each hand and one in my mouth - don't laugh, I know you've done that too!
Rehanging black stitches! arr-r-g-g-h-h-h! But this is gorgeous! and I did go for the shortrowed lace edging from Nougat like I mentioned back in '12 Step'.
I don't think I ever told you the story behind the BTR trim, which is what I named that edging. BTR is the airport code for Baton Rouge and I was in Baton Rouge, LA doing a hands-on, weeklong workshop for a couple of machine-knitting ladies.
 Now, previously, hands-on workshops had never been my favourite pastime - I always thought I had to work much harder at a hands-on because you got people using machines for the first time - they borrowed one that had been put away because they didn't want to pack up their own from home! Or they hadn't really ever knit anything, like ever, or they weren't using the prescribed yarn and were substituting some crap to save money...and I'd be running from machine to machine problem-solving all day long.
Baton Rouge from KNITWORDS #41
So, anyway, my BTR ladies promised that they weren't like that and they told me I could be working on my own project on the spare LK150 they had set up for me. I went there with a plan to work on my LK design for the magazine. I not only got the entire project knit, but experimented and came up with this fabulous trim that sort of looks like garter stitch but so much better! I got paid nicely for the week, did my own work and at night, they took me out to sample all the excellent local cuisine! I figured the least I could do was to name the garment and trim in their honour!

Friday, July 22, 2016

thought my eyes were playing tricks on me....


you  know how when you're interested in something, you sometimes see something that isn't there? like some words just jump out at you...I got an email advert thing yesterday from John Fluevog shoes - I am somewhat obsessed with them and have several pairs, notably my  prized red operettas -
 http://knitwords.blogspot.ca/2012/11/nipigon-nylons.html 
and when I was checking my email, I saw 'John Fluevog' in the correspondent section and I was taken aback that I thought I read 'knitting in the sunshine' in the subject heading and in my mind, I'm saying, 'MA, you've crossed the line if you think John Fluevog is talking about knitting! Well, he/they were! Oh my! check it out! they are having a knit night at a local /Toronto yarn shop and bringing shoes! what could be better? oh, to be in Toronto next week!


Saturday, July 16, 2016

aran-look scarf...

The Last Red Scarf  (Red Scarf  for Aids Awareness)
Machine: 4.5mm standard gauge with ribber. Knit on Silver Reed 580/SRP60N
Yarn: red Forsell Shamal 4 ply, 20% wool, 80% acrylic, 2520yds/lb (would be T7-8 stockinette) or any fine 4 ply yarn that knits a rib comfortably.
Gauge: Not really critical - Tuck Rib, T8/5, 24 sts and 50 rows to 10 cm/4 in.
FNR hem: Swing H5, all ns working, both beds. End ns on MB. Cast on WY, T4/4, K1R. Hang comb and one large weight in centre. Knit several rows. Set for circular and knit ravel cord in circular, 2 rows. CAR, set to knit both beds, both ways. RC000. Bring all needles out. MC, T3/3, K1R. Rack to H4, bring all needles out. T4/4, K1R. Rack H5. T5/5, K1R. T6/6, knit to RC008. Swing P. Transfer to MB, leaving 2 sts on RB (see stitch chart from yesterday) - all in work on MB; 10 out, 2 in work on RB.
Set back to Swing H. T8/5 Set to tuck rib:
Silver: set pattern to begin, punch card, release card. Electronic, inspection lite off. MB, cam lever to tuck, side levers back at triangle; RB, pick knob on tuck symbol, left set lever on 1, right set lever on 0.
Brother: set pattern to begin. MB, both tuck buttons in; RB, left cam lever down  to N, tucking lever to P, right tucking lever up to P-R.
Tuck pattern: 24 st X 18 row repeat.
SilverReed, enter as shown, white squares are tuck stitches.
Silver with DAK, have Main/X on white square.
Brother, enter as shown.
TIP: for this stitch pattern, if needle selection and needle arrangement is correct, there will be a tucked stitch on the main bed between the 2 rib stitches after the first row of pattern is knit.
Cancel tuck on last 4 end needles each side - Silver- move point cams in; Brother electronic, enter width that you wish the tuck to pattern to; other - pull all 4 edge ns out to cancel patterning before knitting the row (or not - it really isn't a big deal but I thought it looked nicer without the MB tucking into the longstitch...)
Bring 25-0-26 ns to work on main bed. Set to H5 and bring ns on ribber to work so outside ns are on MB - one less than knit bed. Set up and knit FNR hem as above to RC008. CAR. Download pattern (read punchcard or set up for pattern knitting as above).
Leaving 5 sts at each side for tucked longstitch facing, transfer RB sts to main bed except for the 2 either side of the vertical tuck line in stitch pattern that will be at #6Left and #7Right if you are using same stitch pattern.
Knit 715 rows or desired length (150 cm/5 ft) ending at suitable place in pattern, like middle of a diamond. Cancel tuck on both beds, K1R. Swing P, fill in empty ns on RB with heel stitch from MB. Swing H, T6/6, K7R. T10/10+, K1R.
Set for circular knitting. With waste yarn, T5/7, K20R circular. T5/5, FNR, K2R. Remove from machine.
This is a method to give the cast-off edge good elasticity and look similar to cast on edge. Block and steam, steaming WY as well, to set stitches. Remove last two rows of waste yarn to open the end. Fold waste yarn out. Using latch tool, start at side opposite to yarn end. Chain cast off with latch tool by picking up end stitch, put behind latch. Pick up next stitch from other side of WY and pull through. Continue going back and forth across row. At end, pull yarn end through to anchor. Remove waste yarn. Darn in ends.

Did you notice I didn't grade the tension at the end of the FNR hem? I found it just caused grief for the cast-off because of the tight stitches and really didn't make a difference in the look of the cast-off compared to the cast-on!
Analysis: This was really quick - I did it in less than an hour - and easy and made a very pretty scarf! I love the fabric - I used it before in Serial Stuff 2, Tuck Rib Cardi, which I still love and wear a lot - I think this has inspired me to knit it - the TRC,  again, perhaps incorporating the longstitch facings!
Red scarf for Aids Awareness count: 8!

Friday, July 15, 2016

the last red ribber scarf...

Take a tuck pattern, add a few rib stitches to make
vertical lines to stabilize the fabric, start off with a full needle rib hem with the racked cast-on, transfer to stitch pattern needle arrangement, add extra stitches on rib bed for tucked longstitch facings at edges to finish sides - you should be a ribber expert by the end of this! Hope you've been at least making swatches from the previous scarf patterns because you'll need some of the previous techniques - I warned that you might learn something!
FNR hem: Swing H5, all ns working, both beds. End ns on MB (one extra on MB than on RB). Cast on WY, T4/4, K1R. Hang comb and one large weight in centre. Knit several rows. Set for circular and knit ravel cord in circular, 2 rows. CAR, set to knit both beds, both ways. RC000. Bring all needles out. MC, T3/3, K1R. Rack to H4, bring all needles out. T4/4, K1R. Rack H5. T5/5, K1R. T6/6, knit to RC008. T7/7, K1R. Swing P4. Transfer to MB, leaving 2 sts on RB as below:
Tuck Rib - all in work on MB; 10 out, 2 in work on RB. (see below stitch pat. chart)
Set back to Swing H. CAL. T8/5, K1R (Brother, use this row to read/select pattern). Cancel patterning for the 4 outside edge stitches where the longstitch is. CAR. Set to tuck rib:
Silver: set pattern to begin, punch card, release card. Electronic, inspection lite off. MB, cam lever to tuck, side levers back at triangle; RB, pick knob on tuck symbol, left set lever on 1, right set lever on 0.
Brother: set pattern to begin. MB, both tuck buttons in; RB, left cam lever down  to N, tucking lever to P, right tucking lever up to P-R.
Tuck pattern: 24 st X 18 row repeat.
SilverReed DAK enter as shown, white squares are tucked stitches, have main /X on white square
Brother, enter as shown.
TIP: for this stitch pattern, if needle selection and needle arrangement is correct, there will be a tucked stitch on the main bed between the 2 rib stitches after the first row of pattern is knit.
Set to H5 and bring ns on ribber to work so outside ns are on ribber - one more than knit bed. Cast waste yarn in zigzag, hang comb and 1 large weight. Knit several rows, ending CAR. Switch to circular for the ravel cord, K2R. Cancel circular.  Rack to H4. RC000. Main yarn, T1/1, K1R. Rack to H5, T2/2, K1R. T3/3, K1R. T4/4, knit in FNR to RC010. CAR. Download pattern (read punchcard or set up for pattern knitting as above).
Leaving 4 sts at each side for tucked longstitch facing, transfer RB sts to main bed except for the 2 either side of the vertical tuck line in stitch pattern that will be at #6Left and #7Right if you are using my stitch pattern.
Knit desired length, ending at suitable place in pattern (middle of a diamond) CAR. Cancel tuck on both beds, K1R. Swing P, fill in empty ns on RB with heel stitch from MB. Swing H, T4/4, K8R. T9/9+, K1R.
Use WY in circular to end as for the Archaeology Scarf...

This is my last ribber scarf - I'll post the final pattern tomorrow or the next - I've run out of suitable red yarn so that's it for the ribber stuff! oh yeah, if you need/want the DAK file, email me at knitwords@shaw.ca