Saturday, June 25, 2011

spoiler alert!

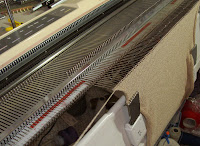
I cracked it! You probably don’t know what, but I did it!!! Let me backtrack a bit...back in March, I think it was, I was doing that green lace hoodie on the LK150 that was a hand-manipulated lace pattern - you can check it out in the archives at the right side of the screen here - click March and ‘on designing’ and read up to ‘the hood’s up’.
Anyway, I had several people ask if this stitch pattern and garment could be done on the standard gauge machine with the lace carriage...well, mostly, I said yes, but you’d need to know how to program lace and I vaguely filed it under my ‘to do’s’ list.
I did get everything finished on the old list, even that pesky accounting stuff that I usually manage to put off for almost anything - the deadline for filing is June 30, so I’m ahead of the game! And, my walking partner and I are up to 12 km this week...
Well, yesterday afternoon, I had nothing specific to do besides waiting for a couple of swatches to dry and that lace idea came back to my mind. I thought, might as well give it a shot - it turned out to be easier than I imagined (either that or I’m just getting better - no comment necessary, really!). I got it on the third try!! (just before I got carried away and accidentally dropped it off the machine...that brings you back down to earth real quick!)
Now, I’ll figure it for the Brother machine -that won’t be too hard because this is fashion lace on the Silver Reed machine and it only takes a tad of tweaking to make those work for Brother! This will be one of the new Serial Stuff patterns, starting in September - stay tuned!
And guess what colour I’ll use? you’re right, not peach or purple!

Thursday, June 23, 2011

my two cents...

I was asked recently what advice did I have for new machine knitters - here it is (you can judge whether it applies to you)
1. Work with what you have - don’t run out and buy everything there is right away - don’t become a collector. I’ve seen them come and go - they start off with one machine and next thing you know, they have another and another and they never seem to get familiar with any of them - Too much too soon is not a good thing - you’ll get overwhelmed and confused and that generally leads to loss of interest.
2. Same thing with accessories - most famous is the yarn changer scenario - and I’ll admit, I fell into this trap, way back when. Without really understanding the purpose of a yarn changer, I bought the one for my machine, thinking that it would make changing colours for fairisle quick and easy - NOT!! I had a punchcard machine at the time and I was making multicoloured fairisle sweaters - no one said that the single bed fairisle card had to be redesigned for the yarn changer (punched in reverse, in fact) and of course, no one pointed out the reality that colour changes would only be on even numbered rows...duh!! So my yarn changer sat in the back of the closet for a long time - I did take it out briefly to do some double bed jacquard and quickly realized that was a fabric I could mostly live without - back in the closet went the yarn changer... Buy an accessory when you’ve learned about it and can’t live without it - and remember, all accessories are not for everyone - just because your friend has one does not mean it’s for you.
3. Do not overstock on yarn - I can hear you laughing - now she tells me, you say! Only buy what you can use in the near, foreseeable future. There is no use stocking up on something you’ve never used before but buy because you think it’s on sale or was a pretty colour (or not, even worse!) - what if you don’t like it? What if it turns to junk when washed? What if you don’t have enough for a whole project? Don’t buy mystery yarn - it will only lead to frustration, so leave the mystery yarn to the more experienced - you’ll notice they aren’t buying it because they know better (or should if they are truly experienced).
4. The best advice I can give anyone who wants to become good - Make the same pattern over again a few times - I don’t mean make it, rip it out and re-knit it - I mean choose a good, suitable pattern, (find one for your machine and use the recommended yarn - don’t begin by making a whole bunch of changes to the style and size) work through it and hopefully learn something. Analyze your results. Make it again and you’ll be able to fix something that went wrong, either because you didn’t understand the instructions or because you didn’t read it correctly. And then, if you like it, make it again (give one to your sister if you have to) and you’ll be amazed at the confidence builder this is!
5. If you have a real question for me that you want a real answer to, send me the question in an email to me at knitwords@shaw.ca - don’t put it here as a comment...

Friday, June 17, 2011

80s revival

My daughter-in-law is going to an 80’s theme party on the weekend and was looking for some leg warmers - somehow, I must have missed that part of the 80’s...Anyway, I offered to whip her up a pair - her theme was black, silver and pink. Well, as you may know, my shelves are not exactly full of any of those colours, but I did have a partial cone of something called ‘spring garden’, a black, pink, blue and white acrylic mix left over from the Nomi Lee days, that looks kind of tweedy, and some metallic thread that might fit the bill (or is it ‘fill the bill'?). With no criteria, other than she would be wearing black leggings and high heels, I thought they should be ribbed, sort of slouchy with maybe a fold over cuff and go from ankle to mid calf...
Here’s what I came up with and she loved them!
After I was done, I realized this would make a great beginner ribber pattern.
So, the yarn was a slub, thick and thin, that would stockinette at about T4 or 5 on the standard gauge machine and I added a strand of metallic royal blue thread (run it through the other side of the tension mast and join it with the main yarn in the feeder).
Legwarmers
Set up for full needle rib, Swing H5, all needles in work, both beds, 35-0-35, end needle on main bed at right and on rib bed at left.
Cast on waste yarn and ravel cord as follows:
T5/5, K1R. This will be the zigzag row. Hang the comb and 1 small ribber weight in the centre. K10R, ending carriage at right. There is no need to do anything else - the cast-on will look awful but we don’t care, it’s just waste yarn, right? and it does the job.
Now, to knit ravel cord (I use  disposable ravel cord, somehting that is smooth, hard twist, strong and is thrown away - Bramwell Artistic or crochet cotton works well) that can easily be separated later: Set to circular - don’t be lazy, look it up in your manual (good practise for when I’m not here telling you what to do). Thread up the ravel cord and knit one row - this will be a row of stockinette on the main bed side. Reach up at left side with the latch hook and catch the ravel cord and pull down about 4-5 inches and, leaving hook hanging there (this will make a loop that you can cut later so there will be 2 ends of ravel cord at each side making it easier to pull out), knit the row, making a row of stockinette on the rib bed side.
Thread up the main yarn. T5/5, K1R. Rack to H4. Carefully bring out the needles. K1R. Rack back to H5, bring out the needles again and K1R. This is the racked cast-on - Pretty easy, nothing else to do and it makes a stretchy edge, unlike the circular cast-on that is in your instruction manual. The racking back and forth criss-crosses the stitches and forms a fixed edge cast-on - for full needle rib, it’s great - later you can fool with the tension and change it up for whatever you want - I use it many different ways in various edges and trims - see ‘Knitting on the EDGE’ and ‘Band Practise’ (see your copy or the bookstore at http://www.knitwords.com/ to order - this has been an unpaid, unsolicited commercial for MAO!) for more of my variations of this.
Now, getting back to the legwarmers, set RC000. Add 1 large rib weight to each end of comb. Go up one full number to T6/6. Knit to RC130 - as you are knitting, everycouple of rows, give a tug on the centre weight to make sure that everything is going well and nothing is caught up where it shouldn't be. At RC130 or more if you want them longer, set to tuck on ribber for English rib: main bed knits all stitches both ways and rib bed knits one way and tucks the other. K30R (or more, as desired or as amount of remaining yarn allows). Cancel tuck. T10/10 ( or as loose as it goes on each bed - Brother ribbers only go up to T8), K1R. Transfer all sts to MB. Leave everything as is, weights, comb and all. Leave empty rib needles in work. K1R. Drop loops off rib needles, by unlatching carriages and running rib carriage over rib bed only. The loops from the rib needles go into the main bed stitches, making very large stitches on main bed. Chain off the stitches - this gives a really loose cast off! Seam the side to form the tube!
The English rib will fold over automatically for the cuff at the top of the legwarmer!
You could use more stitches, less rows of plain rib, more rows of the English Rib for a neck warmer...This will all work on any double bed machine, any gauge...

Thursday, June 16, 2011

My tricked-out LK!

I got this cute email the other day:
Dear Mary Anne, I had a question I hope you could find time to answer. I follow your columns in Knit N Style magazine, and notice you use the LK150 for your featured projects. I wondered if you do anything to your LK150 to "beef" it up?
I've heard of people putting stronger magnets on the bottom of the carriage, so I wondered if you had any similar mods to your machine? My LK150 seems kind of cheap and flimsy after knitting on steel bed machines so maybe it’s just a matter of getting used to the different feel of a plastic machine.
Thanks and keep up the good work, I look forward to the wonderful projects you come up with.
Sincerely, Linda J

Hi Linda, I use the LK150 for KnS because I want to show hand knitters what they could do with a machine and I know they are not ready for standard gauge garments! By taking the same yarns they use with sticks, I can produce a garment they can relate to and want to make, rather than the finer knits we, as machine knitters, are used to - hand knitters look at them and say’ ‘that looks store-bought’ and they make it sound like not a good thing, if you know what I mean.
The only 'mods' I have on my LK is a second row counter (when doing a hand-manipulated pattern I use one to keep track of the pattern rows and the other to keep track of the garment rows) and a second tension mast/assembly (for 2 or 3 colour work and then you always have waste yarn ready - I do this on my other machines too) - otherwise, I think it's perfect the way it is.
As for the magnet thing I haven't heard this and don't know what it would do - I would be leery of making a change like that - but notice, I do stick with light DK to DK weight yarn, maybe occasionally a worsted weight but nothing heavier (I’d use a bulky machine for the thicker stuff). I like yarns that knit in the T3 to T5 or 6 range and I think that is optimum for the LK150. You are right - there is a big difference between a metal bed and the plastic machine (my son used to call it my ‘fisher price knitter’!), but when you stick within that range, it is lovely and a pleasure to use (especially when the foam strip/needle retainer is good!), in my opinion!! Also, notice the heavier the yarn, the more weight you will need for it to knit properly. I am lucky in that I do have all the ‘toys’ for my little baby - an intarsia carriage, the fairisle carriage, the 8 st-needle selector, a weaving tool, 9/18-st EON tools and the old garter bar (nah-nah-na-na-nah!!) and of course, my favourite accessory, the KR11 knit contour. When I was at the North Carolina seminar in May, I was totally excited to find an adjustable 7-prong tool that the dealer told me was a 6.5mm gauge and I scooped it up. It turned out to be a 7mm tool from http://www.dknits.com/ but it’s close enough that it does work!
Hope this helps and answers your questions.
-Mary Anne

Wednesday, June 15, 2011

Stuff...

I did get my ‘LSA’ finished and the button on - the one I thought was going to be the perfect one wasn’t - it was a bit too light in colour but I did have the perfect one, just didn’t remember it until I went to my button basket!
The original pattern was in KNITWORDS No 44, but I shortened the sleeve and didn’t add the cuff. The yoke is knit sideways and one sleeve is knit up and the other down so to get the same edge on the cast-on side as the cast-off side, I began the first one with waste yarn and then the end one had waste yarn also. To finish it, I used the main yarn doubled and e-wrapped the same number needles; hung the open stitches wrong side facing; pulled the open sts through; knit a loose row and chained off. Beautiful!
My daughter, Laura, was home for a few days and I can only say the reason I still have this cardi is because beige is not her colour, but she did place her order for one in black, along with a plain straight dress to match - good choice, girl! She’s looking for a new job and thought a dress with the long sleeve version would make a great interview outfit instead of the stuffy ‘old-lady’ suit she bought in desperation a couple of weeks ago which she said she’d never wear, but paid $1200 for - yikes!! I’ll do it in bits and bites and have it done in no time, once I get the yarn!
I have a friend’s birthday this weekend and it was a toss up what to make for a gift - a shopping bag or maybe a pair of socks?...I may have given her a shopping bag already, so I rooted through my sock yarn stash and found a ball of Fortissima Socka Mexiko Cotton Stretch - a 100g/460m ball in the right colours for her - it’s superwash wool, cotton, nylon and polyester and oh, they knit up nicely - using my circular sock pattern (it was in the handout packet at PPP) - I made the cuff only half the depth I usually do for winter socks and I’ll probably have a hard time giving these away - they are so nice - good thing she’s a good friend!

Monday, June 13, 2011

reasons to knit...

A letter came the other day, rather fitting, as it’s been a year since the end of KNITWORDS magazine. Barbara Davis of Chicago often wrote a letter, along with her renewal. I have never met Barbara, but she wrote as though we were friends. In this letter, she began by telling me that she had been shocked and unable to respond at the time because her husband was ill - he passed away in November. She told me: ‘when I was unable to knit because of duties and caring for several ill family members at once, I would read the magazine and try to plan some time to knit. I remember an article you wrote about using small periods of time and I used that to plan and start learning to use my machine.’
Later, referring to a series where I would make a garment for my grandson and explain the techniques in an article and in the next issue, had an adult garment using the same techniques, she went on to say how she was really hooked with the idea of small articles/projects that took less time - it took small amounts of yarn and fit in small time periods. She mentioned how she ‘watched Nathan grow from a baby to a little boy with lots of hoodies knit by Grandma who adores him.’ I had a huge lump in my throat.
She went on to tell me: ‘You fulfilled your mission - you educated, encouraged, inspired and excited the subscribers. You gave patterns, diagrams and special articles to help beginners and seniors like me. The photography was excellent. The one ingredient you sent that was priceless was LOVE - it came in every issue! Thank you, Mary Anne.’
Thank you, Barbara! After I got over my tears I thought I would find that article and share it with you. From KNITWORDS No 31: it was my ‘editorial’ column - I always called it my ‘reasons to knit’ letter.

It’s been said, ‘a picture is worth a thousand words’. Or is it? The comments I most often hear when I go to workshops and seminars are, ‘the garments look so much better in person’ or ‘the photos don’t really do justice to the garments’. I say thank you, because it would be terrible if it were the other way around and we get into a discussion about how can we make the photos better. I conclude we can’t. I think they are very good. The photo is flat, with no dimension, there is no getting around it. We do try to show the flow and drape of the fabric and the shape of the garment in the pose. The viewer needs to have an open mind and look at the overall information and analyze it. Combine the photo with the details in the pattern, the schematic, the close-up shots and the yarn information and other than a real live trunk show, it doesn’t get much better than that.
One of my favourite topics is a discussion of the quality of our finished product. I feel very strongly that in order to end up with a quality garment you need to have first rate yarn to begin with, and, good techniques and finishing methods to take care of the final details. I frequently hear the knitter has been unhappy or dissatisfied with her end product and, after seeing our garments, comes to the conclusion the reason for her own disappointment is the yarns she has used were not up to par. Been there, done that! I don’t understand the idea of wanting to make a garment or whatever for $25. You have spent good money on the equipment to work with, yet are afraid to commit further with good materials. Why invest in machines, software, training and most important, your time, to make a item that can be purchased at Wal-Mart for $30?
Here’s another remark. ‘I don’t knit anymore because I have no time.’ Set your priorities and make time. Instead of trying to set aside an entire day of the week just for knitting, which can be frustrating and counter-productive, take small bites. Knit a swatch one day. Set up your plan of attack for the next day and get your pattern ready, whether you are working from scratch or working from a written pattern, prepare everything and get organized. Try the 15 minute approach. Have it all ready to fit 15 minutes of knitting in here and there. Knit a sleeve in 2 or 3 fifteen minute periods throughout the day, between other chores or whatever. You will be amazed at what you can accomplish and how much more fun it will be. Enjoy the smaller successes and they will quickly add up to a finished product.
Does any of this strike a chord? Ask yourself these questions. Why are you knitting? What are your expectations in this craft? Your answers may help you gain some satisfaction.

Sunday, June 5, 2011

Snippets

A knitting friend gave me the cutest card...

Inside it says ‘I walk the line. ~ Johnny Cash’

I laughed and laughed!


Here is a portion of the sleeve on the hoodie I told you about the other day. This motif is repeated vertically up the sleeves and in the centre of the front, but on the front the holes are not all cut out, I guess, because of the zipper.

Now, to get this look with knitting, I had been mulling over different ideas. My first thought was to make the large diamond opening in 2 sections by holding one side, and knit the first side, decreasing and then increasing the centre edge. Then, place that side in hold and repeat on the other side. But what would happen in the centre? I didn’t want to do a lot of messing about and definitely no sewing - I would like the centre to be sort of filled in loosely somehow. So, my next thought was to shape both sides of the diamond opening at the same time and, to get long-enough-to-do-something-with strings in the centre, leave the empty needles in work each row, but drop the loops before knitting the next row. Then when I began to close up the diamond somehow latch up the strings to fill in the centre. Here’s what I got:
Problems to correct or overcome: somehow stabilize the inside end stitches of the diamond opening - either using some of the existing strings to e-wrap or use another piece of yarn.
I had 11 empty needles at the centre of the diamond so I only reformed 3 columns of stitches, doubling the yarn in this part - maybe change that into seed stitch? And, make the diamond bigger, of course - this was just a let’s-see-what-happens? swatch.
Make the shaping of the diamond opening more interesting - maybe make a mini cable in the travelling stitches, like the detail in the raglan shaping of ‘ReddyWare’ (February Serial Stuff for mid gauge) or ‘Crosswise’ (No 48).
  
My young nephew was over last night - he’s admittedly somewhat of a geek and he was showing me a little gadget that was the Blackberry version of the ipad (I think) that he was setting up for a local businessman. Without thinking it through, I impulsively asked him for some help or suggestions with email and address book stuff because I wanted to know if I could have several and separate address books to send out emails only to certain people. He went into my office and he laughed and he laughed. Apparently my office computer is a little out of date - I have a 12 inch monitor and my operating system is Windows 2000 - he laughed some more! He tried to convince me that I needed to upgrade. As he left, he said, 'don't pay me too much attention, I'm just a whippersnapper’ - I think that was a low blow!

Friday, June 3, 2011

freakin' frogs

you’ve heard that old saying, ‘the hurrier I go, the behinder I get...’ well, yes, I’m rushing, trying to get this beige thing finished so I can move on to the more important job of experimenting. Sure enough, I blow right past the neckline shaping and I’m at the top of the piece, RC170, before realizing I forgot to stop at RC135 and begin the shaping at the centre side for the vee neck...dirty, rotten &%*?!#...., I do so hate ripping out! But, I though, oh well, when life gives you lemonade, add vodka and have a drink - is that what they call a mixed metaphor? don’t answer that!
Maybe my new young girls don’t know how to rip out quickly - so, if you’ve heard this before, forget I said anything!
Keep weight on the work, evenly - notice I still have the ribber comb in the bottom of my piece even though this portion of the front is stockinette - I leave the comb in to make it easy to weight evenly, but I have the work coming over the front of the rib bed - I think it is easier to do shaping when the work is out front and you can see better, watching for mistakes or floating and tucking stitches - now, carefully bring the needles out, leaving the stitches in the hooks. When you pull sideways, drawing width-wise on the yarn to unravel, the stitches flip back and one row is pulled out in less than 10 seconds!!
The biggest problem with unravelling is keeping track of the number of rows - what I do is use the empty needles at the opposite end to count with - so, pull out 2 rows, bring out 2 needles, rip 2, count 2, etc. It’s not totally foolproof, but it works for me - if I didn’t have empty needles on the main bed, I’d count on the rib bed. Then when my selected needles show that I’ve ripped out the required number, I turn back the row counter.

Happy frogging!

west coast swing!

I’m back from the west coast - that 3 hour time difference is a bit of a deal, but I survived. Pacifically Passap Plus was great! Thank you, Pat and crew, for allowing us ‘flat-bedders’ to come to your party! There were familiar, friendly faces but most importantly, there were new, young faces!! I was so pumped! Hi to Irina and her red-head friend (sorry, I didn’t catch your name), Melissa (31 yrs young!!!!!), Anne, Norene, and Jodi  and the others - it was a pleasure to meet you all - hope I was able to properly inspire you to keep machine knitting!

Leaving Thunder Bay, it was quite chilly - right on the freezing point - in fact they had to de-ice the plane - I thought my season of wearing ‘In the Tweeds’ was over, but I put it on to get to the airport, thinking I’d leave it in the car - my suitcase was already overfull. At the airport, it was still pretty chilly, so I kept it and thankfully so - I wore it in Vancouver, I wore it on the drive to Portland - we stopped on the other side of Seattle and visited with Morgan Hicks and I got to see his store - All Points Yarn in Des Moines, WA (http://www.allpointsyarn.com/). A great place and, the yarn!! wow - if you’re in the area, it’s a must-stop! Morgan is very knowledgeable about yarns, mk-ing, hand knitting and crochet - he is so enthusiastic and inspiring to talk to! And Morgan, even though you spelled my name wrong, I still love ya!
My free day in Van was spent window shopping on Granville - one of my favourite things to do - it’s a great mix of high-end and really high-end retail and I get a chance to check out the good stuff and get tons of ideas of things to try - I made little notes and then emailed it to myself so I wouldn’t forget by the time I got back home - they may not make any sense to you, but I can picture the garments from reading my notes:
things i saw on granville st:
-very loose knit, vee at hem, like shortrowed to a point, tension changes, very loose, transferred to make big holes then brought back to work and knit tighter
-open front cardigan hoodie in Lucky Jeans - mesh knit like 'spots in dots' without the spots - very lightweight cotton.
-open cardigan, knit in rayon - bands of stripes created with say 20 rows of 1X1 eng rib so it was vertical looking then transfer all to MB and do a slip & tuck stitch???
-battenburg-look lace work and tons of white cotton eyelet looks.
I did buy a hoodie at Lucky Jeans, with full intentions of giving it to my daughter but what can I say? it was cold and I needed something other than ‘in the tweeds’ - it has this really cool open work on the sleeves - a combination of devoré and maybe battenburg - a knitter came up to me in Portland wanting to know if I had knit it - I told her I’m going to find a way to get the look of it with knitting - I was daydreaming about it on the long plane trip home, dying to get to my machine and make a swatch or two - lots of ideas - I’ll keep you posted!