Saturday, October 2, 2021

that time thing...

‘Member I mentioned the bit about your iPad usage and how much I disliked it? Thought about it and took same iPad to my workroom and turned on the stopwatch feature every time I went in. I wanted to record the actual time that I spent on this garment, ‘Floral Mesh’ (that’s mesh, not mess!) I included thinking, calculating and pondering times as well as all the putting together and finishing, for a total of 15.25 hours!

Things I relearned this time:

1. You can start lacing on either side…every third row means there is no direction!

2. Half the garter bar and the small piece is ONLY 149 sts!!! I always expect it to be 150 sts!!! Why can’t I remember that!

3. Keep checking your yarn supply. My cone is on the floor behind the machine and you know, out of sight, out of mind! I started with a full cone and almost ran out on the next to last row of the final piece! Fortunately, I have my machine positioned so the tension antennae whacks back, hitting the wall when the yarn runs out, usually leaving enough yarn in feeder to allow you to stop without loosing everything!

Wednesday, September 29, 2021

mesh floral...

I’m focusing on the sleeves now. I’ve found I want them longer than I used to like. Several reasons:

  1. When they are longer, you can pull them down, keep hands warm, use like a glove to open doors or press the walk button.
  2. When tieing around my non-waist when it’s too warm to wear, much easier with longer sleeves!
  3. When I’m done with garment it’s easier to find new person to take over with sleeves that will fit regular people!

Also, I’m experimenting with width of cuff and forearm section. Because I’ve added about 4 inches, sometimes you might want to fold the sleeve up/back and it needs to be wide enough to do that but not so loose that it flops around when down. So, here’s another reason I like that Franky seam, it looks good and is fairly flat from either side.


On this one, I took the increase down another level. Just brought out a new end needle, just to work position, and let it knit! Wow! Who knew? Easier than heck and it works so well! I let the second-to-edge stitch lace  instead of having to least two plain stitches at the edge. I like the look of the seamline without the extra knit stitches on either side, more of the lace pattern!

This turned out better than I thought it would! I love the mesh sections of the stitch pattern. It is actually transferring to every other needle  with a yarn-over between, then two plain rows. The third row is every other stitch transferred the opposite way and it adds a little mini-cable look on either side of the lace holes to the fabric.
My next button-front lace hoodie is going to be just that mesh! Red, maybe… 

Friday, September 24, 2021

the holy grail...

In my ongoing quest to produce the perfect button-front lace hoodie with pouch pockets, I began with another long swatch of various patterns. This time, I’m using Bonita (from Knitcraft, a 100% mercerized cabled cotton, 500g cone, a good solid 4 ply weight, great stitch definition, usually knit at T8 with a stockinette gauge of 28 sts and 40 rows/4 inches) an old all-time favourite cotton. It didn’t have much in the MAO-fav colour range but I did use it over and over. Great yardage, pretty cheap price and very good wearability certainly out weighted the lack of colour options and, of course, you know, it is no longer available. But I do have a stash. 

My plan is to use the light blue, again not my favourite - it has a rather dull tone that almost looks a little dirty (in my mind anyway) but I could over-dye it a little darker if I’m really not fond of the finished product or, give it away! 

The last time I used Bonita was in Tumbleweed, from #53 - it was lace carriage at T6, gauge of 26 sets and 44 rows, washed and dried. The final garment has a fairly firm fabric, maybe because of the larger areas of plain stitches. I wanted a little more drape and softness this time, so am using T7.

In going though my existing stitch patterns, I found this one, already programmed out. 60 rows by 60 sts! I’ve never used it before - I did swatch it like a thousand years ago and probably thought it looked like curtains or something, but life changes and all that and I can look at it with a new eye, maybe. Anyway, whatever the reason, I swatched it here. Hummm, after the wash and dry, the mesh part did look very interesting, almost like it scrunched up and has a neat texture. I’ll give it a shot!


Made the sleeves first. Because it’s such a large stitch pattern I wasn’t sure which I liked better, the large flower going up the centre or offset, with the smaller motif centred. It’s a matter of setting the first needle position either at 0 or half way, 30 (right or left, doesn’t make any difference). I figured the sleeves don’t have to match anyway. I actually preferred the small flower centred but then promptly forgot about it when knitting the body, so ended up with the large motif going up the front. 

 No big deal, I can always make it again in another colour and change it! Maybe find someone else who might 
like that dusty rose…

Wednesday, September 22, 2021

sweater weather...

At last! We’ve had a long, hot summer! I know you’ve missed me and I’m sorry to have been silent for so long. Didn’t really mean to but between the weather and computer and software issues, what more can I say? 


The good news? I have been knitting, not a lot, but bits and pieces, here and there and I’m definitely ready for Fall! I’ll be known as that lady who wears those button-front, lace hoodies - she has one is almost every colour, you know! I’ll try to catch you up…

The ‘natural’ one turned out great. The new stitch pattern added - it won’t replace the Me-cozy design in my heart but it’s nice. I’m still totally hooked on the Franky seaming method and, in my search for the best way to do it, on this one, I changed up the increase method slightly. In the antique gold one, I moved the edge stitch out one space and filled in the empty needle with the purl bar of the inside stitch. It made the edge quite tight and hard to pick up just the half outside edge bit, so on this one, I simply hung the purl bar of the outside stitch onto a new empty needle. It works and the resulting seam looks good and it was okay to pick up. 

I did have a Plan B in the back of my mind, I was maybe going to over-dye this one so I had it hanging around without buttons, just in case I might change the colour. I even wore it out once, buttonless! I needed the pockets, what can I say!


Though I had several options for buttons, when our lockdown finally ended, Fabricland finally re-opened, I went to check out their buttons, probably just to go somewhere. Nada! At least, nothing better than what I already had. Finally made the choice, sewed them on and life goes on! Next! 

Friday, July 30, 2021

killing it...

Time, I mean! You know how you get that report on your device saying how much screen time you had in the last week? I hate that! OMG! How could I be wasting that much time! I wish I could get a thing that measures my productive time, like the minute I enter my knitting room, the clock starts ticking and I`m racking up good points! Big sigh! By the way, I never take my device in there! Anyway, that is some of my motivation for machine knitting lately!

I found some more 2 ply cotton – this one is Honiburd in natural, aka off-white, ecru or ivory. Personally, I think it should be called cream as it has a slight yellowish undertone, one of my best colours or non-colour, if you know what I mean.

 I do love that Me-cozy lace stitch http://knitwords.blogspot.com/2021/04/deja-vu.html. Maybe you can tell because I`ve already used it on three button-front-lace-hoodies but I`m trying to branch out – who knows, there may be another new favourite out there!


Using the leftover yellow from Holey Moley, I made another long swatch, trying out several different stitch patterns. I still prefer the all-over patterning as opposed to one that results in vertical or horizontal stripes. I do like the second one down but the third one – it was an 8-st X 16-row built-in, that I added a few extra holes to every alternate diamond - is a new one and I`m feeling adventurous!

Wednesday, July 21, 2021

trials and tribulations...

Did you miss me? Sorry I haven’t been posting much but it’s summer! And here in Thunder Bay, we are having a real summer. Most years, a hot summer day might be a high of 22 to 24C (70-75F) but this year, it’s off the charts! I enjoy a warm evening where you can have dinner out on the deck with a sweater or poncho handy but, oh my, we’ve had HOT! 

I still get some knitting in and I’ll continue to tell you about that, but I also have had some ‘blogger’ issues which I’ve tried and tried to solve. Last month I got a message saying that ‘feedburner’ or whoever was sending out my blog subscriptions was quitting in July. I'm hoping it's the end of July but we'll find out! I wanted to have an alternative ready before I told you about it and it’s been a struggle to figure it out – long story short, I think I’ve got it sorted!

So, if you’ve been getting an email of my current blog post and you want this to continue, you’ll need to re-subscribe. Just click this link http://knitwords.blogspot.com/  – it will take you to ‘Needles to say…’ and at the top right hand side of the page, you’ll see the new box to enter your email. Do that and click ‘subscribe’ and then say you’re not a robot. That’s it! They will send you an email to confirm and that’s up to you. Hope you do and I promise to get back to telling you stuff about my machine knitting!

Friday, July 2, 2021

whoops...

The ‘antique gold’ wool that my sister chose - had a full cone, 500g plus a very small partial, total of 578g, (less 60g for the two cones) so I figured I’d have plenty of yarn. The charcoal lace wool hoodie
https://knitwords.blogspot.com/2021/04/deja-vu.html that I made for myself back in April weighed 530g, finished, and since Janet’s will be a little smaller and a bit shorter, I thought I was golden. 
Decided on using the Tumbleweed https://knitwords.blogspot.com/2010/05/knitting-machine-lsd.html stitch pattern and hems (published in Knitwords #53) – I think I forgot to tell you that I over-dyed it to match my olive green Day Dress, but oh well – it used to be beige and is now a pretty green! 
So, back to the present! I was carefully measuring and weighing and recording my progress with each piece. Then, all that went out the window as I made the hems to each piece as it was finished. 
Now, instead of taking my own advice and having a Plan B, it was done, right down to the final two side/underarm seams and there is only about 2 metres left – not enough for the seaming! I could take the smart, safe way out and do the seams in the old way but I’ve become obsessed with that Franky seaming method,  https://knitwords.blogspot.com/2021/03/she-likes-it.html    even to experimenting with increase/decrease methods. In the past, I’ve always said that I like to /have two stockinette stitches at the edge, one to be taken in the seam and with the Franky method, I’m hanging only half of the outside edge stitch for the seam so two plain stitches at each side make the seam too wide, especially with a very holey lace pattern like the me-cozy diamonds. 

So, on this one, I have done a simple increase on the edge stitch, picking up the bar/heel stitch of the edge and putting it on a new needle. Anyway, head like a rock! I had intended to show how minimal these seams are, so I still wanted to use the Franky method. Ha! I found a ‘close’ match of ‘cinnamon’ in the same wool and figured I would try it out, if it didn’t work, I could still resort to the old way where the seam is on the inside and the colour isn’t so important. Darn, picking up that edge stitch was so hard, I had to keep going. If Janet notices, I’ll tell her it’s a new design feature, like the coloured piping up the leg of those old jogging pants! :) 

Final weight, 516g…so, back to that hole theory – more holes, less yarn, maybe that’s true…more research required…

Friday, June 18, 2021

it worked...

unwashed
Vickie’s twister wool lace hoodie, that is! I got hers out of one cone!! OMG! so
nice! I was right about the yardage on that yarn! Now, I still have a full cone for me! Later on that!

Something I like to tell newbies is to make the same thing several times – you’ll be surprised at what you learn through the repetition. Here’s me saying, wow, either I forgot more than I knew or I knew I forgot more! Whatever! It is getting to be that way but I’m still having fun.

Things I learned (again, maybe) so far

1. Be sure to use yarn marks at the edges – I usually put them every 50 rows – easy to remember and it does make the putting together so much easier and neater when you match them up.

washed but unfinished

2. Keep cheat sheets handy for the various techniques, as a reminder! how many rows in that band? what stitch size? turning row? the buttonhole technique – I thought I had it down pat and what do you know, missed one step and had to remake the whole band!

3. Before washing, hand stitch that pocket in place – only takes a  couple of minutes and saves having to re-block it after washing!

4. Put the band on the front of the hood before attaching the hood to the neckline. If it already attached, the front edge of the hood won’t stretch out to accept the band in one piece – you’ll need  two separate waste yarns on the band instead of being able to use the garter bar.

done!

Done and it’s in the mail!

Friday, June 4, 2021

you know i didn't...

keep that one. I do know how to share, but it was close! Lisi came by, I remembered it was her birthday, showed it to her and she loved it! In the finish, it was a good thing I went with my backup plan of doing the bands in the ivory colour, it all looked good and I was left with about 50g of the clover, definitely not enough to have done the bands  - weird, the yellow one weighted in at 468g, finished and this one, same number of rows and stitches exactly, weighted 488g. Guess that’s the difference in the stitch pattern, although, when you think about it, stitches are stitches. More holes shouldn’t really make that much of a difference because the stitch is knit and then transferred to make the hole…oh, it’s over my head!

I was totally pleased with how it turned out – even had the perfect pewter buttons to finish it off without having to worry about making do - but already feeling bad about not planning it properly for Janet. Before I could change my mind, I called her, explained about the lace hoodie and offered her a choice of colours for wool. She’s really psyched, liked the fact that it was longer and would cover her bum! She chose ‘antique gold’, so outside her comfort zone – she wants to have something different! I’m okay with that.

In the meantime, my knitting friend Vickie from BC, gifted me with a couple of boxes of yarn! She recently moved and was feeling overwhelmed with her stash and offered me some of her good stuff to lighten the load! Oh my! talk about Christmas coming early! In the mix, besides 3 huge cones of wool crepe deluxe tweed – be still, my heart! - was 2 cones of Twister from Yeoman Yarns in the denim colourway. This was one of my favourite yarns and unfortunately, as did so many others, was discontinued.  https://knitwords.blogspot.com/2009/06/all-ribbing-aside.html

Anyway, it’s a tweedy wool that I always thought had great yardage and now I’m going to see if I can get 2 lace hoodies out of it! We’ll be matching, fingers crossed!

P.S. don’t tell Vickie, it’s a surprise!

Thursday, May 27, 2021

you could call me...

obsessive! maybe compulsive! or even impulsive! I do tend to get stuck on something and I’m going to repeat it to death! No biggie, I think of it as keeping busy and it’s nice to be productive! Yeah, I’m making another lace, button-front hoodie. So!

Just to change it up a bit, I swatched a different lace pattern, this one from Becca https://knitwords.blogspot.com/2018/11/earth-to-mao.htmlhttps://knitwords.blogspot.com/2019/01/unfinished-business.html 

thinking I had 2 cones of white Brittany. Turns out one was 'arctic', the other was 'optic' and there was a third one that was just 'white' - they were Bramwell Montana (says something about how old they really are), basically the same thing as Yeoman’s Brittany, the 2-ply soft cotton. I only noticed the colour difference after getting the swatch out of the dryer. What to do? You can’t plate with the lace carriage. Continue and over-dye it, may be an option. Adding in a second colour without stripes? Like, using the second colour just for the bands/borders so it looks like you planned it instead of just running out of yarn… like that Rich Raglan that was part of Serial Stuff 2 https://knitwords.blogspot.com/2013/11/who-needs-sudoku.html

Looking further, I found 2 part-cones of Brittany in 'clover', a dark blush/gray-ish pink shade, about 250g left on each. Not really my colour but truly, I was thinking of making this one for sister Janet who is quite a bit shorter than me. The finished weight of Holey Moley is 468g, so it could be kind of pushing it. Back-up plan needed! After more searching, partial cones of 'parchment', an off-white, looked like it would ‘go’ with the clover and, yes, impulsively, I dove into this new project! Without thinking it through, (and shortening my schematic to suit my much shorter sister!) I went ahead, so excited to see how using the parchment for the hems and bands would change the overall look and solve the yarn shortage issue.


To be honest, by the time I was finished the Back, I was in love with this colour and thought, oh well, Janet will never know, and it’s be too long for her anyway!;))

Tuesday, May 11, 2021

smug...

that was me! Finished up Holey Moley last week and I thought, ‘oh, if I had somewhere special to wear this!’

We are in a stay-at-home lockdown, basically since Christmas, but the last month, really serious, where only essential stuff is open. I knew I wouldn’t get new buttons until this was over and I couldn’t wait. The best option I had was 8 ivory, plain 3/4 inch buttons that would work so I painted them to as close a match that I thought would do – I have some acrylic paints in my craft stash – a drop of mustard yellow and half a drop of golden brown gave me a shade slightly darker than my pale primula cotton.  Finished them off with a clear top coat of nail polish to protect the paint and I’m ready!


I’ll back up a bit. Everything done, ready for the wash – I had hand basted the other edges of the pockets in place, the centre front edge is incorporated in the button bands – thought it would be prudent to get everything pre-shrunk before the final sewing and  figured it might work better to have them stitched down, rather than free-floating in the wash. Worked nicely, pulled out the basting, pinned them again and machine-stitched in place, lining up the pattern properly. This is so nice! Love it!

washed (note ruler)
 with bad, unwashed sleeve

I had the appointment for my first vaccine and although it was a cloudy, sort of miserable day and I wanted to be comfortable, I figured I’d wear this with jeans and sneakers. Walked in, health card in hand and the lady said, ‘I just love your sweater! ! You look so springy!' I said, 'thank you'. Her, ‘Oh, it has a hood too! I need one of those, where did you get it?’ 

I had to admit I made it. She couldn’t see my smug smile…I was wearing my mask! Made my day!

Thursday, May 6, 2021

holey moley...

Brittany is a very fine 3/14, 2 ply cotton – Yeoman’s website lists it as 400g
cone/3380m, but it was on 350g cones at one time with 66 colours! Oh, the good old days! I don’t think I’ve ever used it single stranded – it’s way too thin for the standard gauge machine – even to use a tuck stitch at T2 – what could you make other than a baby’s something? Oh wait, I DID a couple of double bed things single stranded – a set of his and hers cardigans in double bed jacquard (Knitwords #34)  and, what do you know?, a little boy’s golf shirt in a tuck stitch at T2! That was Tiger in Training in #41.


Mostly I used it double stranded, for a washed gauge similar to a 4-ply yarn, but it is much softer and drapier by comparison. For example, Yeomans’ Cannelé is a 4-ply mercerised cotton (won’t have the same shrinkage factor) and you can get the same gauge using the same stitch size but the swatch from Cannelé will be stiffer and not as fluid, so not always a good substitute for each other especially if softness and drape are factors in the design. I like mercerised cottons for a crisp, more tailored project.

To double the yarn, thread each strand into separate tension discs ad join in the yarn feeder. Otherwise, two strands together in the same side of the tension mast will cling together and ‘climb’ up, feeding unevenly, possibly causing loops and bumps in the knitting.

For my Holey Moley hoodie, I swatched at T5 (26 sts and 45 rows; washed 29 sts and 50 rows) and T6 (25 sts and 40 rows; washed, 28 sts and 45 rows).  Note, I’m using the Silver Reed which has a separate lace carriage that knits and transfers and the tension/stitch size is different than the main knit carriage – I would knit this double stranded yarn in stockinette at T7 and my lace carriage is about two numbers lower for a similar gauge – on a brother machine, I’d go with T7 and T8 for the same thing. I hadn’t used Brittany for lace, and I wanted a comparison. After the swatch was washed and dried, I liked the size of the holes (slightly larger) in the T6 part. In the charcoal wool hoodie, using the same stitch pattern, the holes closed up a lot for a more textured effect and I was hoping the cotton one would remain airy, without having to press it out every washing.

Unwashed

The main difference between knitting lace with wool and soft cotton: initially the cotton seemed to require more weight (on some transfers, only one of the strands transferred properly) which I added. The Back knit beautifully. The first half Front, not so much - there were a few random dropped stitches which I was able to spot and repair without having to rip back. I set up for the second Front, and briefly, it crossed my mind to think about the sponge bar but as usual, in a hurry, excited to get things done, I continued. It seemed fine. I took a day off and went back to knit a sleeve. Halfway up, after like 16 repairs, I admitted defeat and aborted it. Pulled out the needle retainer and sure enough, flat as a crepe!

https://knitwords.blogspot.com/2016/02/mental-note.html

Note to self, READ MA’s blogs on lace knitting before attempting a new lace project!

Friday, April 30, 2021

the power of suggestion...

 I got an email from someone asking if I’d ever used Yeoman Yarns Brittany? Does the Pope have a nose? Have you used it for plain stockinette? Heck, yeah! Does it bias? Never happened to me! But guess who has 2 cones of Brittany in ‘pale primula’, well-aged (as is virtually everything on my shelves!) – it’s not quite the Pantone colour of the year but I have a couple of rayon print fabrics, recently purchased, slated for spring dresses and I think this goes perfect!

My inspiration, that last lacy cardigan, Smokin’ – love it! And in this cotton, oh my, so excited!

So, what’s the big mystery about cotton? And how do you know what to do? You’ve probably heard the horror stories: it grows during wearing and ends up stretching out; it makes a really heavy, draggy garment, hard to work with because you need to pre-shrink before putting together, the garment biases and twists – NOT to all that!  My guess is these stories are based on hand knitting or people using industrial cotton, not meant for our knitting machines, something that should only be used for knitting dishcloths (and WHY do they make dishcloths??? – sorry, Bonnie from WI – she did give me 3 back in 2018, I think, at the Founders Fest and honestly, I used them and came to love them – sadly, the last one developed holes and I think it’s time to put it to rest).

unwashed swatch
Anyway, I’m talking about a very good quality cotton, meant specifically for machine knitting.

My method of using cotton – allow for the shrinkage when making your swatch. This yarn, (Yeoman Yarns Brittany) is what I call a soft cotton – not mercerised and has a matte finish. Sample out or test knit for the gauge. You want it to look a little loose because laundering will shrink it and cause the knit stitches to become smaller and tighten up. I do use the dryer but don’t over-dry – that will cause the cotton to become stiff and hard – if this happens, no worries, just add water and try again! My theory from here is that when you launder the garment, regardless of the stitch, whether it is stockinette, lace, tuck or whatever, it is all going to shrink at the same rate so there is no need to pre-wash the pieces before assembly. I make the entire garment, put it all together (yes, it will be too big, at least, too long) and then launder it and presto, you have a lovely finished garment that fits and was easy to assemble!

Friday, April 23, 2021

the truth...

Sometimes I don’t tell you everything. Yeah, I admit it, not wanting to say, after all that work, that thing sucks. I don’t like it. It doesn’t fit right. It didn’t come out like I planned.  http://knitwords.blogspot.com/2021/02/all-aran-ed-out.html

But, what to do about it?


Usually after finishing something, I put it on and am so happy, I wear 
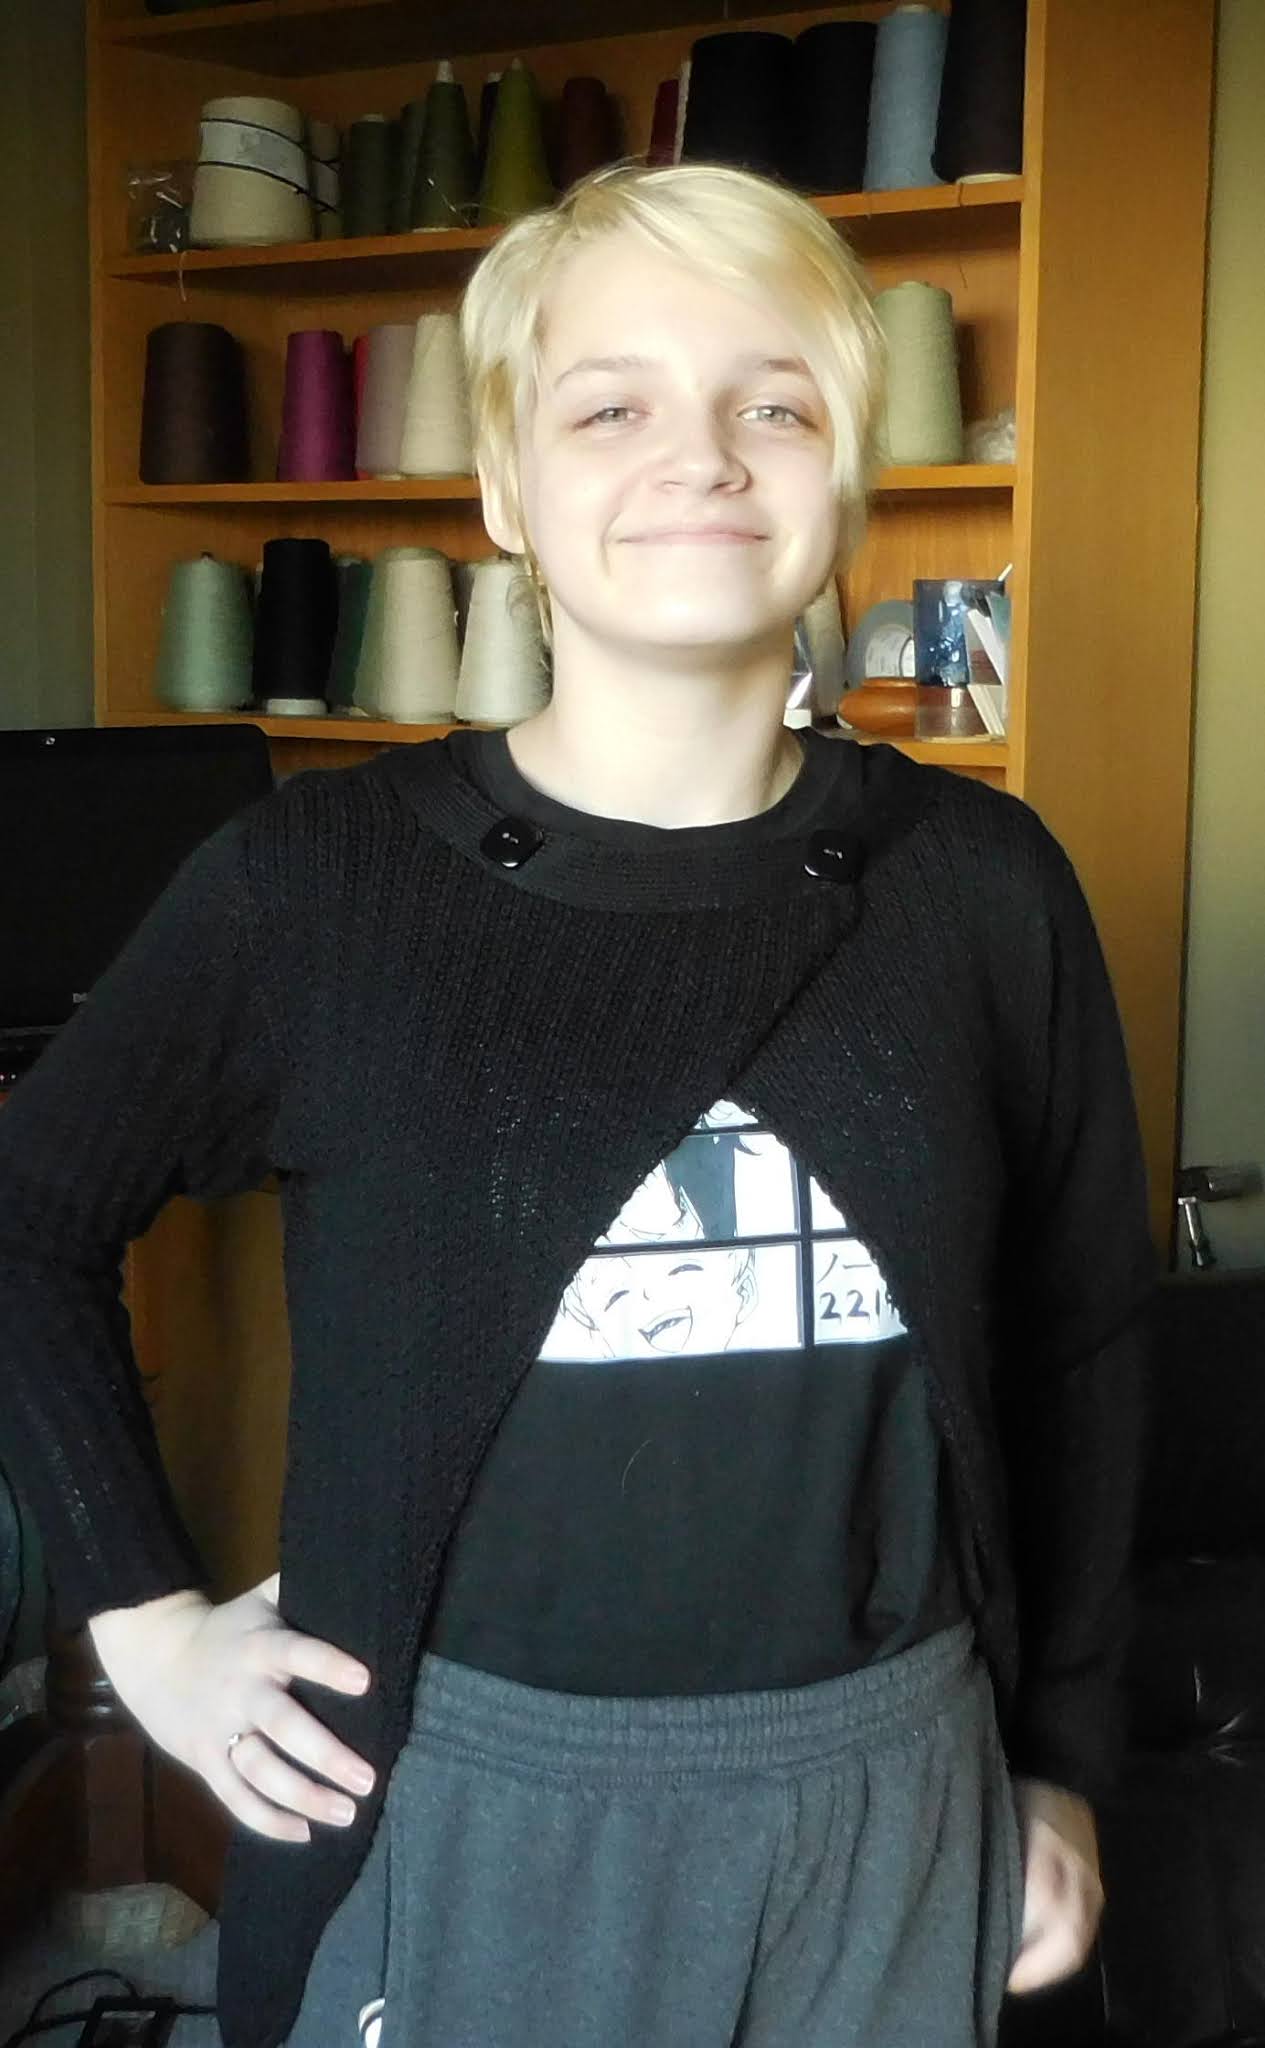
it for like three days straight! That red tunic, I didn’t even give it a name! When I put it on, I just thought, oh dear, yikes! I blamed it on my hair-do – or lack thereof! It was one of those days! Anyway, I did try the tunic on a couple more times, when my hair and make-up wouldn’t be the reason and yeah, I just didn’t like it.

I finally figured that I messed up on the sleeve – I had altered the original shape, narrowing the neck width, changing it into a closer-fitting round neckline, which brought the shoulder in. The top of the sleeve would sit at the top of my shoulder like a set-in sleeve, but I made the sleeve same as the original design, but, by mistake, the next size up! and although it all went together fine, there was just too much sleeve! The garment was bunching and thick at the underarms. It was tempting to just leave it, but I knew I would never wear it and I couldn’t give it away like that.

Before I could talk myself out of it, I took apart the side seams and ripped off the sleeves. It’s been kicking around the room since and I finally promised myself to fix it before I could move on to anything else.

Unravelled the sleeve down to row 60 – easy to figure where I was because of my notes and I still had the markings on the number strip to match up with the centre cable. Reknit the sleeve using the shape of the last one I made (charcoal lace – Smokin’ – ‘cuz that’s how I feel when wearing it!), so it’s much narrower at the underarm and then the curved cap.


Put it all back together, washed it to get the kinks out and yeah, it’s all good! I’ll be wearing it (Poppy Perfect) for the next three days! ;)

Tuesday, April 13, 2021

déjà vu…

This is not exactly a spring colour but, I love my lace carriage, and I had two full cones of this ‘charcoal’ Forsell pure new wool 4 ply and thought, I gotta do this! That Driftwood hoodie https://knitwords.blogspot.com/2020/11/under-wear.html  has been one of my favourite stay-at-home-all-day wardrobe staples – I love the shape of it, the feel of it (it’s a thickness thing!), the button front (instead of zippered) and it just makes me feel good. https://knitwords.blogspot.com/2020/11/hind-sight.html


You’d think I already have enough hoodies but in assessing things, I don’t have an all-over lace hoodie with pockets, so that’s my goal. Choosing a lace pattern was the next step and this one’s Me-Cozy from Knitwords #48. I have used it quite a few times over the years and as I wanted lots of holes, somewhat geometric, and no multiple passes, this fit the bill. I searched my books for an appropriate hem/band/trim but rather than another ribbed band, I hoped to keep it simple. Looking at my original design, I saw the edging was totally easy, just a rehang, ewrap, knit a row and then the cast-off, all ending up looking like a garter-stitch little hem. I tried it out on my swatch, and I had the feeling I did this before! https://knitwords.blogspot.com/2009/01/in-betweenssometime-last-week.html  I’ll go with that again!

Just for something a little different and to avoid the issue of having to hang the bottom of that original pocket, incorporating it into the hem, I went with a patch pocket that would be sewn on afterward. https://knitwords.blogspot.com/2018/02/decreasing-hack.html

When it came to doing the front bands, I figured the patch pockets would look much nicer if that centre side edge was incorporated into the front band, a little risky but what the hay? The devil may care!


Pleased to report my new Franky seaming technique of putting wrong sides together works very nicely on this one too! http://knitwords.blogspot.com/2021/03/she-likes-it.html

Oh, I just love this thing! I see another one in the near future! Who cares about spring colours? I’d be very happy for anyone to see me wearing this! ;)

Friday, April 9, 2021

denim done...

I got the set-in sleeve seaming sorted. Seamed the underarm using that ‘franky’ seaming technique - I can see that becoming my go-to method! That turned the sleeve cap into a ‘circle’, so, to join it to the body, in sections, starting at one end of the machine, hanging as far as it could stretch, casting off that part and then hanging the next. Worked fine.

I had already decided the front bands would be stockinette with the chain-stitch in the fold line (Side Steps https://knitwords.blogspot.com/2013/05/snow-days.html  and I thought the collar would look great with that too. Took me two trys to get it right, with the chain inserted between the angled ends, but looks good. I did a riff on that chain stitch added to the pocket edge https://knitwords.blogspot.com/2011/03/fourth-times-charm.html 

I was putting off dealing with the pockets to be honest. Almost resorted to my back-up plan of closing up the pocket opening by grafting over the ravel cord opening - no one would notice, up then I wouldn't have pockets! I had been so pleased with myself, thinking this was going to be easy. Putting the opening (green line of ravel cord to hold the stitches) as I was constructing the body, thinking I'd just knit an inside patch for the actual pocket. Realized that wouldn't work for various reasons and then it finally dawned on me to just sew a bag pocket that I could hand sew the opening to the pocket opening and stitch the fold along the inside of the front band so it would be held in place and not sag below the bottom edge and still be totally useable, not showing on the outside in any way. It works! So happy!


Wednesday, March 17, 2021

she likes it!...

And it looks cute! Got it done in time! Used the knit side as the finished outside.

Easy Bind Edging: This works brilliantly! Especially good for the curved lines – it does look good from both sides which is nice because on the side ‘tails, you see both sides. The swatch shows both ways to complete. I used the right side finish, hanging the edge with  the purl side facing so the trim would show knit side to knit side.

The neckline: I followed the instructions for ‘Crosswise’, hanging the neckline stitches and knitting 10 rows of stockinette at garment tension plus one row at T10, then waste yarn and remove. A 10-stitch strip X 300 rows of stockinette is then hung on same needles, purl side facing, with the neckline open sts hung and pulled through the edge. Loose row and chain off. Sewed the two buttons through both edges to secure the neckline – no need to worry about buttonholes that wouldn’t work properly anyway!


Seaming: came up with a new method that is just the bee’s knees! Omigosh, impressed the heck out of myself! Joining the side seams, both curved was a challenge to make it look good on both sides. After a couple of attempts, this worked: purl side facing, hang first edge, picking up half of the edge stitch/bar, evenly. Hang second edge, knit side facing (this would be putting wrong sides together) again hanging half edge stitch. Bring needles out and manually knit very loose row (Pull stitch back almost to A position). Carefully chain off! This opens out to make a nice flat join that looks great from purl side as well and adds a nice chain to seam line on knit side that hides the little glitches of the curved edges.

Makes me want to knit the whole thing again in a lighter colour so someone might notice what a good job I did!

Tuesday, March 9, 2021

stuff about franky...

 No, I won’t be writing the pattern for this – way too much stuff happening to write it all down and grade sizes, never mind having a yarn that everyone can get. I’m going to try and give you enough info about what I did to help you in case you still want to attempt this!

My swatch was stockinette, just because, and then I chose a tuck pattern (it’s a basic stitch, usually included in even punchcard machines) that I’ve used in the past – it was really just to bulk up the fabric and add a bit of texture without being too baby-blanket-ish (bubbly), which a lot of tuck patterns are. I haven’t quite committed to which side will be used for the public side. I prefer the look of the purl side because of the vertical lines but pretty sure I’ll use the knit side because it presents a flatter finish that most non-machine knitters recognize.

I have mentioned that I often knit sleeves first but maybe haven’t really explained why. The sleeve is usually the smallest piece, area-wise and it gives you a chance to get used to the stitch pattern without worrying about working the full width of the needle bed. It's a good opportunity to experiment with your increase method (if you forgot to do this on the swatch!) without it being in a prominent position - who looks at the underside of the sleeve? Same for the cast-on and cast-off method to be used. Normally I would cast on with waste yarn and ravel cord and then a plain row of stockinette before going into the stitch pattern so there is a plain row to pick up later for the trim - this I did on the first sleeve. Proceeded to work through the increases which become more frequent as the knitting progresses - with tuck stitch, the row gauge can be quite high - mine is 52 rows to 10 cm/4 inches - and even if there is an increase of one stitch in less than four rows, any type of full-fashioned increase doesn't work very well and it tightens up the seam line too much. I found the best method to use here was to bring out a new needle on the carriage side at the beginning of the row and wrap it, also selecting the second stitch, bringing it out to cancel the tuck, turning it into a plain knit stitch to improve the edge. What you're doing is basically having two knit stitches at the edge to make for a smoother line and ensure the seaming and finishing goes well. This will prove more important on the Front/Back because of the curves.


At the top of the sleeve, I did shortrow the cap and then took it off on waste. Then said to myself, what were you thinking? OR better yet, WERE you thinking?  This is black! Picking up those tiny black stitches is going to be brutal! AND there’s no need to have open stitches – the ‘easy bind edge’ is going to hide all!

The second sleeve has an ewrap at the bottom and a loose row chained cast-off at the top! And look at me! No point in taking photos of the real thing, it’s black! I made a swatch in beige of the bottom edge of the front/back so I could show how this looks…

Saturday, March 6, 2021

on spec...

Finally got to show Rhiana my idea and she was good with it. She commented on my enthusiasm, noting the exclamation mark in the notes I made. We discussed colour – she likes black or white or pastels. Scanning my shelves, I found a full cone of black Bramwell Sable Crepe hiding in a corner – it’s a dress-weight acrylic that I have no trouble parting with.

The original garment was black so you really can’t see much detail but I did detect a bit of texture in one frame that lead me to think it was maybe a tuck rib and likely a bit thicker, more like a mid gauge weight. I want to use the standard gauge machine and stick with a single bed stitch because of all the shaping. Did some research, looking back over old Knitwords magazines and in N0. 48, there’s an MAO design, ‘Crosswise’, that has some interesting features, like the angled fronts and the neckline. Not wanting to invest in time-consuming techniques here – she’s 14 and might wear this once or twice! – that self-faced, sloped edge is out - I’m looking to keep this simple! Made my swatch, starting with stockinette at T6 (which is the likely most suitable stitch size for this yarn) and then a simple tuck that gives nice vertical lines and adds a bit of bulk to the fabric,  at T6, T7, and T8, mostly for comparison. Give it a light steaming, measure, let it rest overnight and measure again – tuck will change, so the rest time is important.

That sample I used to do the ‘easy bind edge’ on http://knitwords.blogspot.com/2020/09/easy-bind-edge-question.html has been floating around my workshop and it’s the perfect trim for this project: narrow, works good from either side and should adapt widthwise nicely.

I drew the shape out on graph paper, adjusted here and there, until I was satisfied, then laid it out on the mylar that fits into my KR11 knit radar. I’m good to go!

Tuesday, March 2, 2021

knitting knightmares...

 I woke up in the middle of the night, in a sweat, about attaching those sleeves! Yikes! Way too invested in nothing!

What happened was, the body was sideways knit, right? The top edge is picked up and the yoke knit up in stockinette. I did the Back Yoke first, shaped the neck and shoulders and took each shoulder off on waste yarn. Then, did the first half Front Yoke the same way, but at the top of the shoulder, I decided to go with that reverse seaming on the shoulder that I like so much - it’s easier so why not? You just hang the corresponding shoulder right now and cast off, done! no waste yarn, turning or rehanging! Did the second one, smoothed them out, admired my work and quit for the day. 

The sleeves were already knit, with shortrowed sleeve cap, taken off on waste (and/or garter bar) planning to use the open stitches to make the seam to join the sleeve to the body. Only thing, now, there is no way to hang the body/yokes flat to match the flat sleeve! No worries, I’ll figure it out later!


Right now, I have something more pressing to get to. Last month, I Netfllixed 'Wentworth', an Australian show about women in prison. Totally worthwhile, loved it but now I have to wait for the final season to be posted later this year! Aw! Hate when that happens! Strangely, I have become rather obsessed with a knit top I spotted in Season 5  (spoiler alert - when Frankie gets out). Maybe it caught my eye because, being set in prison, everyone was wearing those teal sweat suits (prisoners) or uniforms (guards/warden - now there's a nightmare!) and the sight of real clothing struck me, I guess. I quickly sketched it out on the back of an envelope to remind myself. When I went back to the computer and found it again for a closer look, I was thinking, who could I make this for? Not my style, but someone young...what do you know, it's granddaughter Rhiana's 14th birthday soon!


Tuesday, February 23, 2021

dillydallying?...

 dragging my feet? lollygagging? procrastinating? camping out? Yes, yes and hell yes!

Honestly, I was pretty pumped with my design. I had knit the two plain stockinette sleeves first while thinking and re-thinking the body of this lacy jean jacket. I had it all planned out, sideways knit, making it in one piece, planning out pockets (that’s the lime green ravel cords awaiting further developments), shortrowing some shape and I was all gung-ho! I added more of the lace circles in the stitch pattern, spacing them alternately every 10 stitches, increasing the hands-on work (by the way, there are 8 RTRs in every 36-row repeat!). But, approaching the centre back, I started thinking, ohmigosh what was I thinking? It was going forever! And as the first centre front edge hit the floor, after reminding myself that this was cotton and would/should shrink up a lot, I was re-measuring my swatch, re-calculating the row counts, re-measuring my shape, totally questioning my sanity. Do I cut my loses and quit? Admit defeat? Continue into madness?  
I was really close to losing interest, having an increasingly difficult time motivating myself to continue. I had another project that I’d like to get into but felt that abandoning this mid-stream would mean relegating this precious yarn to UFO status. Not acceptable! P
ersevered, finally on the home stretch of the last half front, pulled out all the stops and got ’er done!

Taking it off the machine, stretching it lengthwise and folding it into the garment shape, saying, what the haich? No worries, this will be fabulous!

Friday, February 12, 2021

jean jacket re-visited...

Don’t know about you but I’ve come to hate that term, ‘hunkered down’! I prefer to think of it as just getting on and doing what needs to be done. So, I’ve been sitting around, wasting time, putting in time, whatever, but I have been knitting!

A while ago (LOL! turns out it was like 4 years ago) I had a plan of knitting a lacy denim jacket https://knitwords.blogspot.com/2017/09/regifting.html

and after a bit too much research, that was abandoned. https://knitwords.blogspot.com/2017/09/missteps.html

Last week, after realizing I was cabled out, I started making a quick list of things to work on. Went through my knitted wardrobe, tried on several things and I remembered that recurring dream of denim and lace in a jean jacket style. Pulled out those old notes and swatches and just by chance, the RTR Lace Cardi was at hand. I really love that fabric which is a sideways knit combination of purl-st ridges and hand-transferred simple lace. My first thought was that I never really get to enjoy that stitch pattern because it is basically in the back of the cardigan and it dawned on me that using it again would give me those vertical lines I was looking for and still satisfy my need for a hands-on approach to knitting in general. Revised my design and it’s a go!