Tuesday, November 29, 2022

is it knitter's block?...

 What to do? I thought for a minute I had a breakthrough – what if I made a swatch of the floral mesh in another colour of the 4 ply wool, you know, a leftover cone that isn’t enough for an entire project? so I’m not wasting the real stuff. I have the charcoal, it’s dark like the bilberry and would show off the stitch pattern similar to what bilberry would. Make a swatch or just go with a sleeve? Why am I even wasting time thinking about it? Jump in, make the sleeve - you can always abandon it halfway through if you really aren’t feeling it!

Oh yeah, change the sponge bar! https://knitwords.blogspot.com/2022/03/the-elephant-in-room.html

Read all your cheat sheets and notes…

Aw man! I just got a new order of sock yarn!

Wednesday, November 23, 2022

dithering...

stalling, just plain delay tactics! I’m still knitting socks (and hoping for a good hair day)…putting off making the big decision – my next project, another long, lace, button-front hoodie. The choices: wool (navy, red, willow and dark brown) or cotton (Bonita cotton in cream, tan or red and CannelĂ© cotton in marsh/green). I decided to go with wool for the season – it’s now pretty well full-on winter so I’ve narrowed it down to the navy – it’s actually called ‘bilberry’, maybe a bit darker than navy but with a brightness to it. I haven’t had anything for myself in navy in a very long time. Now, I’m flip-flopping on the stitch pattern. The choices: ‘me-cozy’, that very airy, diamond-in-diamond, I’ve used multiple times and still love but already have it in the dark gray wool hoodie https://knitwords.blogspot.com/2021/04/deja-vu.html .

Or ‘floral mesh’ https://knitwords.blogspot.com/2021/09/the-holy-grail.html, the big summery print I’d like to use again but does it match up better with the green marsh CannelĂ©? And there’s ‘Gossamer’… https://knitwords.blogspot.com/2012/01/lacy-daze.html

what to do, what to do?


Monday, November 21, 2022

socking news...

Getting back into the knit of things, I’m sock knitting – I thought I had said everything I could possibly say about making socks – on my double bed Japanese knitting machine (for the newbies out there)  but, turns out, I learned something new! I can’t possibly recap everything here, but if you type ‘socks’ into the search bar at the top of this page, it will bring up at least 20 posts of my extolling, sometimes passionately, on the subject of my circular socks and give you a couple of links to my freebie sock patterns – there’s even one or two done on the LK150 mid gauge, not circular, of course, but pretty nice.

https://knitwords.blogspot.com/2012/12/sock-it-to-me.html

Anyway, back to the present, I have been purchasing the 100g skeins of sock yarn, usually buying 2 of each colourway, especially if they are on sale and for sure, if it’s one of those with a multi-colour stripe repeat. I think I told you before that I don’t really care if the stripes match perfectly – hate to waste the part you need to pull off to get to the same place as you started the first sock with. But here I am, making a pair for a special new friend and I want them to be perfect. Got the first one done and started pulling off the yarn to find the royal stripe I started with, and pulled and pulled and I began hyperventilating about wasting so much and these are bigger, (deep breaths) like size 9.5 wide and I was worrying about not having enough and it dawned on me, I could just thread up the second cone and knit the second one from there and it would match! What do you know? Perfect, and the second pair, one off the first cone and the next one off the second - that pair matches perfectly too, no waste!


Wednesday, November 16, 2022

third time's a charm...

Yeah, I know, Ive said that before! 

A couple of days go by, I’m mentally planning my next project. Going to knit some socks just to get back in the swing of things, I’ve wound all my sock yarn onto cones, ready to go. Before I take the wool crepe deluxe off the machine and thread up some sock yarn,  I pick up S&P and try it on one more time. That collar, the vee part, feels a little bunchy... what would happen if I made it again, eliminated pleats on the underside, just had the to-be-pleated part on one end, which would be the topside?

I’m not usually this persnickety! I wouldn’t admit this to anybody but maybe I’m a little nervous – I haven’t been out in the knitting public for over 3 years and I’m probably over-thinking!

Did I tell you the shoulders and sleeves fit perfectly?


P.S. The seminar in Pigeon Forge – it’s March 11, 12, 2023 – you can email Myra at myrean@comcast.net for details and to reserve your spot.

Thursday, November 10, 2022

time will tell...

I got the last end darned in and the collar stitched down so it doesn’t look too bad. I’ll be honest here. When I put it on and looked in the mirror, it was like, OMG, MAO! You’re a blob! It was awful! I hated it! I turned sideways and hated it even more! Oh wait! Besides no makeup and a bad hair day, you’ve been schlepping around in tired, old sports bras for the past couple of years! Ar-r-r-g-g-g-h!

Time for the wash and dry. Many times, I think that’s going to make everything so much better, but I know you can’t bet on it! Its almost like holding your breath while the laundry churns around – I think when you’re dealing with natural fibres, there’s life in there, kind of like washing your hair, it goes back to natural. So, if things are over-blocked or over-flattened, there’s hope the laundry will restore some of it! Fingers crossed anyway!

Omigosh! It worked! A little steam here and there and it’s all good! Now, if only this cold sore would go away, pray for a good hair day, put on a good bra and hope someone who can handle taking a photo comes by – we might get a real-life picture!

P.S. Thanks all, for your nice comments and encouragement! Greatly appreciated!

Thursday, November 3, 2022

the neck's best...

 As I was whiling away the summer, I was thinking knitting. I have a few more long button-front lace hoodies in my head, but I did want to get finished with Salt and Pepper before starting a new project. I knew if I abandoned it incomplete, it would stay that way and I wasn’t going to do that! It’s not in my nature to quit unless I see no recourse or salvation.

After hearing from Margie about the Pigeon Forge re-boot, I was pretty excited! I had that bad collar still on S&P.  Tried it on again, same thing, felt like I was choking…took very deep breaths…and thought, well, too much fabric at back of neck so what if I shortened the depth of the centre back but still made the centre front the same  number of rows. Repinned it to reflect this and it seemed to work. Took a minute to weigh up the pros and cons of trying to salvage the collar, like ripping it back halfway and rehanging it. Gave myself a V-8 slap and said why would you try to do that? There’s plenty of yarn, what would you be trying to prove? re-knitting from the start would be quicker! And, look, now I have a photo to show what I did!

It took a short time to reknit the collar, get it attached, re-do the seaming - I was chastising myself for dragging it out so long. Patted myself on the back and went for my walk.


Options for another attempt at the collar – making a shadow-pleat version – not really liking this as I had envisioned the collar to be all gray and other than use a double strand of the gray tweed to beef up  for the shadow pleat, I thought would be to stiff and thick so ruled that out.  Could do the K6R, RTR, thing, using the garter bar to make reverse stitch lines. Yikes, MA, this is wool crepe deluxe at T6 and 180 sts wide…I doubt even you could do that now!


In the words of the old Project Runway’s inimitable Tim Gunn, make it work!

Sunday, October 30, 2022

the truth...

Remember that photo  (the game plan post from May) of the finished pieces and me bragging I was going to enjoy the putting together? Well, normally, I’d just jump in and join the shoulders, attach the sleeves, yada, yada,  yada… but I took a day or two off and came back, looked at the photo and thought, well, those shoulders look quite narrow. Huh, it wasn’t that the shoulder was narrow, it was the neckline was too wide! What the haich was I thinking? I pinned the shoulders together, through the waste yarn and put it over my head. Yeah, very bad, too wide, neckline! The outside edge of the shoulder was in the right place.

Took another few days off. Came back, redrafted the neckline, ripped out the Back, down to the underarm so I’d know exactly where I was and reknit the Back. Did the same to the Front. Pinned the shoulders and tried it on, we’re good! Attached the sleeves, tried it on again, seems fine. Made the neckband, just a long rectangle, attached it on the machine. Pinned the bottom of the vee in pleats, tried it on and felt like I was choking…


By now, it was mid May and I thought, well, you aren’t going to be wearing that thing – long sleeve, tunic, high neck - any time soon…walk away, give it a rest!

Don’t get me wrong, I did a few things over the summer, like knit a couple of pairs of socks for gifts, and, I did make a new button band for my light blue mesh floral  http://knitwords.blogspot.com/2021/09/mesh-floral.html – it somehow got a red wine stain :) that wouldn’t come out ;( and as it was one of my favourites, thought it was worth the effort. And I did a few practise seaming experiments on S&P  to see which seaming method to use but I was happy to walk away again.

Thursday, October 27, 2022

forgive me...

 Hold onto your latch tool! You’re in for a shock! I’ll bet you’re surprised to hear from me! I do have a gazillion excuses!

I was trying to grow out my bangs - I've never not had bangs, you know…the ‘w’ on my keyboard won’t always  ork…my shoulder hurt…couldn’t buy Jif peanut butter for months!...needed new glasses…my optometrist retired…my optician retired…it was too nice outside and I was obsessed with my walking streak…my other shoulder hurt…my hairdresser has moved away…I became discouraged because I read on the internet that these fashion choices were over for 2022 – cold shoulder, tunics, camo, skinny jeans, neutral colours…I thought my career was over so what’s the use..

And the reality of it, I think l was disillusioned with that whole intarsia project.

Then, out of the blue, I get an email from Margie from the Tennessee Valley Machine Knitters, will I come and do their March 2023 seminar in Pigeon Forge, TN? Well, yeah!

Omigosh, MA, better get knitting!

Good thing Salt and Pepper isn’t cold shouldered – I could have had a trifecta of fashion-faux pas! Oh, wait, I’ll just wear it with my grey skinny jeans! That’s well past a trifecta!

Saturday, May 7, 2022

my game plan...

Not sure if you could read between the lines but this intarsia project had me scared! After the three sleeves, I really wasn’t sure I could pull it off. I’d have to admit defeat! That’s not what I wanted to do so I pondered. Decided to make the back first – just some stripes, really to make sure I wasn’t going to run out of the gray. I’m pretty sure on the internet ad version of this, the back would have been plain, one colour only – didn’t want that, but couldn’t see complicating my life with an intarsia design. Quickly got that done and I was happy with it – remember, I haven’t made a pullover in some time, so making the Back was helping me see the entire garment better, testing out the length  and shape before getting into the intensity of intarsia. I decided to restrict my intarsia knitting  time to 20-row intervals, to maintain calm and not allow myself to get over-tired which leads to mistakes which leads to frustration…

As you can see, I got all the pieces knit! Now, I can enjoy the putting together and getting that collar done! To be honest, I won’t likely be doing another WCD intarsia project for another thirty years!

Happy Mother's Day!

Friday, April 29, 2022

after thoughts...

although I was excited about the prospect of a totally new project – the intarsia thing - there was unfinished business. I had been halfway through number 12, button-front lace hoodie in the remaining denim Yeoman’s Twister http://knitwords.blogspot.com/2021/06/it-worked.html with that large lace diamond pattern, Lacy Twin - I couldn’t abandon it midstream – you probably know this, it’s like a death sentence to put something like that aside – so much harder to get it back on the machine later so I was determined to finish it off before allowing myself to get into the new stuff. Got all the knitting and assembly done, the machine parts anyway and then I could toss it aside, saving the darning in and buttons etc. later.

I’m picking it up again, sort of a consolation prize between the intarsia grief!

And here's something I can share about the handwork of finishing. Mostly, it's just tedious but here's my tip to maybe make it a bit easier. For seaming the doubled stockinette bands at the bottom edges and joining the hood band to the tops of the front bands, this is what I do: with long straight pins, thread one through the half outside edge stitch of each piece to uncurl the ends. This allows you to steam them flat before attempting to hand stitch them together.

This steaming defines the edge stitches, making the whole thing easier to handle and see. Then, using the longest tail available from the inside edge, hand stitch from the top/outside, through half stitch from one side, across to corresponding half stitch of adjoining piece, to next half stitch on same piece, across to opposite side, next half stitch, etc. (going into each half stitch or bar only once) to end and thread the tail in the inside of the band. This makes a nice, flat, almost invisible, no bulk join/seam, when done neatly, blends right into the band, making it continuous, both inside and out!

Wednesday, April 27, 2022

the zen...

of intarsia knitting quickly disappears when you spot dropped stitches. Add Wool Crepe Deluxe, tiny little stitches in salt and pepper tweed, almost invisible against the steel tones of the needles and sinker posts. And a dropped stitch? When you notice it? It’s like a silver bullet, dropping like a stone! And there’s usually two or three, grouped! Aaaarr-g-g-g-h-hh! What was I thinking? 

You know, funny thing, I keep remembering a conversation, years ago, with a machine knitter who was telling me about her many machines, twelve or more in total. She began itemizing them, had two silver reed standard gauge machines, I asked her why and she blithely said oh well, you know for those times when you have an intarsia project homesteading on one, you can still do a lace carriage project on the other… I’m pretty sure I just walked away, shaking my head. Am I wishing for another machine? No, not really because I’ve never let myself get bogged down with a project, forcing myself to finish one before starting another.

Yeah, so, I made a sleeve (centre, bottom). Relearned intarsia, relearned increases. Because the needles are out in C position, latches open, ready for the laying of the various colours, to increase full-fashioned, with the 3prong tool, move the outside edge stitches back to B, lift them off, bring a new needle to work and move those 3 out the one space. With the single end, pick up the heel stitch of the third stitch, fill in the empty needle and return all 4 needles back to C, making sure you didn’t disturb any of the other latches… that’s the biggest issue! And, should the work be out front? In front of the ribber, which is my standard – I always think you can see the work better and increasing/decreasing is easier…but, I learned (or should I say re-learned) that because the work is behind the latches, having the work out over the ribber creates more issues with the latches closing before you want them! OMG! I obviously wasn’t thinking!

Looking at the finished sleeve, from the right side, thought I’d like the stripes to be more straight-lined, not so random looking but it wouldn’t matter to me that sleeves would be different. Started the second sleeve (left), fully intending to reverse the diagonal of the stripes, got carried away and forgot that until about 40 rows into the patterning. Oh well, finished that one and made a third! No biggie, it’s not like there’s a deadline or anything!

Monday, April 11, 2022

mickey mouse...

Not! Did I mention intarsia? Gosh, it’s been a while since I did intarsia on the standard gauge! In fact, seems like a thousand years! I still have this top that is from, as near as I can figure, ’92! I remember knitting it. I had been on a trip to Scotland and brought back a T-shirt with this on the front – bought it for me but when my then teenage son saw it, he wanted it. Mickey Mouse with his hand around your throat! Being the softee I was, I gave it to him but before I let him have it, I photocopied the picture – back then, I had this big ole copier that would reduce and print so I set it to 50%, copied it in sections, pasted them together to get the picture in half-scale and then traced it on my KR7 paper, knit-from-screen the old-fashioned way! It was made with a white and a black 3 ply cotton, the red was Bramwell’s Artistic, over 300 rows at T5 – no wonder I remember it!

Over the last 30 years, I’ve reserved intarsia for the mid gauge machine – much easier to see, larger gauge, less work, you know what I mean.

Natural Fibres Princess!’ from Knitwords No.3, Winter ’97, was a raglan tunic made on the LK150 using 8 colours to form the interlocking dogtooth pattern – that one cured me for a while too! A couple of other small bits, in the links below if you’re interested!

https://knitwords.blogspot.com/2020/04/one-stitch-out-not.html

https://knitwords.blogspot.com/2012/03/n8.html

Did some practise swatches, testing out colour choices, stitch size and angles. The first swatch is at T7 with the gray (tweed WCD called marble), ivory/winter white, and black. Actually, made swatches because the intarsia carriage is a slightly different gauge from the main knit carriage and figured I better try it out small before committing to a big project like this. Normally with WCD for a top, I would use T6 stockinette with the  main carriage but I wanted to try T7 to see where it was in relation to the main carriage knitting and, because I want this to be sort of drapey and soft, went with T7. Also, the lazy person that I am, thinking that a larger stitch size equals less rows, less work? Measured it (30 sts and 39 rows), washed and dried it, ending up with 32 sts and 42 rows. Left it and tossed it around the room, looking at it and it seemed to be a little wonky every time I moved it, like it was biasing. Hmmmm…too loose, probably. Made another on at T6, added in the red (don’t really like, but good to know), tried some different angles (on the arrow, the bottom side, I moved the colours one stitch every row, then on the top side, knit two rows for each).

Feeling good about this, drew out my shapes on full width, half scale paper and penciled in a few lines, similar to that photo from last post. Nothing is written in stone, but I think the MAO plan of making a sleeve or two first is a smart way to go. Keep watching this space for results!

Here's a link to the pdf of my intarsia article from KW#3

https://acrobat.adobe.com/link/review?uri=urn:aaid:scds:US:46178df5-2349-31db-bc99-72f01b4606b7

https://acrobat.adobe.com/link/review?uri=urn:aaid:scds:US:46178df5-2349-31db-bc99-72f01b4606b7

Friday, April 1, 2022

what goes around...

comes around! 
The other day while scrolling through something, this photo ad appeared. You know, those insidious ads - hate 'em! But I was so taken with this! 
Was it the collar? Kind of like one I've done a few times many years ago. As you can see, I dug out evidence of past designs, this one from 1995! It was published in Canada’s Fashion Machine #54, done on the LK150, combining a simple intarsia design with V-neck. Here, the collar was a rectangle of stripes of knit and purl (6 rows of each colour) with RTRs (Remove, Turn, Rehang) between colours to add texture and then attached to the vee opening.

The shadow pleat version made it to my neckline booklet, The Neck’s Best Thing – #7, Shadow Pleat Band in shallow V-neck. Here again the collar is a rectangle, the pleats are formed using a thinner yarn for the second stripe, ridges forming automatically, using the purl side of the fabric as the outside.

The ‘new’ tunic itself was like $29 so you know it’s going to be junk when you get it, if you order it.  
Maybe it was that gray/white/black thing that always appeals to me and I've been obsessing about this design for the past week...think I may have to knit it out of my system...You know it’s been a while since I made a pullover top, so maybe it’s time. Dare I think of intarsia in Wool Crepe Deluxe?


Tuesday, March 29, 2022

number ten...

And eleven! Yeah, I’ve been knitting away, kind of ignoring you and just getting on with my lace projects, feeling bad for leaving you hanging! Been meaning to give you my run-down on the front bands, buttons and holes – how, how many and stuff like that, so here goes.

On that last bunch, the three Bonita cotton ones, https://knitwords.blogspot.com/2022/02/my-hole-theory.html I really paid close attention to the spacing of the buttons and my conclusion: 8 - 19 mm buttons, spaced 8 cm apart (from centre of button) works best for the length of this garment – the front band is about 65-68 cm\25.5-27 inches in length, 21mm\7/8 inch wide. On the blue one, I had 6 - 23cm buttons, spaced 11 cm between and there’s a little bit of stretching, gaping between when buttoned which can be sort of unattractive – trying to avoid that! On the red mesh, used 8 – 19mm buttons and it’s perfect (did the rose one the same but the buttons were slightly larger, not a big deal but optimally if you had all the right options available, go with the 19mm size.

Tip: When making the buttonhole band, instead of having to count needles to the next hole, use the straight side of the needle selector and measure 7 cm (to get 8 cm centred) between first and last needles of prospective buttonhole – see photo at right. Start the top buttonhole needles from neck end of band, 4 needles for hole, 7 cm to start of next hole,  4 ns, etc down and leave any excess/extra at bottom end, eliminating the need to have evenly spaced holes right to the bottom.

Just finishing up another laced, button-front hoodie in ‘thistle’, Forsell’s Pure New 4 ply wool for sister Janet – her birthday last week and she really does love that gold one I sent her last fall, so I’m happy to make another for her. The stitch pattern is from Gossamer, from Serial Stuff 3, and the hem is from Tumbleweed, KW No 53.

Number 11, in the light blue Bonita cotton, is for my next-door neighbour, Susan, just because she’s a great girl, hope she likes the colour! The stitch pattern is from Lacy Twin, way back, cover of KW No.20 https://knitwords.blogspot.com/2011/07/cross-knitting.html  – I had remade the twinset for myself in black WCD – totally classic! https://knitwords.blogspot.com/2020/03/schemeing-vees.html

My year of lace carriage is just about complete…in my mind anyway - never really started out to spend the whole year on this but it kind of became a bit of an obsession - you know how I get…and it’s not like I really have to stop lace carriaging, like, you’re not the boss of me! I can do what I want and truly, I still love that thing. In fact, I have been toying with the idea of a lace, button-front hoodie in wool crepe deluxe (be still my heart! – am I ready for it?) and I still have that green CannelĂ© cotton…


Saturday, March 12, 2022

the elephant in the room...

The sponge bar, a.k.a. needle retainer bar, is a touchy subject. It’s not mentioned in any techniques books or resource manuals that I’ve ever seen. And hearsay, yikes! So much, do this, don’t do that…and I have, in the past, given little hints here and there but I thought I’d put it all together here. First, for the beginners out there, almost all flat bed machines have a needle retainer system which is some sort of foam strip that holds the needles down in the channel. You need to have the correct one for your specific model. I admit much of my knowledge is with the Silver/Studio/Singer genre but have had experience with Brother/KnitKing and I think the basics are the same. The weather/climate and how your machine is housed plays a large part in how long the foam strip will last. If you’re in a warm climate, no air-conditioning, the heat will play a part in how fast that bar will retain elasticity , same as a home with forced air heating in the winter – no set rules in how long it will last, but…

How to know if it needs to be replaced? In certain pattern stitches, like tuck, maybe the tucks are not knitting off properly. Maybe the stitches are not actually tucking when they should. Mistakes in patterning will show up. Sometimes, if the foam strip is really bad, it will even show up on plain stockinette where the stitch doesn’t knit off properly, making a tuck where it’s not wanted. When hand transferring, like cabling, manual lace, or increasing and decreasing, if the needles are moving up and down as you attempt to fit the three-prong or a multi-prong tool onto a group, causing more work than it should be, these are indications that the sponge bar is loosing it’s holding power. I generally notice when the hook part is elevated above the flat bed when the needles are in A or B position.

When a brand-new strip is inserted properly, the front of the needle in A or B position should be sitting firmly down on the metal.

My guidelines for the sponge bar (and lace carriage work - the touchiest one): Swap it out between pieces. I always have at least 3 bars. A brand new one (never use for lace knitting – it will be too firm and the needles won’t transfer properly, not enough give!). Save this one and break it in on a stockinette project. Mark the date on it with a felt pen when it’s first inserted. The other two, (both somewhat used, at least one or two projects on each) use to swap out, if necessary – if it’s working and lacing properly, keep going – this is only when problems occur! - for each new piece, giving the second one a day of rest between pieces.

Check the give on the needles – Bring needles to B and press down – if there is a quite noticeable distance, consider replacing.

Try to complete one full piece per sitting. The bar won’t suddenly collapse and if it’s working well, go with the flow!

May all your lace transfers transfer!

P.S. I don’t like the idea of taking the bar out of the machine while you’re away – you may forget how it went in…I once had a customer who put it in upside down and then called for help…yikes!

Monday, March 7, 2022

back in the day...

The other day I was chatting with favourite grandson Nate – we were talking about his family going to Edmonton for the March break, next week. I told him the last time I was in Edmonton was like 2003, maybe, and I went there to be on a TV show. I gave him a very quick snippet, said that I was pretty sure it was on YouTube. Before I knew it, he had it dialed up on his screen! He was thought it was pretty cool that his Grama was on YouTube! Wow, a blast from the past! I figured, what the hay, may as well tell you too!

Wa-ay back, we’re talking 1996, pre-Knitwords magazine. I made this gold and white baseball jacket to go with my pair of high-top sneakers and it made the cover of Canada’s Fashion Machine. I used Linda MacPhee’s Crazy Jacket pattern, knit up a pile of fabrics in various stitch patterns using ‘Starlight’, a gold fingering weight hand knitting yarn and white Yeoman’s CannelĂ©, cut’n’sewed them into this jacket and sent it off to CFM, along with my shoes.

A few years later, my friend Vickie sent the magazine to Linda MacPhee who was doing this TV show about sewing – I think it was airing on PBS at the time. Anyway, Linda called me and invited me to Edmonton to be on the show. I went, thinking it was a good opportunity to get some airtime for knitting machines - she had promised me we could show a machine on the program. Packed up my trunk show and an LK150 and flew off to Edmonton. Went to the TV studio, had my make-up done and chatted briefly with Linda. She said we’d do a little run-through, get the feel of things and then do it for real. I said a couple of things that sounded totally dumb in my ears, said to myself, no worries, we’re gonna do it again and next thing I know she’s saying, that’s all the time we have! See ya later! Knitting machine still in the case! Here’s the link, https://www.youtube.com/results?search_query=linda+macphee+workshop+Mary+Anne+Oger  - it was season 1 episode 3 in case you’re interested, my part starts at about 8 minutes in.

I wanted to show more and had prepared a new cut’n’sew project, Faded Glory – later featured in Knitwords #29, Summer ’04, which is on the Knitwords back issues cd http://www.knitwords.com/previous.html 
as an unadvertised extra…

I did get to the mall…

Tuesday, February 8, 2022

that hole theory...

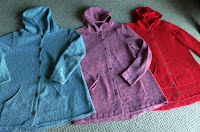
Got the rose hoodie put in the mail. Dee got it and she loves it! Called to say how pretty it was and the best news, it fit perfectly! I was so happy!

I wanted to tell you what I learned on these last three – they were all the Bonita cotton, so all knit at the same stitch size. I had swatched the floral mesh stitch pattern in the rose and swatched the red mesh in the actual colour, same stitch size. The gauge was a bit different, rose floral was 26 sts and 40 rows and the red mesh was 25 sts and 45 rows to 10 cm/4 inch. http://knitwords.blogspot.com/2021/07/whoops.html

The blue was made first. I liked it but on the red one, wanted it longer, added 12 rows of faggoted border (3 cm) and the sleeves a bit longer (15 rows plus the faggoted border, 10 cm). http://knitwords.blogspot.com/2021/06/you-know-i-didnt.html

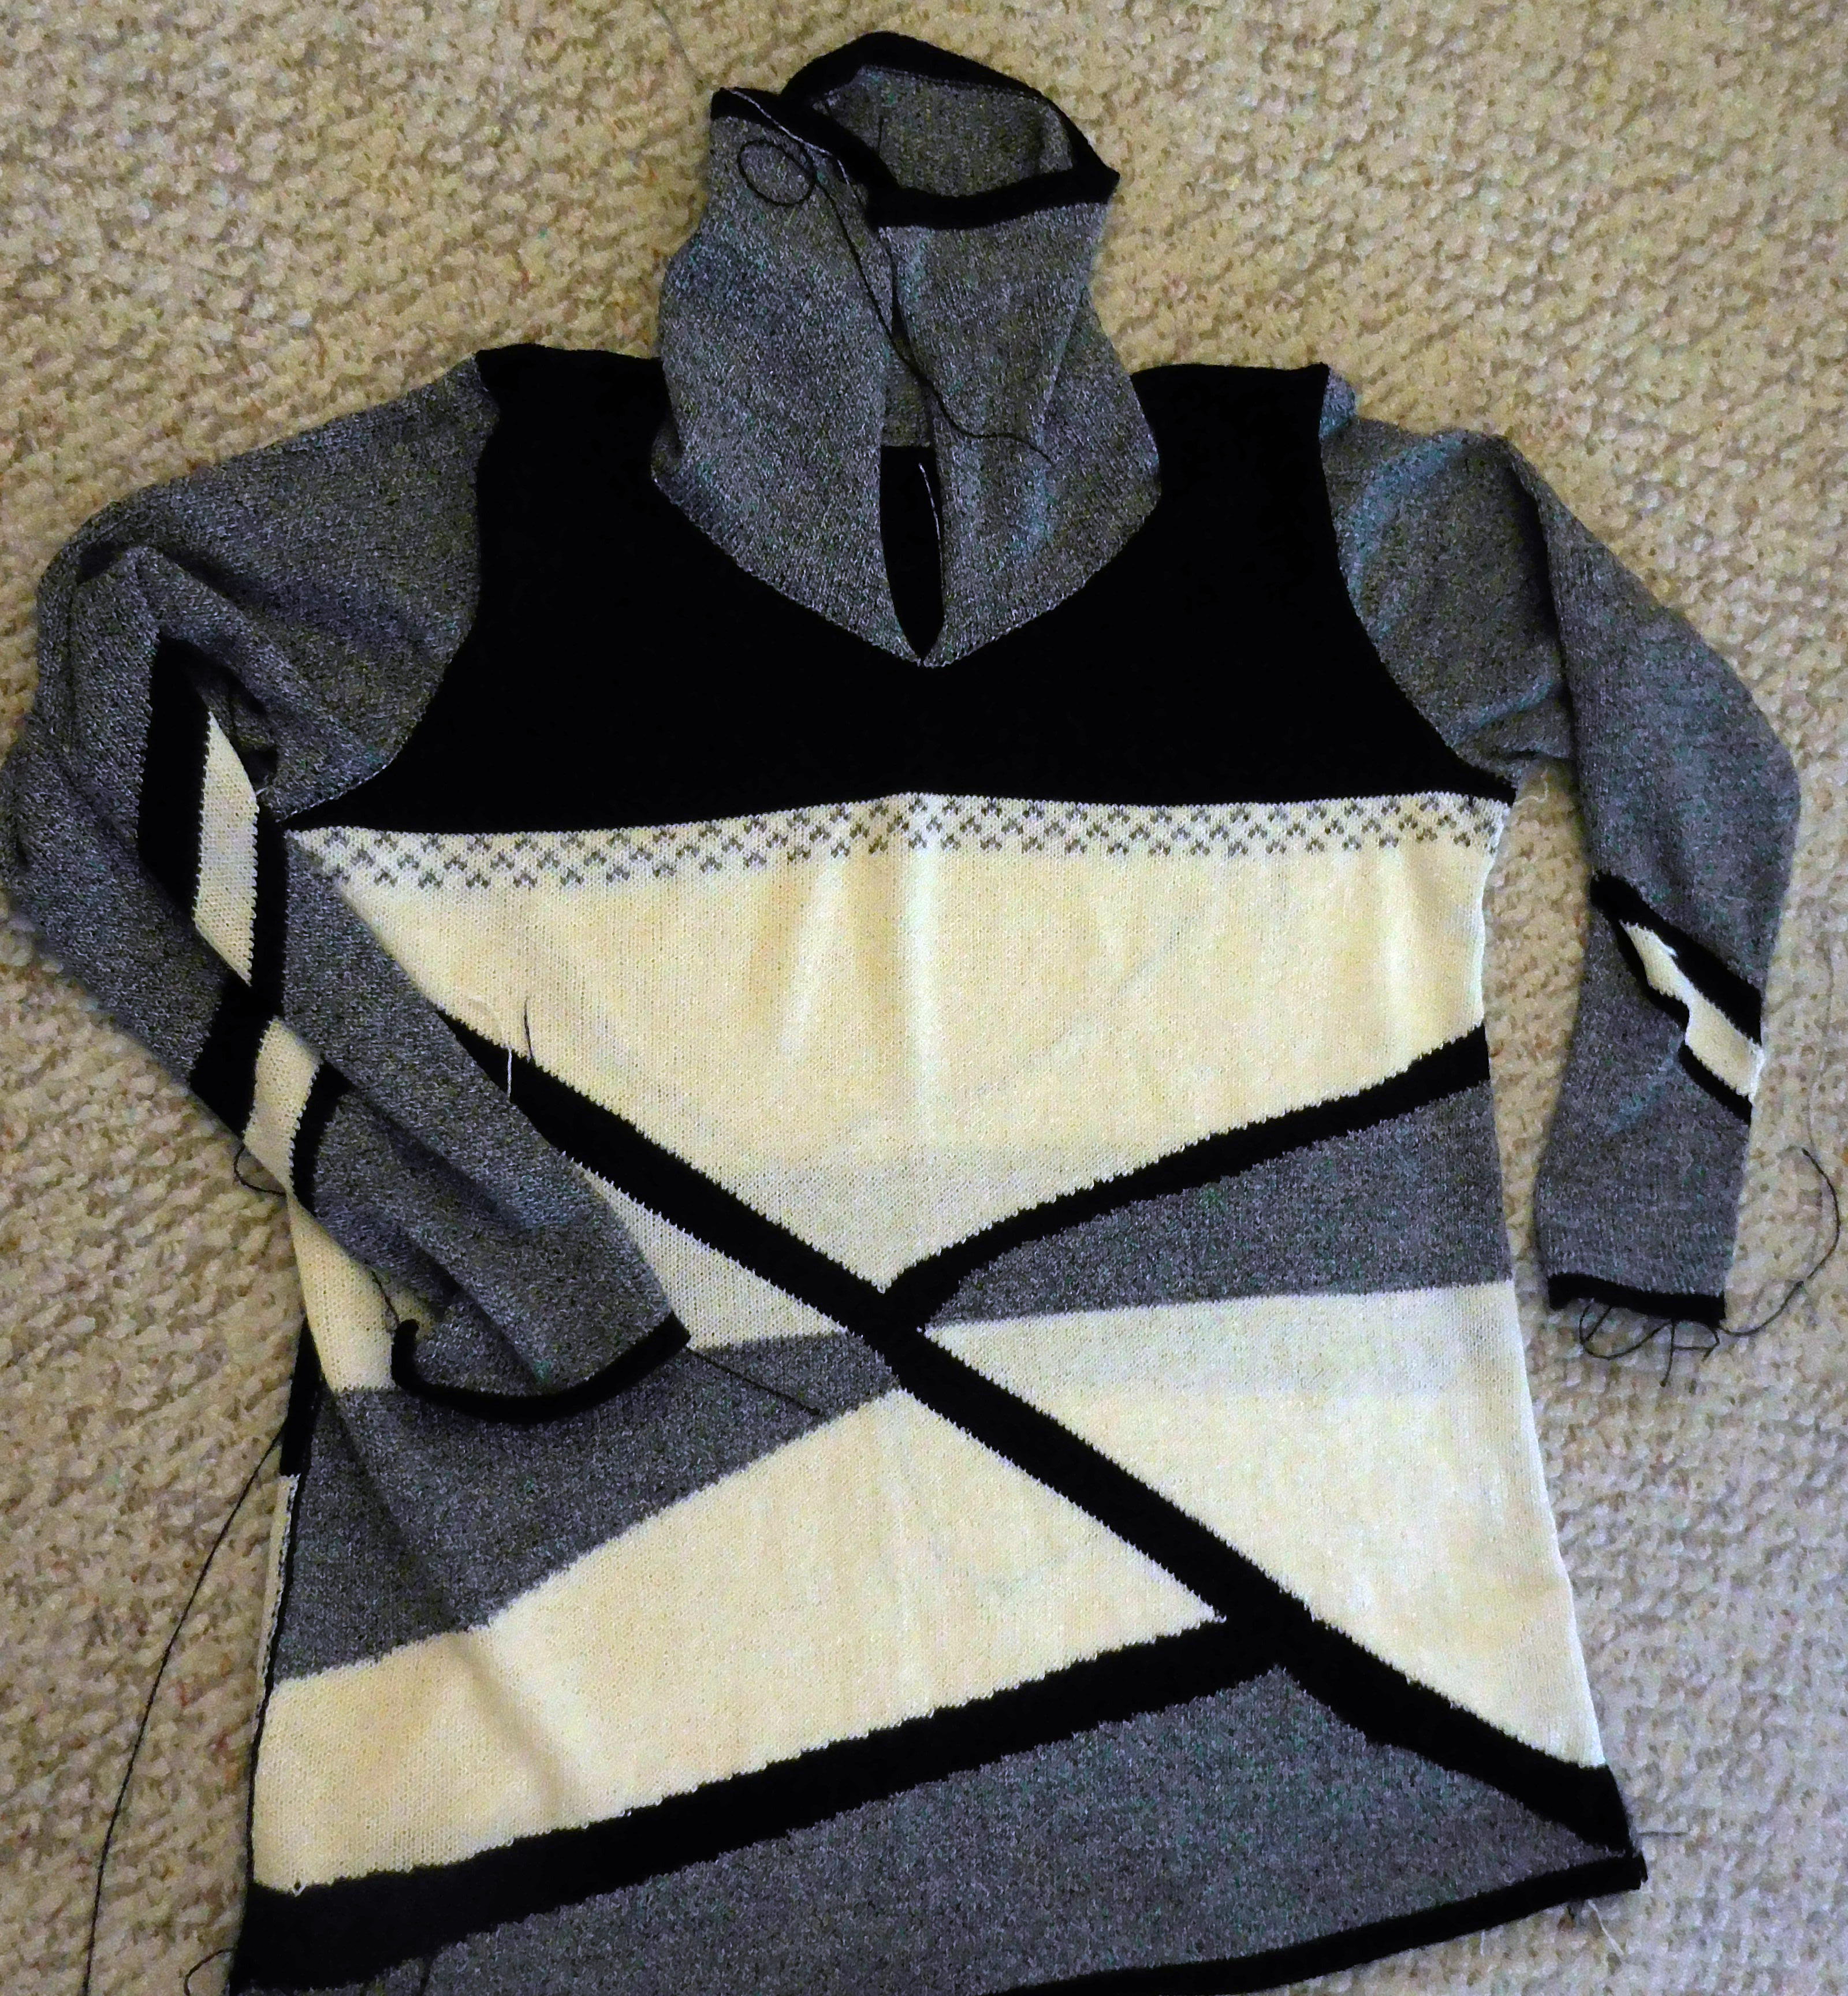
Thought the red was perfect so made the rose one same size but because of the gauge difference, less stitches and more rows. At the end, after washing and drying, buttons on and done, they weighed within 5 grams of each other! So much for my hole theory! The red mesh one looks very airy and full of holes – the stitch pattern is 6 rows X 4 sts, 24 sts total and 4 of them (6%) are holes. The floral design is 60 rows X 60 sts, 3600 sts total repeat with 351 of them being holes (10%) … so the way I see it, the holes have nothing to do with it!

Anyway, I’m still working on it! ;)

Back to things I’ve learned – record the yarn amounts used in each piece – this will help if you get into a yarn crisis and must adapt the plan (more on this next time!).

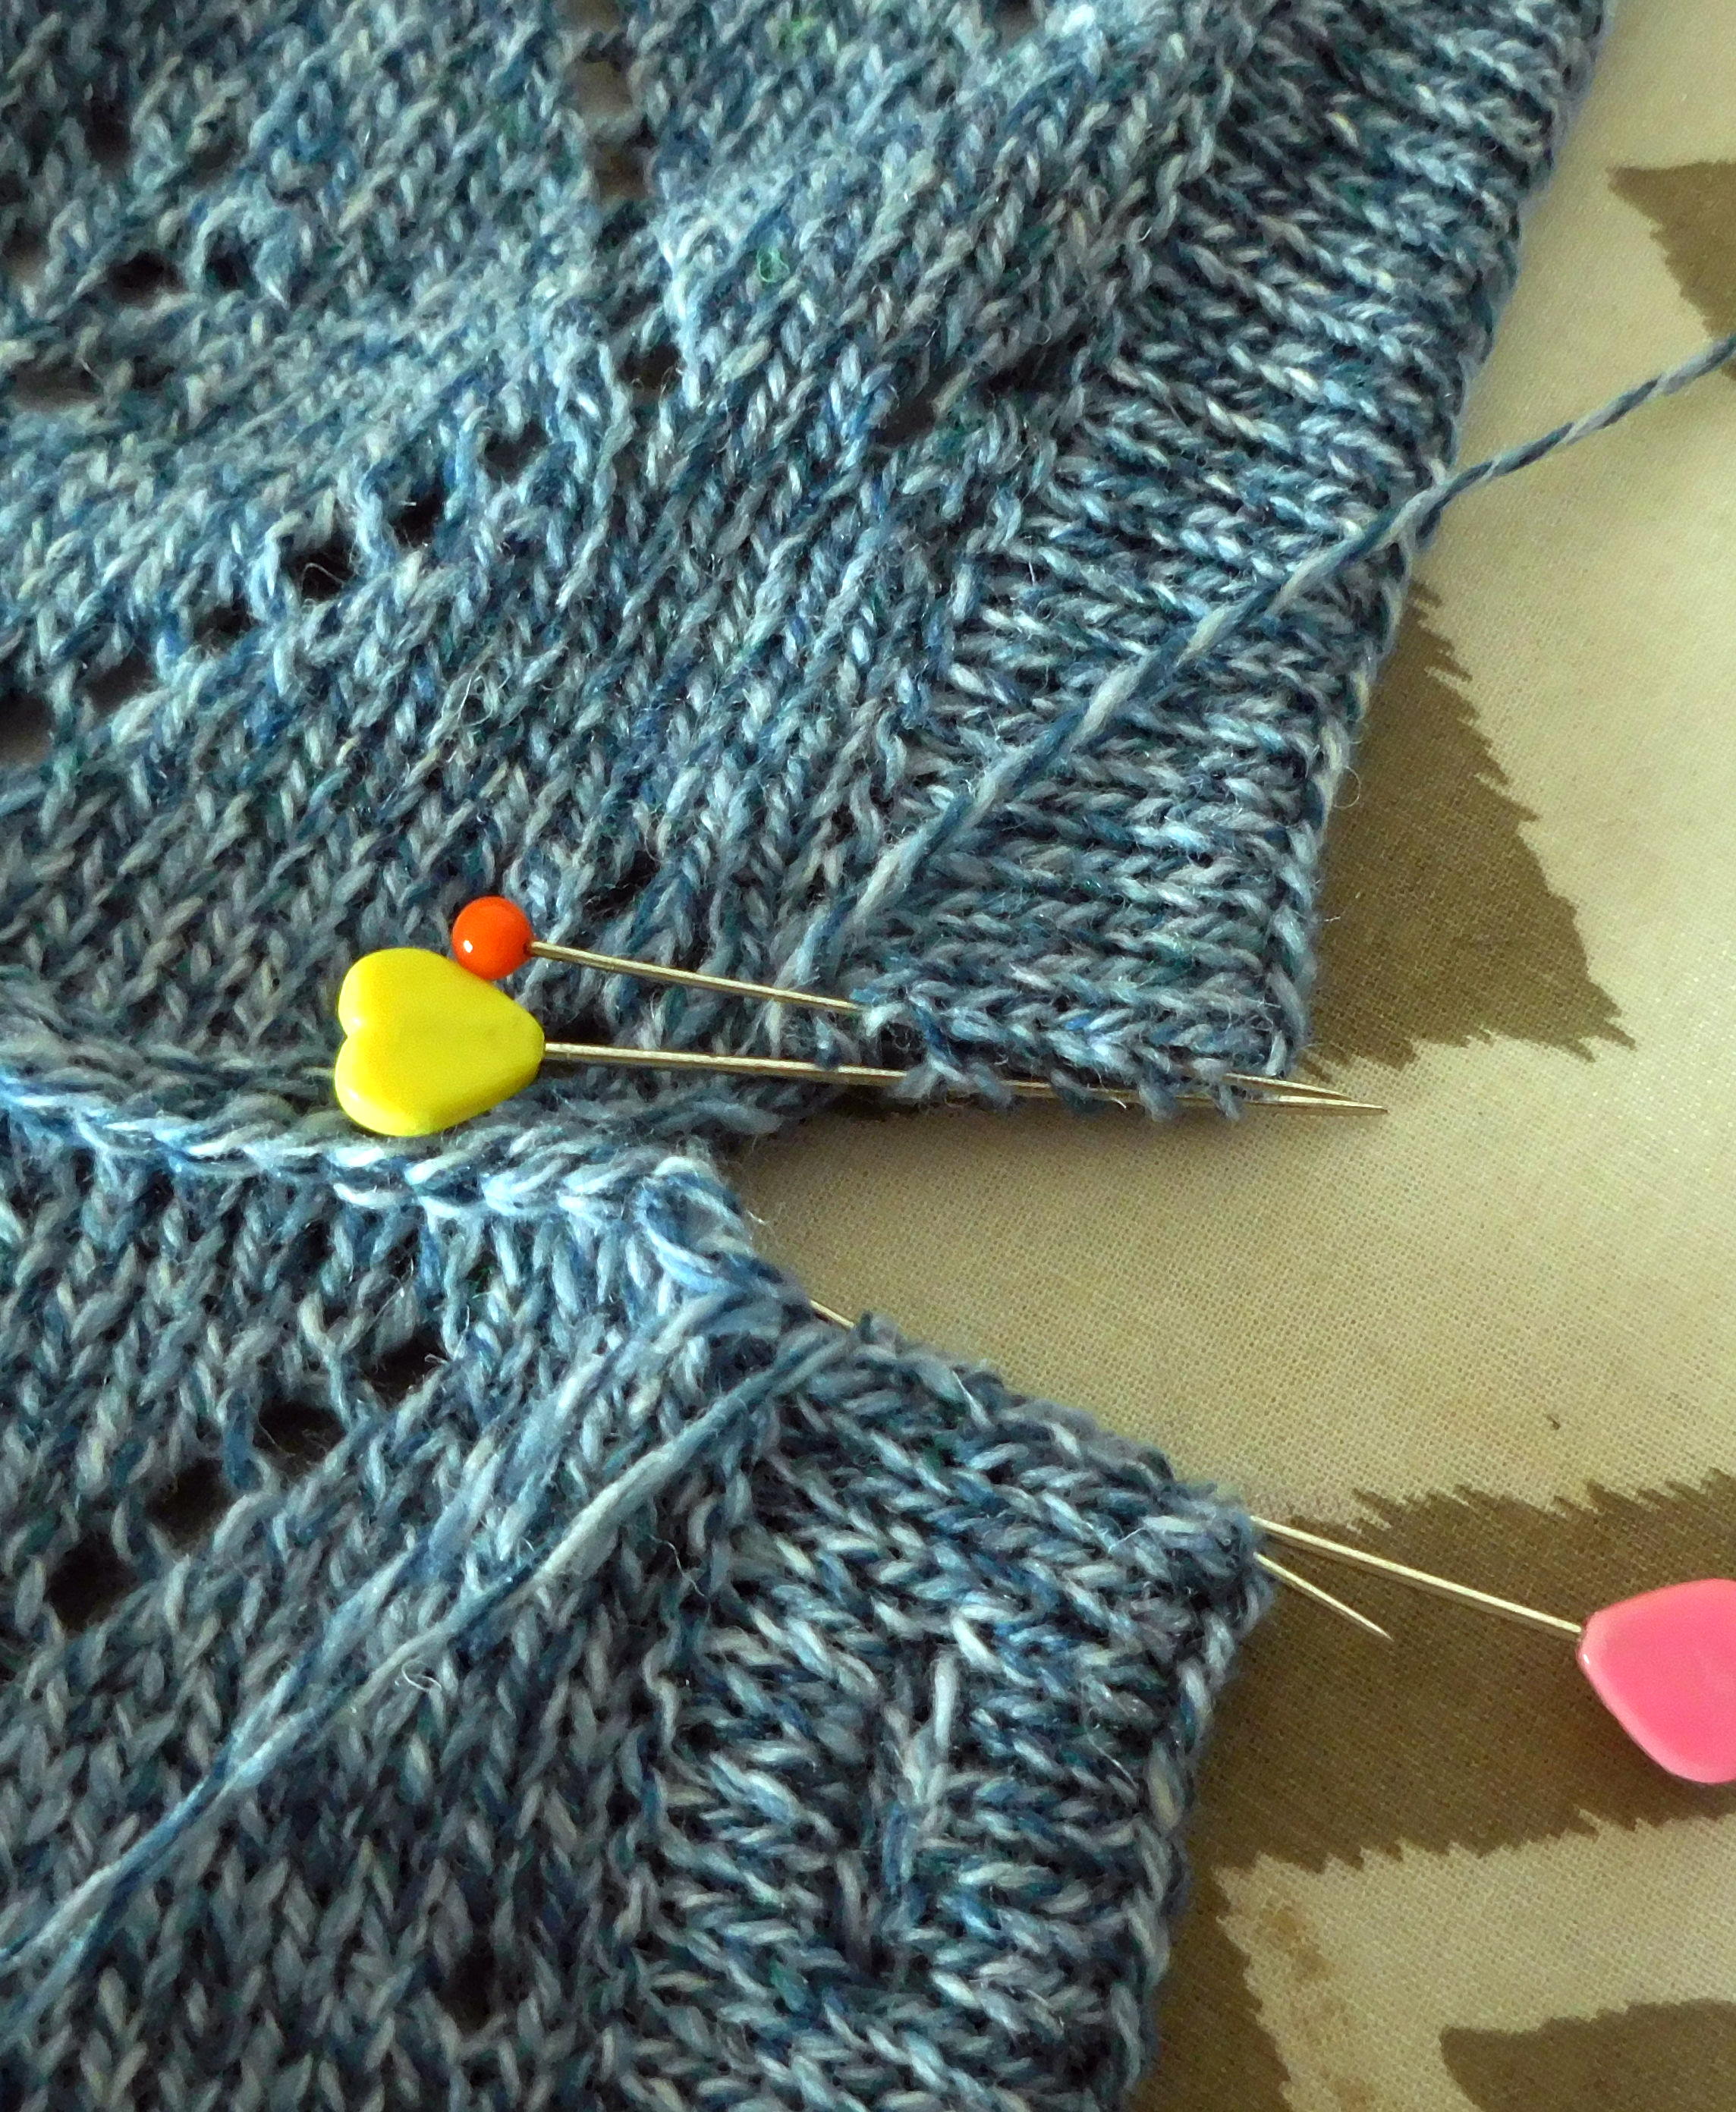
Yarn marks are essential – hang one for the centres of each piece too, as well as the 10 cm increments for seaming at the edges.

Another thing, you know, you start out with a plan - for example, the sleeve having an underarm length of say 45 cm and you knit that according to your swatch (if you  made one) but how does it turn out when the whole thing is assembled? For future reference, I always record finished (after wash and dry!) measurements so I can judge just how accurate the final garment is to the original plan. When making for someone else, especially when sending away, this can be very important if, say, they want another one but maybe the sleeve shorter – you’ll know what they have and how to change it!

what I’m watching…Marvelous Mrs Maisel – love seeing the ‘50s and ‘60s fashions – that girl can rock the swing coat and it’s fun to see who shows up in each episode – that was Lord Merton from Downton Abbey who played Jane Lynch’s butler and that’s the guy who played Christy’s (Mom) ex-boss… OMG, is that Mr Monk?

And, so excited! Crave just put up Season 19 of Project Runway! Can`t wait to get into that – love me some Christian Siriano!


PS - Dee sent a thank you - 3 full cones of Yeoman's Cannele in 'marsh' - green!!! I must have died and gone to yarn heaven! Now, really excited!!

Thursday, January 27, 2022

the same but opposite...

I really did think I was being so smart. Last year, I made that awesome denim lace jean jacket – here was the plan - https://knitwords.blogspot.com/2021/02/jean-jacket-re-visited.html

As with a lot of my knitting lately, some of the issues - https://knitwords.blogspot.com/2021/03/knitting-knightmares.html

Here’s what it looked like finished - https://knitwords.blogspot.com/2021/04/denim-done.html


After wearing it a time or two, I decided that the sleeves were too long – they have a buttoned cuff, meant to sit at the wrist and, obviously without thinking it through, I made the sleeve length like I would my regular sleeve without cuff, that I’ve been pulling down over my hand to act as a glove, you know, for opening doors and stuff when you didn’t want to be in contact with whatever. Also, not sure if you noticed but the sleeves were a different colour. When I made it, I did have two different dye-lots of the denim, one being slightly darker than the other, but I figured it would all come out in the wash.

Well, it didn’t and when I was wearing the thing, as I glanced down, that lighter-shaded sleeve bugged me a bit. Add that to the sleeve length issue and I got my first brain wave! I could remove the sleeves, shorten them, over-dye ‘em and Bob’s your uncle! Yeah! (she later said to herself with an eye-roll.)


Brimming with self-confidence, I pulled the sleeves off. Unravelled them down to row 100, counting the rows down from the underarm (that I knew from my notes) as I reeled the wool winder, cleverly, I thought and, not breaking the yarn, re-knit back up to new desired length (20 rows less than original), reshaped the sleeve cap with shortrows as per usual. At the top of the shortrowing, I like to knit a full row to get rid of the wraps, then do an RTR (remove, turn, rehang) and knit another row, which creates a nice purl stitch ridge, then take off on the garter bar, to join into the sleeve opening. But, if you read back, this sleeve has to be inserted into the circular opening on the body so did the RTR, K1R thing and then knit  4 more rows of the sleeve yarn so there would be enough yarn to join the sleeve in the same over-dyed colour. Nifty, huh? Then knit 8 rows waste yarn and cast off – ya don’t want it unravelling in the dye job, right?


Did the dye thing, stove top method, so far so good. Rinsed and dried the sleeves. Removed the waste yarn and carefully unravelled the last four rows, down to the purl ridge. Still okay but prudently decided that new waste yarn was required. It’s still flat, easy to do. Got the sleeves attached, all done. Gosh, darn…sleeves are the perfect length but…

Friday, January 21, 2022

jibber jabber...

You’re probably thinking that after all those ‘mistakes’, I’d either abandon the rose hoodie or re-knit it. Now don’t get all judgy on me! I just kept on going, figuring that my impeccable finishing techniques would save the day.

Being extra careful, things went well. Bands, buttonholes, all the putting together, no problems. All was done! Thought it looked pretty fine. I was going to post it off to Dee without buttons – she said she had some, but I couldn’t resist. How could I tell just how good it really was without giving it a good try-on? ;)  I sewed on suitable buttons that I’ve had for eons - she can change if them if she doen't like 'em! Wow! looks pretty good, fits nice, and, as often happens, the colour has grown on me! After wearing it for the better part of an afternoon though, I decided the hem needed some extra attention. On the back especially, likely because of the shortrowed curve, it seemed to be curling up slightly. 

In Band Practise, there is a trim called Baton Rouge (#4) which I’ve used on several garments, both mid and standard gauge and, on the bottom of it there is a tip that says “Add this step any time to add extra weight to edge. Hanging the other way, adding another row and cast-off also counteracts curling edges.”

The hem used already was the same as I did on my original lace, button-front hoodie, just like on Me-Cozy, an ewrap, K1R, loose row and chain cast off. http://knitwords.blogspot.com/2021/04/deja-vu.html


What I did:  Purl side facing, hang the cast-off chain, picking up both sides of chain.

Manually knit very loose row (main stockinette tension here was already T9) – don’t break yarn - and chain off, taking last stitch to opposite end of needle bed.

Turn piece to hang knit side facing, again hanging both sides of the chain-off.

T9, K1R.  Manually knit very loose row and chain off, ending by pulling tail through last loop.


Beautiful! There is so much happening on the garment, with the complicated-looking large stitch pattern, the pockets, the front bands and hem, I defy anyone to say there’s anything wrong with this!


Wednesday, January 12, 2022

a comedy of errors...

Not really anything funny about it! Don’t know if you remember but I did say I’d like to re-knit that blue Floral Mesh, just for practise really and to use up the rose-coloured Bonita. http://knitwords.blogspot.com/2021/09/the-holy-grail.html

It’s not my colour and it’s not like I really need another button-front lace hoodie…my friend Dee jumped on it and said she even had the buttons! Well, why not? It would give me a chance to get my money’s worth out of charting out that 60 St X 60 Row stitch pattern!

bad sponge bar

As usual, started off with the sleeves, both knit up perfectly, not a dropped stitch in sight. I didn’t get back to it right away and everything sat for a week or two, more likely two. Got started on the Back and wouldn’t you know, it was like the jinx of the machine knitting gods was living in my room! I had kept track of my time on each piece with the blue one and, it’s sad to say, I used to know better than this! This Back, I spent twice as much time on – dropped stitches and mostly, not-transferred, therefore not lace, stitches! Now, back in the day, my usual advice, know when to cut your losses, know when to quit! But I persevered, got ‘er done! Three and a half hours!! instead of the one and a half for the blue one! I knew what was wrong, it was that freakin’ sponge bar. But the piece was done and off the machine.
Took another week off and guess who forgot all about it? You’re right! Now, on top of it all, ‘she’ forgot to re-position the N1 cam after the hem and knit the first front centred over 2-3 Left instead of 0! Oh man! I thought it was time to hang up my transfer tools!

Another week went by, made the second front with the same mistake. Kept saying to myself there was no way I was going to be able to give this thing away – the shame of it! But plodding on, and congratulating myself for my stick-to-itiveness, the next big dilemma, the pockets. Again, a brain fog took over, forgot all about the N1 thing and trying to match the pocket patterning to the front, made them correctly! Ar-r-r-r-g-g-h!

Things I learned on this one…check your blessed sponge bar! I added that to the top of my cheat sheet!


Thursday, January 6, 2022

it's 2022...

Omigosh! I’ve been having conversations with you, in my head, over the past couple of months. They’ve been full of excuses, apologies, promises and whys…I’m ashamed of myself and I’m sorry! So I ran out of yarn spray. So I couldn’t get any better buttons. So what if I can’t just drive down to Minnesota. Big freaking deal! My health is fine, my family’s pretty much okay too, so where do I get off feeling sorry for myself? Huh! I’ve given myself the proverbial kick in the butt and here I am, again, promising to do better.

I was knitting and trying to keep busy but feeling like I had nothing new and exciting to say, doubting whether I was still relevant and realized that was really based on, was I ever relevant? and you know what?  Been taking myself far too seriously! what the hay? If you don’t like what I’m talking about, you can just hit delete or whatever! I still have things to say, knit and share!

I left off with that blue ‘Mesh Floral’, in my continuing saga of the perfect, longer, button-front hoodie. From there, I knit it again in red Bonita, the same yarn as the blue, using the all-over lace mesh, very holey ;)! 

In my defense, I think it was still summer or at least early Fall when I started it. I got the pieces knit, relatively quickly, no real issues, until the putting together. Somehow I forgot just about everything I knew! I attached the hood to the neckline, without really thinking, saw that I had forgotten to do an e-wrap cast-on at the beginning of the hood. No big deal, but, not according to Hoyle, aka, MAO. Then, I saw that usually I like the joining seam to be on the outside so it doesn’t show when the hood is down. Also neglected to put the chain across the fold row of the band for the front of the hood and forgot to put that band on before attaching hood to neckline, necessitating the use of waste yarn for this operation instead of the quicker garter bar. 

Concentrating a little harder, managed to get the remaining parts done without messing up. A little deflated (my ego, that is), I knew that no one else would ever see or notice these glaring (in my mind) errors!

Made myself a cheat sheet!