Thursday, April 30, 2020

cutting your losses...

Things go wrong here. I hope I don’t give you the 
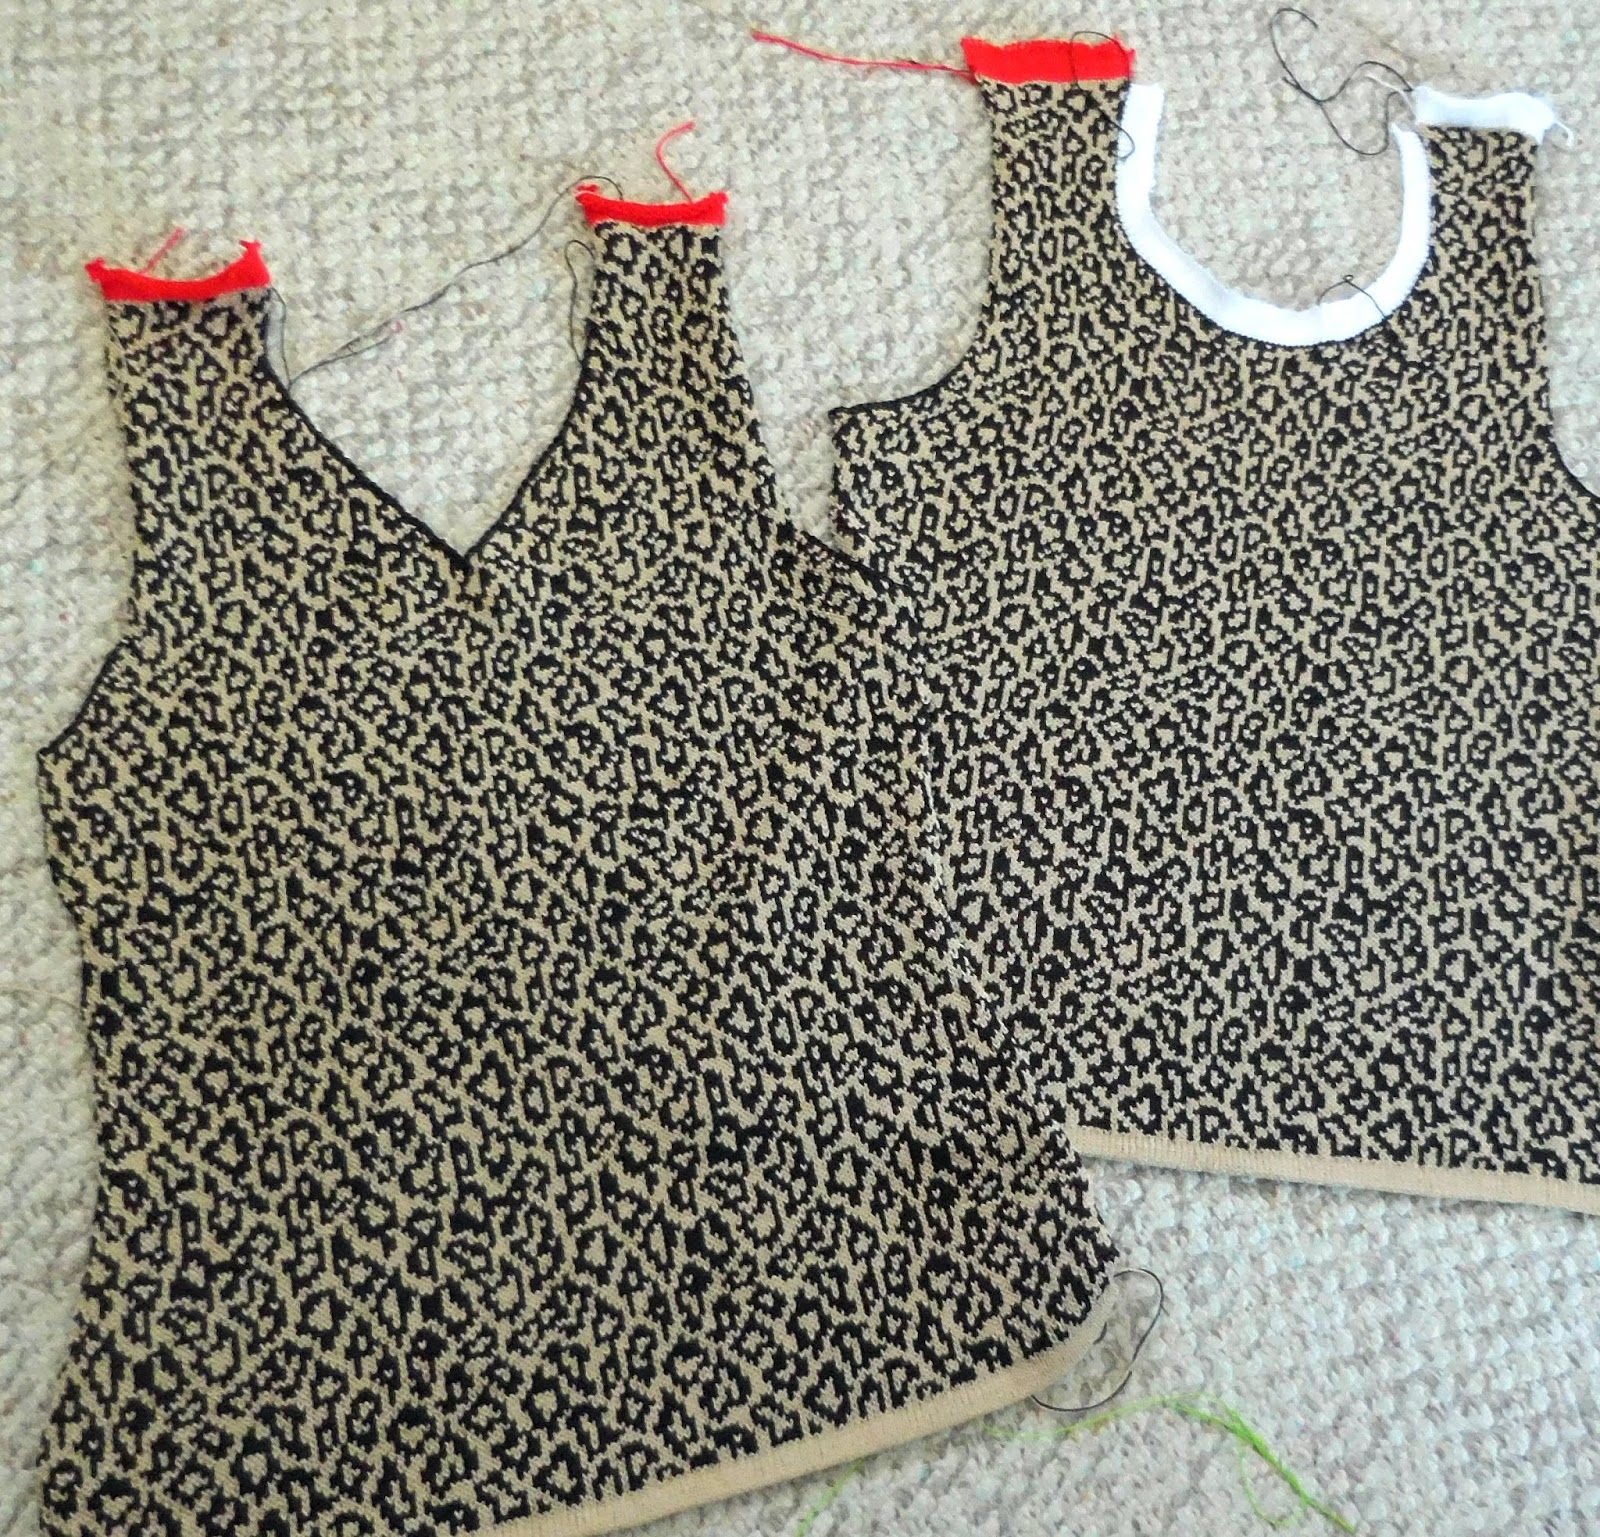
impression that everything is always perfect. It's nice to think you have mad skills but stuff happens, it doesn't just go right every single time. Sometimes you can fudge things with no one the wiser, but you need to know the difference, when you can get away with it, when to re-do and the best way to do it.
Ripping out lace is never a good thing, maybe a row or two but more than that, you’re actually spending double the time to rip out lace because it’s harder to un-transfer, especially those two-step ones where the stitch ends up in behind. Now, even though I think I’m watching what I’m doing, I didn’t see this until after it was off the machine and pressed out. First, I noticed that one side of the neckline looks wonky. What the?? I did see, early on, while it was still on the machine, there is a mistake in the patterning  near the start of the vee motif but I had done the same on each side so one could argue, was it really a mistake? Not glaring and most people would never see it, but I know it’s there. I was justifying it to myself as I continued…
After pressing out the piece and holding it up in the mirror, I thought, ‘oh, gosh, darn, rats!’ I calmly walked away, spent the evening catching up on my DVRs. Today, still not quite ready to admit defeat, I held it up and thought about ripping it back to the beginning of the neckline shaping. Note, there are no solid, plain rows in this pattern which would help with rehanging.
Add to the equation, I am a bit nervous about running out of ‘French navy’ for this project. Started with 200g (final weight of my ivory one, 230g, 42 finished bust) and thought that would be plenty. This is for Shannon, another very slim girl so am making finished 34, but she’s fairly tall, about 5’7, I think, so I added 20 rows to the length. My backup plan was using 50g of ‘twilight’ for the armhole and neck bands, which seemed feasible before I knit anything but now, looking at it, not so much. I could just abandon the whole thing and bake muffins, but I have a commitment, to myself anyway!
To be honest, I knit the second piece up the underarm, still trying to convince myself that the other side would/could be acceptable. At this point, I decided to reknit the lace on this piece and, then, off the machine, rip the other one back to the underarm, rehang it in the plain stockinette. It only took an hour and a half to get this one finished, no mistakes! Golden!

Monday, April 27, 2020

that mitre...


decrease on second row
 
Take half the vee side from bottom of vee to top of shoulder, stretch slightly to determine number of sts. Mine was 1-54 ns and I stretched it to 60.


leave tool to hold triple stitch in place
60-0-61 ns. WY, ravel. CAL. RC000. T7, K1R.
Hang yarn mark at the centre stitch, #1 right.
T6, K1R. Decrease 1 stitch either side of centre stitch, putting all 3 on one needle.
Move all three to left so #1,2 right of 0 are empty
 and 3 sts are on #1 left. Leave transfer tool on top of them to babysit – one (or two) will jump off if you don’t ;).
Move right side over the 2 spaces – I used the garter bar. Put the 2 end needles out of work.
You now have 60-0-59. T5, K2R. Decrease 2 sts at centre, putting one either side of centre onto the centre stitch.
Move all 3 to #1 right and leave tool onto it.
Move left side in two spaces, knocking back
the two empty needles at left side 58-0-59 in work.
T5, K1R. T9, K1R (folding row RC006). T5, K1R.
Move right side out two spaces.
Move centre stitch over one space right.
Fill in the empty needles with heel stitch
from the ones away from centre. K2R.
Repeat this step, moving 2 spaces left –
you should be back at 60-0-61 ns. K2R.
increase

Take a deep breath. Hang hem.
Leave the centre yarn mark but remove the waste yarn.
T8, K1R. Remove on garter bar.


61-0-60 ns, hang garment (you’re turning the band, remember!), placing yarn mark/vee start at 0, picking up outside cast-off row. Turn band and rehang. Pull through. Manually knit row and chain off.

Breathe a huge sigh of relief and pat yourself on the back! Sounds complicated when you say it all like that, but after the first one, piece of cake!

This is so pretty! She’s gonna love it!


Sunday, April 26, 2020

fairisle foibles...

On the Two-Faced Wendy, I did a scoop neck, 10 cm (D) down and the vee, 15 cm (other D) down from the top of the shoulder, both with a half width of 9 cm (B from the schematic), shortrowing both. On the vee piece, because the row count for fairisle is different (42 rows to 10 cm as opposed to 50 rows for stockinete) I recalculated the decreases (need 30 sts in 64 rows), starting at RC170 which is 15 cm below the top of the shoulder. Put the left side in hold - used the ravel cord method just to make sure not to damage that line of stitches and to make it easier to keep track of the vee shaping: [1 st, KWK, 2 sts, KWK] 7X; 1 sts, KWK, 9X which puts 30 sts in hold in 46 rows. Leave these in hold and knit to top of the shoulder without wrapping. After removing the shoulder (see below), pick up the remaining neck portion edge to the top of the shoulder, knit a loose row in the neckband colour (dark brown here) over this side of the vee and chain off. This is a neat, quick way to get the vee done in fairisle! Love it! I'll be using this method again!
shortrowing vee


A few other details about knitting fairisle: shoulder was shortrowed over 5 rows and then all returned to UWP. Change to stockinette and knit 1 row in the background colour (tan here), then remove on waste.  Do the same for the other one. If you don’t knit the plain row, good luck picking up those stitches! Just saying! To join the shoulder, pick up the first one, knit side facing. Hang the second piece, wrong side facing and rip out that row of stockinette (easy to do because that’s the way it was knit). Pull this set through the back set and presto! you have a nice seam, without a line of plain knitting because the second set of stitches is fairisle and when pulled through the plain row of the first side, disguises the plain row. For comparison, the shoulder join on the left of the photo, I hung the first side, the way it was knit, ripped out the row of stockinette and then turned the piece on the garter bar. Hung the second side, ripped out the row, and joined as above, putting last fairisle rows, one through the first and then cast off. You be the judge - there is a slight difference looking at it like this but not enough to make it worth the danger of loosing a stitch! And who’s going to be studying your shoulder seams?


Wednesday, April 22, 2020

the truth about bands...

I did something the other day that I didn’t tell you about and now I’m ashamed! That I didn’t tell you, I mean. That red vee neck, I’m sorry - not much info there and I want to make it better. After I finished the red one, it looked so nice, I decided to put bands on the first (tan/brown) one. And I meant to make good notes, especially for the vee side. But all my good intentions left! It all worked out but there were things I should have said. Next one, I promise!
fresh off machine
after the tool, before steaming
One of the big things about bands is something I do on autopilot and forget to mention. The bands or hems (anywhere when it’s doubled over), when it comes off the machine, looks rather dreadful, especially in finer yarns like WCD. The stitches are stretched sideways when on the machine and you need to help them get back into shape. For necklines and armholes, use the DETT (double eye transfer tool) because it’s good and strong and you won’t be able to bend it. Thread it through the band along the fold, a little bit at a time and stretch it against the straight edge of the tool with your other hand to set the band depth and fix the stitches.
pressed and perfect!

Here’s a photo of the band on the scoop neck, fresh off the machine. Looks awful and it’s sticking up every which way. Do the tool thing and it looks better. Lay it on the ironing board, flatten everything out with your fingers and get everything laying right. Steam it and it’s beautiful!

Here’s a photo of the hemline of the skin print one. Because this is a wider, longer piece, no curves, thread a blocking rod through the hem and pin it onto the ironing board, paying attention to pin it to the correct width. Steam it (hold the iron just above, not touching and activate the steam), while pulling on the rest of the piece to lengthen/stretch the hem into shape. This hem has no fold line, so this is a necessary step to making sure it ends up sitting properly.
I did not add shortrows at the hemline of this as I did in the first three because this girl is a tiny little peanut, like an XS (and double A if you get what I mean) in ready-made. If I were making this for me, I would have added 8 to 10 shortrows like I did for my stockinette ones.

Monday, April 20, 2020

changing tack...

To get away from the hand-transferred stuff, I’m going to try other stitch techniques for the tank top – looking at my list of ‘youngsters’ who might like one, I have some knitting to do!
I like that ‘skin’ print that I did the jacket in (was that only last month?) - going to try it out for my niece, Wendy, who loves animal print even more than I do. Knitting in fairisle takes a different amount of yarn. Still trying to use up my leftovers of WCD, I have 250g sand dune (tan) (plus several swatches that could be undone) and 100g of a pretty rusty brown, leftover from Wild Side https://knitwords.blogspot.com/2009/07/same-but-different.html
I dug out Boondoggle https://knitwords.blogspot.com/2013/08/perfect-pockets.html (fairisle, weights 420g) and my remake of Frill Ride minus the frills (stockinette, weight 430g) https://knitwords.blogspot.com/2010/01/happy-new-decade.html
They are about the same size, same sleeve length but what does that tell me? Nothing that makes me feel better about how far the yarn will go!
Light bulb moment! I could do the first piece and weight it before knowing if I could proceed with a second skin print or make the other side solid – you see that all the time in ready-made stuff! Wendy is much smaller than me, so, less yarn and overall a good thing as I tend to covet things and if it were my size, she might not get! ;)
By the time I did the hem, I’d convinced myself that trying to get 2 pieces of fairisle out of 100g of the rust was just plain dumb. Another option would be a better choice and now, armed with a full, brand-new cone of lovely carob, a deep, dark chocolate WCD, going for it!

Thursday, April 16, 2020

little things...

I know you’ve got a ton of questions! Like, cutting that armhole in farther – do you make a longer band? No, I don’t. I like the way the 60-0-60 st band fits and it may seem a little more gathered as you’re doing it but you can’t tell once it’s on the finished garment, or on you - just do the same thing, keep the gathered part more to the ends/underarm section and it’ll all come out in the wash!
Oh yeah, about making that armhole band (and the neckband for that matter) the original pattern says:
right end stitch easier to pick up
Stockinette bands. Cast on with WY, 1 row ravel cord. RC000. MC, T5, K6R. T8, K1R. T5, K6R. Hang hem by picking up first row of MC. T7, K1R. Remove on WY or garter bar.
What I really do to make it work a little smoother (she said, after the third set of bands) is this:
Stockinette bands. Cast on with WY, 1 row ravel cord, ending CAL (carriage at left). RC000. MC, T7, K1R, T6, K1R. T5, K4R. T8, K1R. T5, K6R. (that initial looser row is the one to rehang and the bigger stitch size makes it easier and doesn’t show of course. The T6 row was just the transition to the next T5 row. You still have 6 rows on this side of the folding row but that side ends up as the outside of the band and having the outside slightly larger makes it fold nicer and lay flatter.) Hang hem by picking up first row of MC (easy, peasy because of the larger stitch size. T9, K1R. (That makes it easier to pull off on the garter bar and it also gives a bigger stitch that is closing the hem AND doing the join later to the garment edge!) Without cutting MC, remove on WY or garter bar and set aside.
whole stitch at left end
The CAL at the beginning means two things – when hanging the hem, that little impossible half-non-stitch usually at the left is much easier to find when it’s on the right end and you’ll have up with a whole stitch at the left and really feel good about yourself! Secondly, after hanging the garment, you turn the band and rehang to join it to the garment. The cast- off row will now be right to left, much easier to chain off in that direction and less ends to darn in. You’re welcome!
For the band on the vee side, I used the mitring technique from The Neck’s Best Thing, No 3, Mitred Stockinette Band, making it just for that piece, putting the mitre in the centre of a 50-0-49 stitch band.

Tuesday, April 14, 2020

one stitch out? not!...

After I posted the other day, about Sheila setting up that stitch pattern properly using the lace tool in DAK, I remembered! What I did before was use the symbols to make the chart and then set it up as ‘intarsia’ under method of knitting and then the program let me work from screen. I did write an article about this method and intarsia, called ‘Picture This’, in Knitwords No. 38, Autumn 2006 and did a pattern on the LK150, for my favourite grandson, Nathan.
This is pretty cool because it indicates the exact needles with numbers so you’re sure of not making a mistake. Even if you don’t have the “non-electric link” cable, I just use the arrow-up key to advance to the next row. Here, I’m showing the lace pattern I used for the Vee neck of my red Two Faced . The black lines near the top of the screen on the right hand side show the shortrow decreases to make the Vee.
P.S. Just to keep Sheila on her toes, I set her file up as ‘machine knit lace’ and it works! Even though you get an error message saying this pattern cannot be knit on a Silver Reed (just because of the garter stitch ridges – he doesn’t know you’re going to hand transfer them anyway), it does seem like it will do it. One day, when I really have nothing to do, I’ll try it for real! Thanks again, Sheila!
P.P.S. How’s your hairdo? Did you cut your own bangs yet? Maybe the answer is to use a headband. I see Mar Heck has some cute ones for babies – maybe we can convince her to size them up for us!
https://marzipanknits.blogspot.com/2020/03/twisted-headbands-for-babies.html

Saturday, April 11, 2020

living on the edge...

I love what Vera said the other day in response to Two Faced
http://knitwords.blogspot.com/2020/04/pushing-envelope.html
There are any number of youngsters in my family who would be pleased to have a top like this- so I'll attempt one’
After I finish this red one, I’ll get on that! Great idea!
Here’s the situation. I have two partial cones of red wool rayon. At a glance, they look the same but one is really old, the label says ‘geranium’ - it’s leftover from a suit I made for myself back in 2003 and the newer one is the real Silk City WCD, ‘red passion’ the remainder from my Canada, Eh? https://knitwords.blogspot.com/2017/10/celebrating.html
Funny, they both weigh the same, 194g after allowing for the cone. The finished weight of the ivory Two Faced is 230g, so either is a little shy, but what the hay? Another challenge! My plan, narrow in the shoulder some more so it’s 15 cm as opposed to the 19 cm half width (B+C from the original schematic); use the older yarn for the hem and bands; stick with a high, round neck for the first front and plan on a wider, lower vee for the second one which should use less yarn, fingers crossed! I always think lace should use less yarn because of the holes but, really when you think about it, it's the same number of stitches , just transferred so you can't save yarn that way...
 FOBB (fear of being bored) makes me change up the stitch pattern yet again and yeah, it’s partly that extra challenge thing. I had to think really hard to get the repeats on this one – it’s an 18-stitch repeat and if the start isn’t correct, the outlined diamonds wouldn’t meet up after 20 rows and who wants to rip out hand-transferred lace? Ar-r-rg-g-h! Just in case you want to give it a shot for your niece or daughter-in-law, here’s the new chart – make the holes of row 2 at 55, 37, 19, 1, -0- 18, 36, 54…
Thanks to Sheila from Australia for sorting me on my DAK programming – she fixed the other file so we could knit-from-screen. Let me know if you want it!

Monday, April 6, 2020

hindsight is 20/20...

I’m always looking for ways to change things up a bit so for the second ivory ‘front’ I redrafted the lace pattern a bit, revised it to suit me and I think, changed it enough to share it with you. At the bottom/start of Helene’s pattern, in the actual knitting, I thought it would look nicer to close in the bottom of the veed-eyelet pattern – which even the very practised eye probably wouldn’t notice in her chart. I also wanted to make the overall design start lower, so added the single diamond at the bottom and extended the width to go over the whole neckline (I started the bottom of this chart at RC160 of my knitting which is the start of the underarm shaping).
If you don’t want that, start the chart at row 18 and you’ll still have a neat full diamond on the bottom of the larger motif. While I was knitting the second piece, I worked on the stitch pattern in DesignaKnit – you know the drill, email me knitwords@shaw.ca
 and put Two Faced in the subject line. The file probably/should be able to be used as knit-from-screen – right now he doesn’t like the 3 stitches on one needle with holes on either side to use it as a machine knit pattern and I don’t know how to overcome that but someone more fluent with DAK might be able to help. Even if you don’t have DAK, I was able to print out this smaller version and save it as a .jpg which you can play with. At least you can print out the chart and work from that. I was using the hand-knit symbols, not the lace tool to do the chart.
I can see an LK version of this in the future, after I make a red one!
Keep knitting and stay safe!


Friday, April 3, 2020

pushing the envelope...

 My next choice is a one-colour (ivory, aka ‘fisherman’ – what? How did that become a colour name?) Two-Faced.
I don’t usually do much hand-transferring on the standard gauge – it shows up much better with a thicker yarn so usually save those kind of projects for the LK150/mid gauge but that hand-transferred vee motif was fun to do so I figured I’d make another tank and try a little more extensive motif.
I like the length, the side shaping and shortowing at the hemline. I’m going to close the neckline a little higher and narrower, put a band on it and bring the shoulders in a bit more, still with a band.
As I knit the bottom of the first side, I was recalling a hand knit pattern in Knit ’n Style that was actually a motif done on the back of a sleeveless summer top. Hoping that my extensive purging of knitting resources a few years back didn’t include that particular pattern and of course, I wasn’t sure which issue it was in, I thought it was called ‘Athena Tank’. Why did that stick in my mind? who knows but I did find it, in #173, June 2011. It was a hand knit pattern by Helene Rush and guess who wrote the machine knit instructions? ;)  That’s likely why it stuck in my brain. I photocopied the lace chart and hung it up on my tension mast. It’s 60 rows, but easily made bigger by adding 20 row increments and I figured I’d give it a shot.  
I changed it up a bit – the top of the first diamond had all reformed purl stitches. I think that’s a total waste of time and changed it to garter stitch ridges on every other row – less work and looks nicer in my eyes. As the motif continued, I knew it would look better if I could sort of end it at the neckline without worrying about continuing it out into the shoulder area so after the 60 rows, began bringing the double rows of holes back in toward the centre where the original ended and changed up the sides slightly. Got it off the machine and I’m totally stoked! It's beautiful!

Wednesday, April 1, 2020

two sides to every story...

With sand dune/tan Wool Crepe Deluxe, I did the second piece, planning a shallow scoop, with a 6 cm depth. Working on auto-pilot, did the same shortrowing just after the hemline, shaped the sides and just as I got the underarm shaping almost finished, I thought to myself, self, this isn’t a sprint, you’re basically trying to fill in time here, so why not put a little effort into maybe doing a little hand-transferred lace? After all, that little diamond lace motif on the original black one is quite nice. I saw that it was too late for that because it needs to be done over 40 rows and at RC207, I was 7 rows past. Rip out? nah! make up something new! Using the same two-step technique from the original, start with a hole at #1 right to begin the same diamond motif and continue that to row 8, where there are 5 plain sts between the eyelets, add the start of another vee – I made a new chart for you (small pat on back) and just continue it up to where your neckline shaping begins.
After the neck shaping, again, I wanted to have a plain, no-finish edge, so picked up the stitches at each edge up to the top of the shoulder and then knit a loose row across all and chained off, similar to the vee technique.
Now, join the shoulders and you know, I just thought of something that I’ve been doing and haven’t talked about for a while, but check this out – https://knitwords.blogspot.com/2011/11/wonky-shoulder.html
it makes the shortrowed steps of the shoulder shaping look better when you knit two rows after the shaping.
Because of the two colours, make sure and join each side the same, hang the tan/lighter colour first then the darker one, pull the dark sts through the light set and then make the chain with the same colour (light). That way, they both look the same on the outside.
I still needed to add a band/hem to the armhole – it was too gapey without anything. I like mine close-fitting and I thought you might be a little afraid to do this, so I took some photos. When the armhole was held up to the needles to determine the size, I got 72 -0-72 sts.  

MAO told you originally:
Armhole bands. Hold armhole evenly up to needle bed without stretching, reduce by 10% to determine number of needles required. Approx 50 (54, 58, 62, 64) ns each side of 0. Right side facing you, hang garment over same needles, gathering to fit if needed. Turn band and rehang from garter bar, with right sides together. Pull open stitches of band through closed edge of garment. Manually knit very loose row and chain cast off.
Based on that, 10% less would be 65-0-65 ns. Going by my notes from the black one, the armband was 60-0-60 ns and it was good. When hanging the armhole, it looks rather scary in this first photo – like, that’s never gonna fit right! Hang the shoulder seam at 0 and then start hanging the straight part, evenly, without gathers, leaving those to the actual curved, underarm area. It won’t show after the band is on and you’re wearing it, trust me!
I’m ready for another! you?