Saturday, December 26, 2020

neckline options...

Back done, check! I had a starting plan. Was going to still make this a vee neck but not quite as deep as the original. While knitting the Back, had a chat with sister and she indicated that a round neck would suit her fine, so she could wear it with or without a shirt under. 


Now that I’m going with a high, round neck, here’s an option – use pins to rough out the new neckline to give a better idea of what will work. After the pins are in place, hold it up to your shoulders and look in the mirror to check how low/high the front neckline will be and adjust if necessary. Here, it’s easy to count back the cables (every 6 rows right) to find your optimum starting row! It will look better if there is at least 2 rows or half the cable before you begin shortrowing/shaping the neckline. Remember, there will be a plain row knit to get rid of the shortrow wraps and maybe another before the actual neckband.


After the agony of fixing that misplaced column of cables, and getting the Back off the machine, I noticed there were only 12 rows before adding in the second columns, and then 18 rows on all the next ones. Duh! I did have it written down – incorrectly, turns out! Fixed that on the Front and did 12 rows on every one, making the chevron nicer – not that anyone will notice! AND, just like I thought, turning the cables to the centre makes no difference – you’d never notice it on the finished garment, provided there were no esses/mistakes!

Safe and happy seasons greetings!


Friday, December 18, 2020

upping my game?...

Last week while I was playing with socks, I was also pondering how to elevate that Take a Turn pattern. After all, I wrote the pattern and called it Advanced Beginner (because of the extra detail and information included) and maybe somewhere I may have offered some changes or alternatives, like making it plain, without the cables, especially if you had not made a MAO pattern before. 

I no longer have the original garment – must have given it away and I plan to make it again for myself but this one is for sister Janet, who is quite a bit shorter than yours truly and a bit smaller across the shoulders. In the original, there were cables across the back, all beginning at the same time for a straight, yoke effect. I’ll be honest, it was easier to write the pattern that way and get you used to the cables and tuck rib without having to write 6 pages…then once you mastered that, staggering the cables for the front was easier to explain. Also, in the original, the cables were all turned the same way, again easier to explain and reduces the chance of error. Bearing in mind I’m giving this away, I don’t want to go whole hog or anything but I think I’m in a good mind space right now to add a little extra so, on the Back, I went with the chevron effect and decided to turn the cables to the centre, so the left side of 0 goes left to right and the right side opposite.

 I don’t think I’ve really shared this in detail before but when making something that has vertical lines, I try to plan it so that I get a full, straight line at the armhole side, after the shaping, where it goes straight up to the shoulder.  Making a size smaller than the first size (the pattern has nine cables across, spaced with seven plain stitches between) and because the shoulder width here was less, I’d end up with half a cable at the edge – not good. I respaced the cables with only five stitches between, counted them out, checked on the machine by pulling out the needles, wrote them down, before even casting on and I was golden! Somehow, in the actual execution, my enthusiasm got in the way of my careful planning and as I was about to add in the fourth cable, I realized that I only had 4 sts between the last two cables. Big swear, big swear! It’s wine time!

Next day, after tossing and turning all night, trying to convince myself to just complete it the way it was, I thought I could try to just undo those stitches - after all it was only 20 rows…Yikes! Nightmare city! Kids, do NOT attempt this at home! There were 6 stitches, but it needed to be moved out one stitch so there were actually 8 sts unravelled!

I was concerned about the underarm section, which in all my cleverness I had shortrowed and was worried about loosing that because I only needed to unravel halfway through that. If you’ve ever tried to unravel cables across the row, you know it is just as hard to un-cable! I should have taken my own good advice and either scrapped the whole thing or at least, dropped it off, unravelled back to the start of the underarm and rehung it. Would have been quicker. No worries! I’m just putting in time anyway, right?


Friday, December 11, 2020

over-soxed?...

Never! Set aside the ‘tawny pink’ sleeves for Janet’s Take a Turn.
There’s a cably Aran project in that blue alpaca hanging on the LK…
none of it abandoned, just set aside for a minute or so. I realized I needed to do some socks and I know I’ve probably over-sox-talked over the years but here goes me again! I have a very dear friend in Indiana – I’ve mentioned her before https://knitwords.blogspot.com/2008/10/middle-of-nowhere.html.

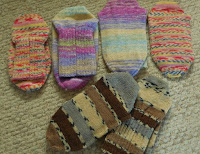
Anyway, I thought maybe this might give someone some inspiration. She’s (my friend) getting on in years and is on medication that has caused weight gain and very swollen feet. I made these socks for her, using my Warmup Sox pattern – you can still request it  https://knitwords.blogspot.com/2019/10/crazy-legs.html

She’s normally a ladies size 8 regular so what I did was knit the same sock but bumped up the stitch size to make them softer and loose, especially the ribbed cuff so it won’t feel tight on her ankles. The rib is knit at T7/7 and the foot is T8/10. I went with the largest width size (40-0-40 ns) but same rows for length of the rib and the foot. Two pairs, along with a package of digestive cookies that she loves - in the mail!

While I’m at it, making more socks – ankle, knee, reading, whatever you call them,  I love making socks! Christmas is coming! Stay safe!

Monday, November 30, 2020

hind sight...

Do you ever have one of those days when you know you’re doing something wrong, but you continue doing it anyway? I have admitted in the past to having a bit of dyslexia – can’t remember which is left and which is right and even though I continually try to talk myself through it, because of that RTR (remove, turn, rehang) I over-think it and make the mistake!

Here’s me, trying to convince myself that I don’t really need a button right up at my neck at the top of the band…didn’t work. I did continue to finish the band so I could at least assure myself that I had the right number of stitches and that it was looking good.

Why didn’t I check out my own blog?

https://knitwords.blogspot.com/2011/03/button-detail.html


Made a new button band, following my own advice and OMG! This is so nice! I wish you could see it on me! Fits perfect! Love, love, love it! And, it does look great with the Aran poncho!

Oh yeah, I keep forgetting to say – had many of you ask if you could use the ribber for the tuck ribs (on both projects) and I did say yes, you can. But you need to consider the value of being able to better see what’s going on without the ribber blocking your view.  And I don’t really feel that it takes all that long to do the tuck ribs. If all the cables were the same across the row, go for using the ribber but with this variety in the mix, it’s probably better to have the view!

Monday, November 23, 2020

the full Monty...

What’s an ‘ess’ or two between friends? Yeah, I made a few wee errors, doesn’t bother me because overall, it’s pretty impressive and I’m happy! I’ll wear it with pride!

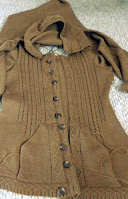
Got the fronts done for Driftwood, pockets and bottom bands done. Just need the hood and front bands – I’ve almost convinced myself to do a button front instead of the zipper. Because I lengthened it, don’t have a zipper in stock to use and I would want a 2-way that opens up from the bottom. If I button it, don’t have to worry about that, can just leave a button or two undone at the bottom…

I really like the idea of two projects going at once, one on the mid gauge LK150 and one on the standard gauge.

Since I have a few standard gauge projects in the queue (a couple of Take a Turn s), I wanted to get another one started on the LK. You might think this strange but I do not have much in the way of mid gauge yarns – I was never a collector of hand knitting yarns, unlike some people I know (no names!) but when I found that gold Aran project, I did uncover a stash of worsted weight alpaca  in a hydrangea blue, very pretty but not exactly in my colour wheel house. I got it back when I was contributing to KnitStyle. A yarn company has sent it to me for a project but when I checked with the editor, she told me I couldn’t use it because they hadn’t paid their advertising bill and she didn’t want me promoting them. http://knitwords.blogspot.com/2012/04/is-it-middle-of-april-already.html

I had even made a swatch but couldn’t find the notes to go with, so, unravelled it and made a new one and I’m all set to do more Aran knitting! Hiking sister Janet will like this, I’m sure! Thinking how I can revamp one of my hems for a different look…

Thursday, November 5, 2020

under-wear...

Here’s me, wasting time, no, not really! Getting through the day with a sense of accomplishment is a better way of putting it, I think. Keeping the mind and hands occupied works for me, even better if there are measurable results afterwards. 
Forgot to say, if you wanted a standard gauge cable/beginner project, there is a free download at www.knitwords.com on the welcome page, a pdf of one of my patterns
from KNITWORDS #36 (which I call the cable issue because there were 5 cabled garments/projects for different machines and levels) Take a Turn is a beginner V-neck pattern with a little bit of cabling to get you started. I actually printed it out myself and it’s on my to-knit-for-xmas list, have a couple of sisters who live in more exciting places that I may get to visit when things calm down a bit, no names! 
Thought I’d give you a bit of a rundown on my Driftwood Hoodie – driftwood is the colour name of the 4-ply wool here – I’m still planning on using this as ‘wear-under-gold-Aran-poncho’! Haven’t planned it all out, working things out as I go, hence, making the sleeves first. 
In case I never said, that #47, Ribbed Diamond Band, isn’t exactly a cakewalk – it does require perseverance and patience but totally worth the extra effort. It was concerning me a bit that it was a ribbed trim. Usually I want to start with ribbed trims, which I did for the sleeves but, I was contemplating the pockets on the front. In my original pattern, the pocket is knit, beginning and ending with waste yarn. The Front is then knit to the same row as the top of the pocket and then removed. The top of the pocket is hung on the appropriate needles (notice my pockets are on the small garter bar, which works fine) and the Front is rehung and continued. The bottom hem joins the bottom of the pocket with the bottom of the front so, here, the hem will be knit, transferred to the main bed and removed, joined later to the rest…more on that later! 

The body is a little longer (actually a lot longer, about 15 cm more) than my Girlfriend Hoodie. I’ve shaped the side seams, wider at hem, decreased in to the waist and then back out for bust width. For the Back, because of the shaped waist, I’ve added 10 rows/8cm shortrowing to centre bottom, just above the hem. 
You might get the idea that although I have a recurring theme of that diamond, nothing is the same. My theory is no need to burn myself out cabling the whole thing. Besides, I never get to see the back so why bother and if there’s a hood it covers a lot of the back so why bother. I came up with this neat little diamond motif positioned in the middle of the Back. I’m happy (and kind of busy!). 
Now for the Front. Made the pockets with the diamond running up the inside edge. I’m planning to add more cabling as I work up the Front, similar to the steps of my LK tunic, almost finished...

Thursday, October 29, 2020

the opposite of TMI...

 NEI, not enough information! A few weeks ago, I had a nice email from Rebecca asking for some help on one of my trims from 50 Ways to Love Your Knitter, #47.

I have a question on #47 Ribbed Diamond Band... #5 Transfer to every 3rd needle in work on knit bed and all needles in work on rib bed... And then #7 and #8 are confusing to me too.  Part of the problem is I see the back side instead of the front side and it’s confusing. I can’t seem to wrap my mind around this.

I answered her rather vaguely (my apologies) at the time, saying

are you just reading or actually trying to knit? Not sure what to add to #5 except to go across on main bed and keep every third stitch. Transfer the rest to the rib bed. Counting only the needles in work in #7, one goes one way (right, the next one goes left, the beginning of the diamond pattern...

Since then, I’ve had that trim in the back of my mind, trying to come up with some reason to knit it. I think it will complement my diamond Aran-look stitch pattern.After knitting it and realizing I short-changed everyone (sad face!) who has this book, here’s what it should say:

47.  Ribbed diamond band: Embossed diamond formed on main bed, on purl stitch background from rib bed, side away is right side (matches with stockinette)

1.  2X2 (2X1) rib, Swing H.  Manual wrapped rib cast-on (see #30).

2.  RC000. T5/5, knit 1 row.

3.  T6/6, knit 1 row.

4.  T7/7, Knit 2 rows. RC004.

5.  Switch to Swing P. Bring all ns to work on Rib Bed. Begin at centre, transfer to every 3rd needle in work on knit bed (by moving #1 right and every 3rd n to RB and) all needles in work on RB. Always put empty ns out of work. Switch back to H. RC000.

    . . l . . . l . . . l . . . l . .

   l l l l l l l l l l l l l l l l l l

6.  T6/9, knit 1 row.

7.  On knit bed, transfer every 2nd in-work stitch to the right, one needle.


8.  Transfer the alternate ones, one space left, knit 1 row.

   . . l l . . . . l l . . . . l l . .

  l l l l l l l l l l l l l l l l l l l

9.  After knitting row where stitches are side by side, cable the two stitches, putting the ones travelling to the left, down first. Knit 1 row.

10. Move 2nd stitch in group of 2 to right and the other stitch to the left, ending with needle arrangement in #5. Knit 1 row.

11. Continue forming the diamond on knit bed to RC012. Make the 1X1 mini cable again

12. K1R. RC013. Switch to P4. Transfer all stitches to knit bed. Continue in desired stitch.

Thank heaven I found a great, machine-knitting proofreader shortly after that!

Tuesday, October 27, 2020

hidden pocket...

We had our first snowfall and it looks like it may be a stay-on-the-ground event.

Way too early and I’m still hoping it will melt but who knows? This is 2020! Anyway, I did wear my Aran poncho the other day while I ran a few errands and it was kind of fun. Had a couple of ladies shout out, where’d you get that? And got thumbs ups! I did see others wearing the blanket-style plaid ones but nothing like mine. Decided it needed a pocket (I hate carrying a purse) and maybe a cardigan/hoodie to wear under to extend the wear-ability. Back at home, I made a pocket, so simple, just a 5X5 inch stockinette patch and hand-stitched it to the inside front point, attaching it between some convenient tuck ribs, above the purl ridge of the hem, leaving the top open. Does the trick, holds a couple of bucks, credit card, mask, keys…

Now, a jacket/hoodie to go under/with! I need a standard gauge project to offset the mid gauge transfers!

Friday, October 23, 2020

going whole hog...

 Working on the second size from my KnS pattern, making a few adjustments to my schematic, mainly making it longer to reflect the tunic length I now wanted (changed side seam length to 50 cm/20 in), adding another inch to ‘1/4 hem width’ because of the change in length and adding a curved/shortrowed 1.25 inches to the centre.

Made the hem for the Back – my new schematic indicates 64-0-64 ns for the width, but my hem stitch pattern is a 12-st repeat, so I’m going with 66-0-67 ns, the closest 12-st repeat and of course redrafting the side seam decreases.

While working on the hem, I was pondering life. I had meant to knit this thing as the original, in stockinette, with the Aran-look yoke but I thought, what the hay? I’m here, working at wasting time and getting through the day, trying to feel like I’m accomplishing something…let’s stretch this out!’

After the hem, I figured I may as well start with that nice diamond thing up the centre back. By the time I got the first repeat done, at RC024, I was itching to expand. I added the 2X2X2 braided cable on either side – oh yeah, turning all those between sts to purl stitches was too much for me and I liked the separating tuck ribs that I used on the poncho better so left 3 plain sts between each new vertical cable with a tuck rib on either side.  After another 24 rows, began the 3X2 cable turned every 6 rows; then at RC072, started a 2X2 turned every 4 rows; at RC096, a 2X1, turned every 4 rows.

Some tips for Aran knitting:

1. Choose yarn and stitch size so the knitting is not too tight – you’ll be fighting with small stitches the whole time and not enjoy the experience. The yarn I used (DK Wool) for this tunic, I would knit at T5 stockinette but for this worked T6 to make sure there was enough give to manoeuvre the cables.

2. Make a cheat sheet noting the row numbers for each operation.

3. The stitches put down first are the ones that show on the public side of the fabric – talk to yourself as you’re transferring to remember what to do.

4. Be sure to read the Cables section in ‘The Handbook for Manual Machine Knitters’ for lots more!

5. Making the Back first allows you to sort things out before working the Front – they do not have to be the same but the front neckline is the most important part of any garment and here you want to make sure you have the best pattern row to stop on. That diamond will look best if completed or stop at the halfway.

6. Mark the needle butts to help keep track of things – I mark the tuck ribs and then you see what fits between them.

I had a lot of fun experimenting with the centre of that diamond!

P.S. sorry for the confusion about inches and centimetres. I always work in cm and give the inch conversion for the U.S. as a courtesy, but sadly KnitStyle wanted only inches so that pattern has only inches in the schematic – I was working on them to change!

P.P.S. I did make a swatch in stockinette only and used that reading for my calculations.


Thursday, October 22, 2020

cables, cables, cables...


Carrying on with the cable/Aran theme from that poncho, I thought, why not do a pullover/tunic? Actually the last thing I submitted to KnitStyle, back in 2014, was a cabled project that was never published but I do have a finished pdf of the pattern if anyone wants…email me at knitwords@shaw.ca and put ‘cabled LK150’ in the subject line. https://knitwords.blogspot.com/2014/09/progress-report.html My description of it: Slight A-line shape, round crew neck pullover, set-in sleeve with accents of a variety of cabling techniques to create an Aran-style look on deep wide cuffs and forming a yoke-look at top of body. Garter stitch rows for bottom hems.

I thought I could make something like that – when doing for them, I had to submit the garment in a finished-34, so although I did get the garment back, no way was it fitting ‘moi’, even if the colour was anything other than one of my least favourites! I have almost two full cones of DK Wool in ivory that should be enough to make that into a tunic. I’ll start with that new hem from the Aran poncho and see what happens!

Tuesday, October 13, 2020

handy work...

Back to this LK Aran piece that I rediscovered, I was originally going to make a long strip, with diminishing patterning – hence the plain section on one side - and seam it for a simple poncho but as I got into it, the hand transfers were so much fun and so engaging, I changed to making the two-piece poncho. Using an old trick https://knitwords.blogspot.com/2018/03/the-moment-of-truth.html (cutting the desired shape from knit fabric to figure out what size needed), I took the first piece off the machine at 200 rows – it measured 20 inches wide by 28 inches long – and I folded up a piece of knit fabric to that size and pinned the two together to see how it fit. That was the point when I cleaned up and put it away. Getting it out again, I thought I should add about another 8 inches to the length so the new size of each piece would be 20 X 36 inches. After making the hem of the second piece, I decided I should flip the patterning and have the cables beginning from the opposite side – maybe not the best choice but I’ll live with it (if doing again I wouldn’t do that – no real reason, just because…) I had made a cheat sheet with the layout of the cables and what rows they were turned so sort of reversed that on the needle bed and changed it up slightly – a few experiments and a few mistakes here and there but who’s counting? Just having fun, me and Clint Black, killing time! The cabling actually goes pretty quick – it’s those tuck ribs that take

up the time – I found that knitting 30 rows, doing the cables as I went then stopping and doing all the tuck ribs after 30 rows and then taking a break, was the best way to get it done. Got the two sections joined – I
found a diagram in an old Knitwords magazine (#30, Autumn 2004) to help with that. The neck opening is a little large for Autumn in the north, so I made another hem piece to add to it to close it up a bit. This was so much fun, doing all the cabling and not having to follow too many rules to make things matchy-match, I’ll be thinking up another LK hand job!

Friday, October 2, 2020

forgotten...

I was tidying up and sort of looking over things in my workroom and surprise, surprise, I came across this abandoned project! Wow! Does not happen often! It was from two years ago and I think what happened, I was cleaning up for company coming, just put this into a covered bin, and you know, out of sight out of mind.

My inspiration, back at the time, was from my Ireland hiking trip and the beautiful Aran knits found in some shops there. Unfortunately, the majority of them are industrial machine-made versions of the hand knits of yester year, but inspiring nonetheless. I had taken some photos to remind myself and one that stuck most in my mind was this poncho. I liked the simplicity, two rectangles joined in a way to make a triangular cover-up and the neckline could be filled in with another straight strip if needed. I was on it!

I had made this first piece, based on some of the Aran stitch patterns in my ‘Handbook for Manual Machine Knitters’ (available on amazon.com), spreading various cables over 48-0-49 sets on the LK150. Looking at it now, I realize I had a brand-new hem technique to share as well as the rest of the stuff!

#152 Aran Poncho Hem. Chain cast-on, hand transferred scallop made by multiple transfers, eyelets eliminated and 2X1 mini cable with tuck rib. 12 stitch repeat, side away is right side.


1. Cast-on waste yarn, ravel cord. Mark every 12th needle, starting with #1 right. RC000. CAR. Measure out MC 4X width of ns in work, plus 8-10 inches. Double it over on itself to have 2 strands together. This will make a long-enough double strand for the chain cast-on. Bring ns to D/E. 

2.    With next size-up latch tool, chain loosely from left to right.  Anchor last loop on end needle. Close latches. Single strand, MT+1, knit 2 rows.

3.   Using 5-prong tool, transfer as in chart for row 3, starting with #1 right as the centre with 3 stitches together. Fill in empty needles with heel stitch from adjacent stitch. Knit 2 rows.  RC004.

4.    Using 4-prong tool, transfer as in chart for row 5. Fill in empty needles with heel stitch from adjacent stitch. Knit 2 rows.  RC006.

5.     Continue as in chart, make mini cables after row 7 and row 11. Continue as in chart to RC012.

6.     Leave the tuck rib business until this row – because the stitch drops down and is reformed on every other row, it can be done in one operation, instead of every other row!

7.     Remove. Turn. Rehang. K2R. RTR. (This makes a two-row purl border.) RC014. Wrong side facing again, ready for next step!


P.S. thanks for all your encouragement! I still have lots to say and share. Cross your fingers! I’m going to give Blogger another shot… 

Tuesday, September 29, 2020

old yarn...

The weather has  definitely turned – no sleeveless and something warm required! Really like the shape of that tunic so my next attempt is same but different. A bit longer, with long sleeves. In checking over my wardrobe, I realize I have nothing very casual and zero in the way of a pullover/old sweatshirt sort of thing so, here goes! Pulled out 2 cones of Forsell Suva Nights in midnight, black and dark navy, really old stuff, wool with a cotton slub, knits as 4 ply. Used this yarn lots in the past but it was discontinued long ago so this could have been on my shelves 15 years or more. I want to knit the 1RT (one-row-tuck) loosely again to create a thinner fabric and I go back to one of my favourite Knitwords patterns, ‘Caped Wrapper’ from #43 https://knitwords.blogspot.com/2013/01/hybrid-knitting.html Swatched, making sure to use waste yarn before the ribbed cast-on because this yarn is already on the soft/not too strong side, without factoring in the age thing. Got the swatch made, with T9 and the second set at T10. After getting it off the machine, I could see there were a couple of breaks in the rib but because it was Full Needle Rib, it picked up and knit without me noticing, not something you’d want to happen in a garment but the single bed stuff knit perfectly. I determined that the loose tension on the rib was the source of the problems and after washing and drying the swatch, jumped into full garment mode in spite of the few little breaks. Using a tighter tension for the rib worked fine and I had the Back done in no time. In case the yarn breaks across the row, here are a few tips: https://knitwords.blogspot.com/2019/05/even-i-had-my-doubts.html Another thing I do is the position of the machine: https://knitwords.blogspot.com/2018/04/the-sound-of-silence.html Long story short, on the Front, the yarn broke once, but the ‘thwack’ alerted me in time and no problem. Feeling confident, and knitting slowly, the first sleeve just about did me in - I stopped counting after 9 breaks, but persevered because it was always happening at the end of the row and nothing was lost, didn’t have to rip out or rehang anything. By this time I was contemplating sleeveless but determination kept me going and what do you know, the second sleeve came off like a dream, no breaks! Got it finished up, washed and dried and love it! It will be my Thanksgiving dinner outfit.

PS  Blogger has changed things and I'm not figuring it out...

Tuesday, September 15, 2020

easy bind edge question...

I got an email the other day and thought it would maybe help others out.
Greetings Mary Anne,
I’m not sure how I’ve lived my machine knitting life without knowledge of your blog, but I just found a small book in my inherited collection called
50 Ways to Love Your Knitter and between that and your blog I feel like I’ve gone to MK Nirvana.  
Anyway, I didn’t immediately see the way to search your blog for this edging, is there a YouTube video maybe?  I am a hand knitter and have been converting patterns for years, so the step 3 is throwing me. Pick up from edge (1/2 outside edge stitch) and put onto every other needle.  It’s the 1/2 I don’t get.
These edgings are fab, I’ve been looking for ways to make my garments more interesting.  I’m trying to make my Gran a tuck st poncho but I wanted a nice edging and this #26 should look lovely.  
Thank you in advance for any clarification you can offer, I’m so excited to delve into your blog.-KVT

Dear K, I don't do YouTube but hopefully I can help. On the selvedge, only pick up the loop/bar/half-knot (whatever you call it), the single piece of yarn, not both sides of the actual stitch. I’ll do a blogpost for you!

from 50 Ways to Love Your Knitter:
26.  Easy bind edge: Use on vertical edges, great for uneven fabrics such as tuck & slip; looks good on both sides.
1.  With wrong side of fabric facing, pick up edge, without stretching.
2.  MT, knit 3 rows.
3.  Pick up from edge (1/2 outside edge stitch) and put onto every other needle.
4.  Carefully push needles out, putting knitting behind latches.
5.  Close latches.
6.  Knit 1 row loosest tension, latch tool cast off.
Steam and pat flat.

So, I found a swatch from ‘Neck’s Best Thing’ by MAO (#26 1X1 Rib with Swung English Rib) and tried out this  Easy Bind Edge, using  pink for the purl side application and blue for the knit side – thought it would show up in the photos with more detail than if it was same colour.
Hang side evenly without stretching

What it should have said:
Easy bind edge: Use on vertical side/selvedge, great for uneven fabrics such as tuck and slip but works for stockinette and others too! Looks good on both sides and finishes sides neatly.
1.  Place carriage at left ( so final row  for the chain cast-off will be knit from right to left which is the easier way for most). Hold piece up to needle bed without stretching to determine number of needles required. With inside of fabric facing you, pick up edge, whole outside stitch.
pick up top side of selvedge onto EON
2.  Bring ns out and close latches (this prevents the carriage jamming up when you try to knit across without closing the latches because the open latch could catch in the selvedge). Carriage at left, Main Tension, knit 3 rows.
3.  Pick up from same edge, but only half of the outside edge stitch, and put onto every other needle. Doesn’t matter if it’s the top bar or the bottom, but be consistent. This is a single-prong tool job. There will be 2 loops on EON and only one stitch on the other.
using carriage to knit loosest tension on right;
switch to manually knitting loose row at left
4.  Carefully push needles out, putting knitting behind latches.
5.  Close latches.
6.  Knit 1 row loosest tension (or manually knit row very loosely if you can’t dial up at least 4 full numbers higher), latch tool/chain cast off.
Steam and pat flat.
To Add to open stitches:
Reduce by 10%, e.g. if original number is 70 sts, multiply by .9 = 63. Bring 63 ns to work. Rehang cast-on sts from waste yarn, gathering evenly to reduce. I picked up 2-3 sts from the trim on the selvedge.  Knit side or purl side as above. Knit the 3 rows. Pick up sinker loop of original row OR sinker loop of first row of trim, either, again be consistent and do #6 to finish.

pick up knit side facing, stockinette and
 chain stitch shoa on knit side
pick up with knit side facing,
purl/tuck-look shows on stockinette side
Oh my, I feel like I just taught a workshop! Wish I could pass this swatch around the room!

Saturday, September 5, 2020

the latest...

I finished that tunic quickly, without really looking it over before putting it together and what the hay? The second cone…it made a line, a definite colour change. I hadn’t checked the dye lot before I started but they were the same. What could have happened? The outside of the cone changed/lightened – yarn sitting out on shelves for years! Ar-r-r-rr-gh! I should have started the second cone at the beginning of the front, instead of just adding it in where the first cone ran out which has always been my standard operating procedure when I know the dye lots are the same. What to do now? Hope for the best in the laundry but if it is still evident after the wash, I’ll give it a quick over-dye!
https://knitwords.blogspot.com/2010/04/colour-purple-not.html
Still love it though! And get real, who’s gonna see it? ;)
Then, sort of tidying up and with the weather turning much cooler, I finished that tweedy poncho from last March.
https://knitwords.blogspot.com/2020/03/purls-of-joy.html
Without swatching first, I had knit it quite loosely, hoping for a good shrink on the finished project, just banking on my experience to be able to pull this one off. Wow! I should have tried to get a photo before the wash – it was humongous! Like almost below my knees and we won’t even talk about the sleeve length! Feeling quite certain I would be donating this to a much taller friend, I tossed it in the wash and then into the dryer. Oh! My! Gosh! It’s perfect! Just like the felted blanket I was hoping for!
Have a great long weekend! Happy Labour Day!

Tuesday, August 25, 2020

a little reminder...

It may be time to change your sponge bar! It doesn’t happen often here – it’s hot and muggy - so I kind of forget but if your lace isn’t lacing or your tucks keep on tucking, not knitting off when they should, the problem is likely the sponge bar https://knitwords.blogspot.com/2016/02/mental-note.html
– and this can happen on the LK150 too! https://knitwords.blogspot.com/2011/02/murphys-law.html

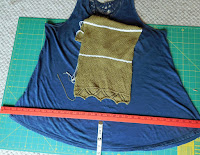
I was reverse shortrowing the curve of the hem for my olive tunic – I started that after completing the hand-transferred Triangles of Lace. Planned to add 10 cm/42 rows from the centre out, beginning with 10 sts in work at centre, adding  5 sts back into work alternately on each side, every other row, using holding position. Because of the curve you need to keep adjusting the weights and I noticed the tucks weren't all knitting off properly. At first, I blamed it on the weights but as it kept happening, it finally dawned on me, it's that freaking sponge bar! Sure enough, it was virtually flat and I'm blaming it on the weather! I changed it out after finishing the shortrowing - don't try to do it in the middle of the shortrowing, wait until you have every thing back in work. I took the piece off on the garter bar to make the change.
 
You might wonder how I arrived at the 10 cm? I’m sort of copying a bought top that I love the shape of – it fits nicely at the top and bust and then is quite loose and swingy, fingertip length with an exaggerated A-line, nice and airy for hot weather. I laid it out and measured across the width at the bottom – notice the tape measure below the red ruler to record the depth of the curve.