Wednesday, March 17, 2021

she likes it!...

And it looks cute! Got it done in time! Used the knit side as the finished outside.

Easy Bind Edging: This works brilliantly! Especially good for the curved lines – it does look good from both sides which is nice because on the side ‘tails, you see both sides. The swatch shows both ways to complete. I used the right side finish, hanging the edge with  the purl side facing so the trim would show knit side to knit side.

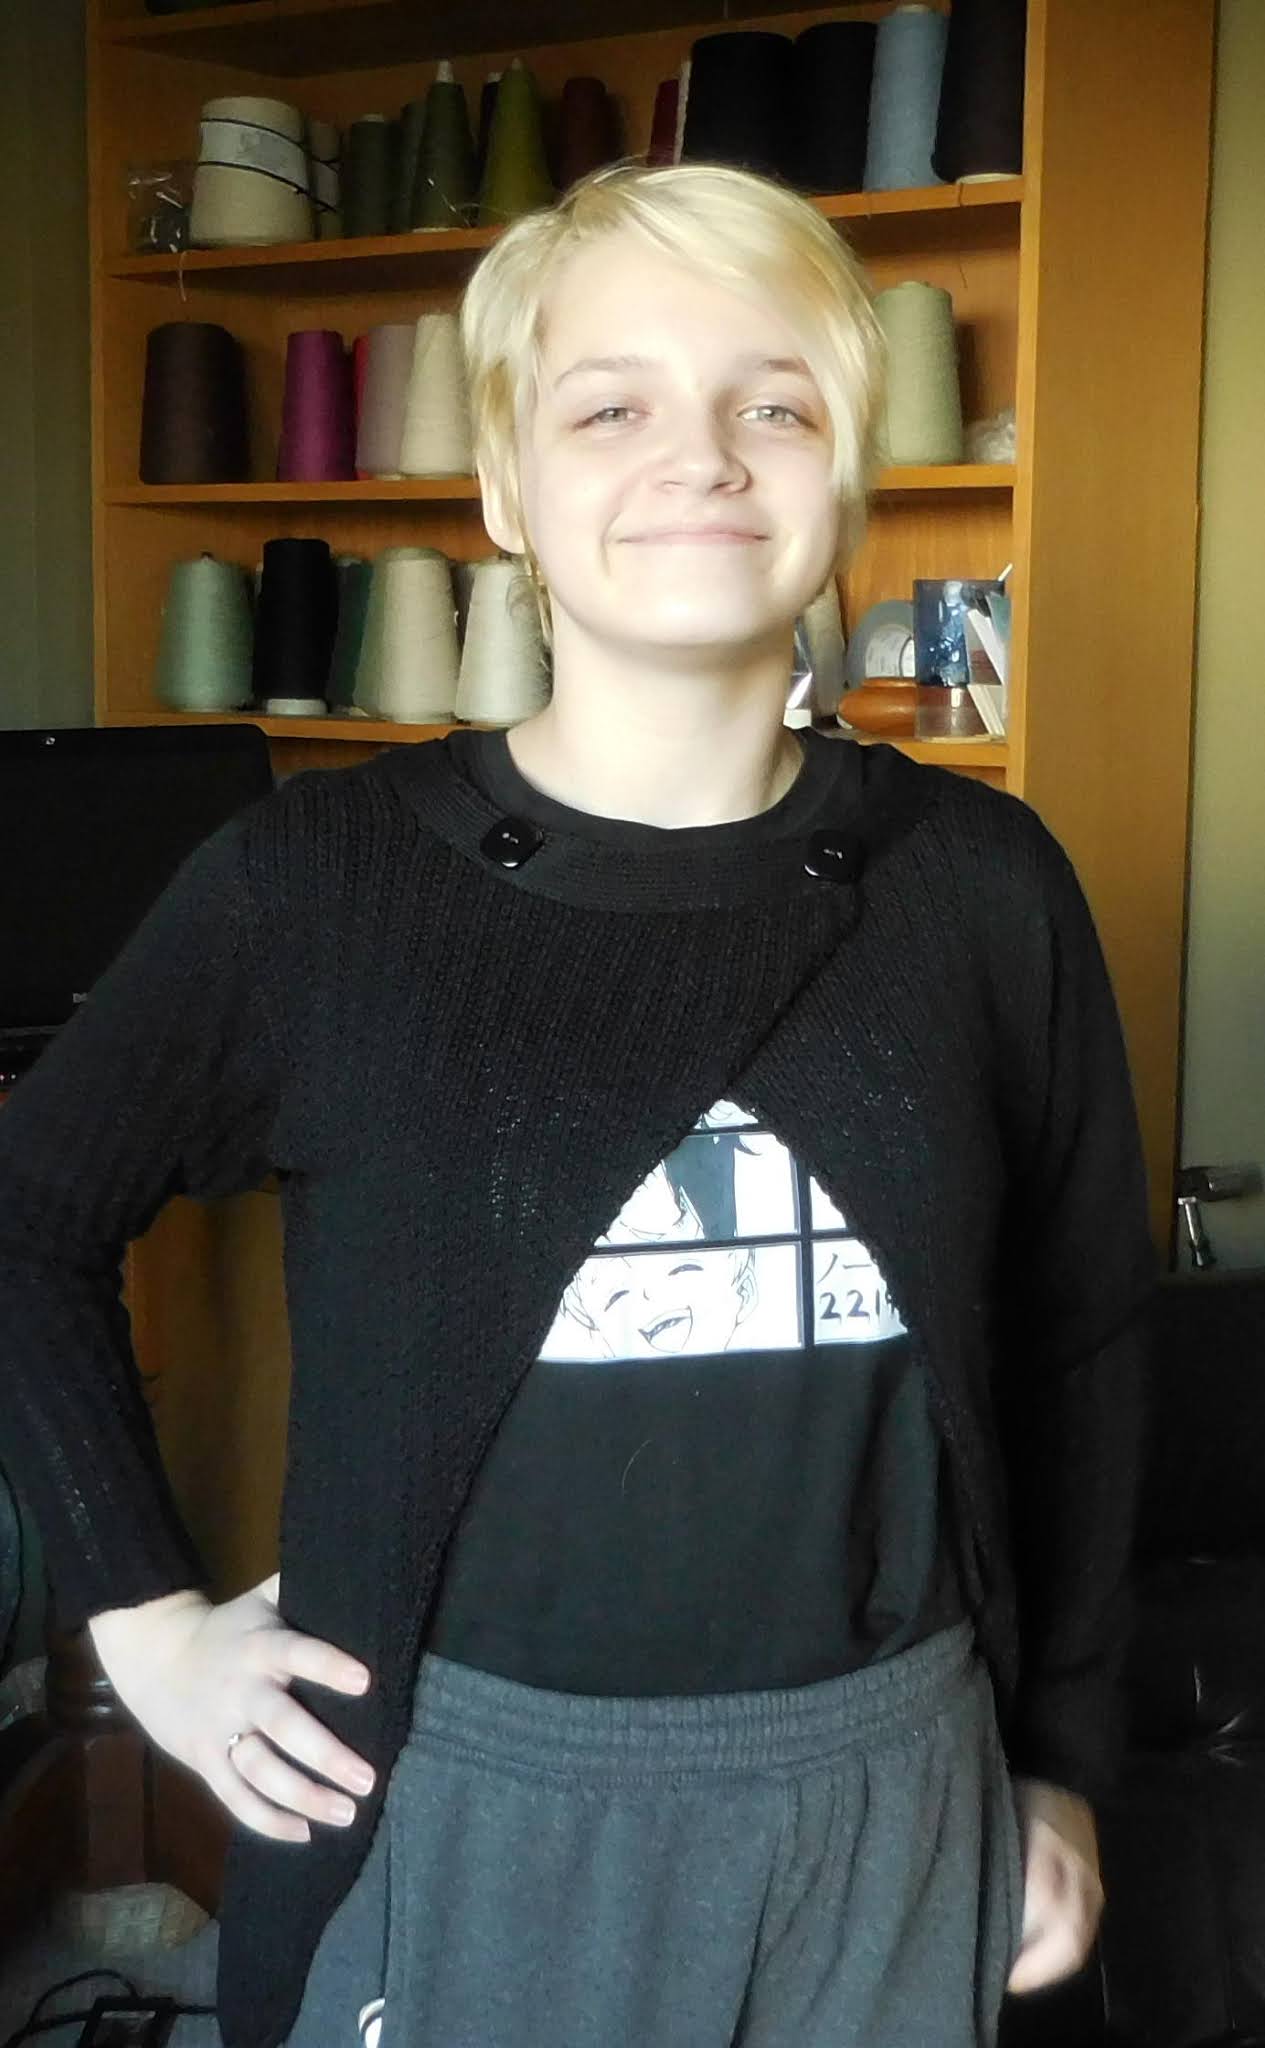
The neckline: I followed the instructions for ‘Crosswise’, hanging the neckline stitches and knitting 10 rows of stockinette at garment tension plus one row at T10, then waste yarn and remove. A 10-stitch strip X 300 rows of stockinette is then hung on same needles, purl side facing, with the neckline open sts hung and pulled through the edge. Loose row and chain off. Sewed the two buttons through both edges to secure the neckline – no need to worry about buttonholes that wouldn’t work properly anyway!


Seaming: came up with a new method that is just the bee’s knees! Omigosh, impressed the heck out of myself! Joining the side seams, both curved was a challenge to make it look good on both sides. After a couple of attempts, this worked: purl side facing, hang first edge, picking up half of the edge stitch/bar, evenly. Hang second edge, knit side facing (this would be putting wrong sides together) again hanging half edge stitch. Bring needles out and manually knit very loose row (Pull stitch back almost to A position). Carefully chain off! This opens out to make a nice flat join that looks great from purl side as well and adds a nice chain to seam line on knit side that hides the little glitches of the curved edges.

Makes me want to knit the whole thing again in a lighter colour so someone might notice what a good job I did!

Tuesday, March 9, 2021

stuff about franky...

 No, I won’t be writing the pattern for this – way too much stuff happening to write it all down and grade sizes, never mind having a yarn that everyone can get. I’m going to try and give you enough info about what I did to help you in case you still want to attempt this!

My swatch was stockinette, just because, and then I chose a tuck pattern (it’s a basic stitch, usually included in even punchcard machines) that I’ve used in the past – it was really just to bulk up the fabric and add a bit of texture without being too baby-blanket-ish (bubbly), which a lot of tuck patterns are. I haven’t quite committed to which side will be used for the public side. I prefer the look of the purl side because of the vertical lines but pretty sure I’ll use the knit side because it presents a flatter finish that most non-machine knitters recognize.

I have mentioned that I often knit sleeves first but maybe haven’t really explained why. The sleeve is usually the smallest piece, area-wise and it gives you a chance to get used to the stitch pattern without worrying about working the full width of the needle bed. It's a good opportunity to experiment with your increase method (if you forgot to do this on the swatch!) without it being in a prominent position - who looks at the underside of the sleeve? Same for the cast-on and cast-off method to be used. Normally I would cast on with waste yarn and ravel cord and then a plain row of stockinette before going into the stitch pattern so there is a plain row to pick up later for the trim - this I did on the first sleeve. Proceeded to work through the increases which become more frequent as the knitting progresses - with tuck stitch, the row gauge can be quite high - mine is 52 rows to 10 cm/4 inches - and even if there is an increase of one stitch in less than four rows, any type of full-fashioned increase doesn't work very well and it tightens up the seam line too much. I found the best method to use here was to bring out a new needle on the carriage side at the beginning of the row and wrap it, also selecting the second stitch, bringing it out to cancel the tuck, turning it into a plain knit stitch to improve the edge. What you're doing is basically having two knit stitches at the edge to make for a smoother line and ensure the seaming and finishing goes well. This will prove more important on the Front/Back because of the curves.


At the top of the sleeve, I did shortrow the cap and then took it off on waste. Then said to myself, what were you thinking? OR better yet, WERE you thinking?  This is black! Picking up those tiny black stitches is going to be brutal! AND there’s no need to have open stitches – the ‘easy bind edge’ is going to hide all!

The second sleeve has an ewrap at the bottom and a loose row chained cast-off at the top! And look at me! No point in taking photos of the real thing, it’s black! I made a swatch in beige of the bottom edge of the front/back so I could show how this looks…

Saturday, March 6, 2021

on spec...

Finally got to show Rhiana my idea and she was good with it. She commented on my enthusiasm, noting the exclamation mark in the notes I made. We discussed colour – she likes black or white or pastels. Scanning my shelves, I found a full cone of black Bramwell Sable Crepe hiding in a corner – it’s a dress-weight acrylic that I have no trouble parting with.

The original garment was black so you really can’t see much detail but I did detect a bit of texture in one frame that lead me to think it was maybe a tuck rib and likely a bit thicker, more like a mid gauge weight. I want to use the standard gauge machine and stick with a single bed stitch because of all the shaping. Did some research, looking back over old Knitwords magazines and in N0. 48, there’s an MAO design, ‘Crosswise’, that has some interesting features, like the angled fronts and the neckline. Not wanting to invest in time-consuming techniques here – she’s 14 and might wear this once or twice! – that self-faced, sloped edge is out - I’m looking to keep this simple! Made my swatch, starting with stockinette at T6 (which is the likely most suitable stitch size for this yarn) and then a simple tuck that gives nice vertical lines and adds a bit of bulk to the fabric,  at T6, T7, and T8, mostly for comparison. Give it a light steaming, measure, let it rest overnight and measure again – tuck will change, so the rest time is important.

That sample I used to do the ‘easy bind edge’ on http://knitwords.blogspot.com/2020/09/easy-bind-edge-question.html has been floating around my workshop and it’s the perfect trim for this project: narrow, works good from either side and should adapt widthwise nicely.

I drew the shape out on graph paper, adjusted here and there, until I was satisfied, then laid it out on the mylar that fits into my KR11 knit radar. I’m good to go!

Tuesday, March 2, 2021

knitting knightmares...

 I woke up in the middle of the night, in a sweat, about attaching those sleeves! Yikes! Way too invested in nothing!

What happened was, the body was sideways knit, right? The top edge is picked up and the yoke knit up in stockinette. I did the Back Yoke first, shaped the neck and shoulders and took each shoulder off on waste yarn. Then, did the first half Front Yoke the same way, but at the top of the shoulder, I decided to go with that reverse seaming on the shoulder that I like so much - it’s easier so why not? You just hang the corresponding shoulder right now and cast off, done! no waste yarn, turning or rehanging! Did the second one, smoothed them out, admired my work and quit for the day. 

The sleeves were already knit, with shortrowed sleeve cap, taken off on waste (and/or garter bar) planning to use the open stitches to make the seam to join the sleeve to the body. Only thing, now, there is no way to hang the body/yokes flat to match the flat sleeve! No worries, I’ll figure it out later!


Right now, I have something more pressing to get to. Last month, I Netfllixed 'Wentworth', an Australian show about women in prison. Totally worthwhile, loved it but now I have to wait for the final season to be posted later this year! Aw! Hate when that happens! Strangely, I have become rather obsessed with a knit top I spotted in Season 5  (spoiler alert - when Frankie gets out). Maybe it caught my eye because, being set in prison, everyone was wearing those teal sweat suits (prisoners) or uniforms (guards/warden - now there's a nightmare!) and the sight of real clothing struck me, I guess. I quickly sketched it out on the back of an envelope to remind myself. When I went back to the computer and found it again for a closer look, I was thinking, who could I make this for? Not my style, but someone young...what do you know, it's granddaughter Rhiana's 14th birthday soon!


Tuesday, February 23, 2021

dillydallying?...

 dragging my feet? lollygagging? procrastinating? camping out? Yes, yes and hell yes!

Honestly, I was pretty pumped with my design. I had knit the two plain stockinette sleeves first while thinking and re-thinking the body of this lacy jean jacket. I had it all planned out, sideways knit, making it in one piece, planning out pockets (that’s the lime green ravel cords awaiting further developments), shortrowing some shape and I was all gung-ho! I added more of the lace circles in the stitch pattern, spacing them alternately every 10 stitches, increasing the hands-on work (by the way, there are 8 RTRs in every 36-row repeat!). But, approaching the centre back, I started thinking, ohmigosh what was I thinking? It was going forever! And as the first centre front edge hit the floor, after reminding myself that this was cotton and would/should shrink up a lot, I was re-measuring my swatch, re-calculating the row counts, re-measuring my shape, totally questioning my sanity. Do I cut my loses and quit? Admit defeat? Continue into madness?  
I was really close to losing interest, having an increasingly difficult time motivating myself to continue. I had another project that I’d like to get into but felt that abandoning this mid-stream would mean relegating this precious yarn to UFO status. Not acceptable! P
ersevered, finally on the home stretch of the last half front, pulled out all the stops and got ’er done!

Taking it off the machine, stretching it lengthwise and folding it into the garment shape, saying, what the haich? No worries, this will be fabulous!

Friday, February 12, 2021

jean jacket re-visited...

Don’t know about you but I’ve come to hate that term, ‘hunkered down’! I prefer to think of it as just getting on and doing what needs to be done. So, I’ve been sitting around, wasting time, putting in time, whatever, but I have been knitting!

A while ago (LOL! turns out it was like 4 years ago) I had a plan of knitting a lacy denim jacket https://knitwords.blogspot.com/2017/09/regifting.html

and after a bit too much research, that was abandoned. https://knitwords.blogspot.com/2017/09/missteps.html

Last week, after realizing I was cabled out, I started making a quick list of things to work on. Went through my knitted wardrobe, tried on several things and I remembered that recurring dream of denim and lace in a jean jacket style. Pulled out those old notes and swatches and just by chance, the RTR Lace Cardi was at hand. I really love that fabric which is a sideways knit combination of purl-st ridges and hand-transferred simple lace. My first thought was that I never really get to enjoy that stitch pattern because it is basically in the back of the cardigan and it dawned on me that using it again would give me those vertical lines I was looking for and still satisfy my need for a hands-on approach to knitting in general. Revised my design and it’s a go!

Friday, February 5, 2021

all Aran-ed out...

The red one was fun, a lot of cable variations, and it kept me busy for a bit! Made it, overall, quite a bit longer than the original, more like a tunic length. 

The Sleeves have a combination of 2X2 and 3X2 cables in a chevron pattern and the Back is basically the same but more cabling because of the length. To add a wee tweak to the Front, I ran a 6-stitch (2X2X2, turned alternately every three rows) braided cable up the centre, then the 3X2, turned toward the centre every 8 rows, 2X2 cable every 6 rows, another 3X2 and then the 2X2 again next to the armhole edge. The Back and Front are not identical because the braided cable, but I respaced to make sure things matched over the shoulder. Just wanted to show you the finished product but I’m pretty sure I’m over cables for a while!

Been dreaming up new things! Stay tuned!