

 Number 13 is done except for the final seaming.I was going to call this a short-sleeved T-shirt,
but a little research told me it wasn’t a Tee because of the set-in sleeve.
What I did was start making this for baby sister Marnie and after thinking
about it while knitting the front and back, I decided she would likely prefer a
short sleeve instead of the sleeveless version. No problem! I’m using that
one-row-tuck technique again, mostly because I need a little extra width and
guess what? MAO did a pattern, Body Basic, using the 1RT/WCD, with a
short sleeve back in Knitwords 42, Autumn'07
Number 13 is done except for the final seaming.I was going to call this a short-sleeved T-shirt,
but a little research told me it wasn’t a Tee because of the set-in sleeve.
What I did was start making this for baby sister Marnie and after thinking
about it while knitting the front and back, I decided she would likely prefer a
short sleeve instead of the sleeveless version. No problem! I’m using that
one-row-tuck technique again, mostly because I need a little extra width and
guess what? MAO did a pattern, Body Basic, using the 1RT/WCD, with a
short sleeve back in Knitwords 42, Autumn'07


 Back to
yesterday and I have this ‘new’ machine. My mind is telling me that the 840 carriage
will work on my old 580 bed but I can’t find anything in print that says that. I
reasoned that the LC580 lace carriage works on both beds so why would the knit
carriages not be interchangeable.
Back to
yesterday and I have this ‘new’ machine. My mind is telling me that the 840 carriage
will work on my old 580 bed but I can’t find anything in print that says that. I
reasoned that the LC580 lace carriage works on both beds so why would the knit
carriages not be interchangeable. 
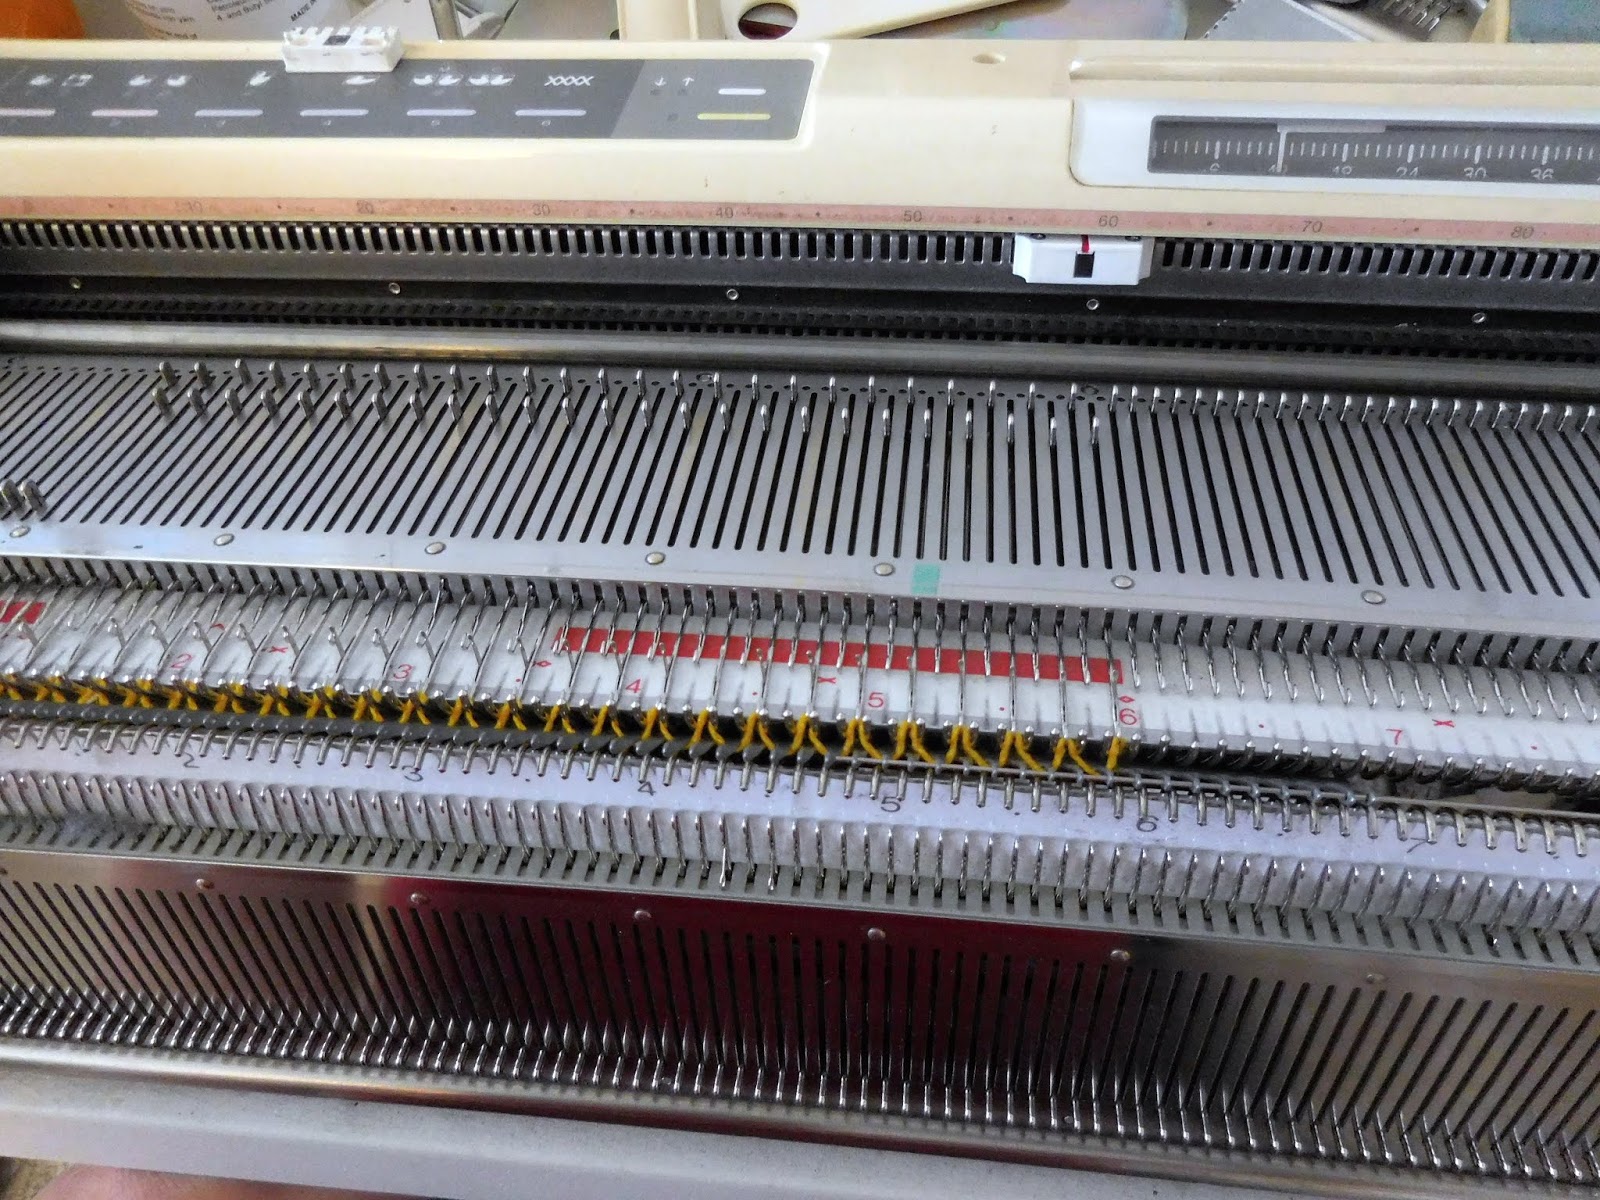 Fresh
this morning, here I am at the machine even before my workout (I can do that
anytime). Just to refresh your memory (and mine but I can use you as the
excuse!) the one-row-tuck is set up so every other row is plain and that’s when
we want the longstitch to do the work on the rib bed so there are clean
stitches opposite, no tucks on the main bed, that would interfere with making
neat stitches on every other row on the rib bed, right? Right!
Fresh
this morning, here I am at the machine even before my workout (I can do that
anytime). Just to refresh your memory (and mine but I can use you as the
excuse!) the one-row-tuck is set up so every other row is plain and that’s when
we want the longstitch to do the work on the rib bed so there are clean
stitches opposite, no tucks on the main bed, that would interfere with making
neat stitches on every other row on the rib bed, right? Right! What I did this time: using the
half width comb for the side seam portion (#75-0-10 ns) first, and then the small
comb for the sleeve section (#11-60 ns) but leave everything between/behind the
beds (add a row of ravel cord on each section to make it easier when rehanging
later). With the carriage at the left, T8, stockinette, knit 1 row. Change to
rib arm (read/program your row here) and add 5 sts at left on ribber for the
facing, end needle on ribber (less than my usual seven because that’s what E
Fisher did). Fingers crossed – that’s what swatches are for! Set to tuck (you
added weights, didn’t you?) and knit row. The rib needles have a loop on them, which is enough to cast them on - don't worry, no one is going to see them anyway and we don't want a difficult, complicated join between the Back and Front! This row was the tuck row. Back at the right side, now, set the ribber to knit those facing stitches only on every other row which in this case is 0-1, same as in Rectangles.
What I did this time: using the
half width comb for the side seam portion (#75-0-10 ns) first, and then the small
comb for the sleeve section (#11-60 ns) but leave everything between/behind the
beds (add a row of ravel cord on each section to make it easier when rehanging
later). With the carriage at the left, T8, stockinette, knit 1 row. Change to
rib arm (read/program your row here) and add 5 sts at left on ribber for the
facing, end needle on ribber (less than my usual seven because that’s what E
Fisher did). Fingers crossed – that’s what swatches are for! Set to tuck (you
added weights, didn’t you?) and knit row. The rib needles have a loop on them, which is enough to cast them on - don't worry, no one is going to see them anyway and we don't want a difficult, complicated join between the Back and Front! This row was the tuck row. Back at the right side, now, set the ribber to knit those facing stitches only on every other row which in this case is 0-1, same as in Rectangles. |
| Side Steps |
 |
| Rectangles |
 On the way
home from Toronto last week, I was wearing my blue 1Rt Linen Hoodie http://knitwords.blogspot.com/2017/07/road-trip.html - it was quite warm and I was loving the hoodie. I had a black camisole under it with my light jeans and I felt cool and good. I caught a couple of glimpses in mirrors and liked the sheer-look of the fabric and it struck me I could knit a dress of the same fabric. Last year, for a special family occasion, I had sewn a dress of a sheer fabric with a bias-cut slip in black underneath instead of lining the dress and I could use that under a sheer-knit dress. http://knitwords.blogspot.com/2017/05/cross-training.html
On the way
home from Toronto last week, I was wearing my blue 1Rt Linen Hoodie http://knitwords.blogspot.com/2017/07/road-trip.html - it was quite warm and I was loving the hoodie. I had a black camisole under it with my light jeans and I felt cool and good. I caught a couple of glimpses in mirrors and liked the sheer-look of the fabric and it struck me I could knit a dress of the same fabric. Last year, for a special family occasion, I had sewn a dress of a sheer fabric with a bias-cut slip in black underneath instead of lining the dress and I could use that under a sheer-knit dress. http://knitwords.blogspot.com/2017/05/cross-training.html 
 Sometimes it’s hard to come up with a new
topic but I‘m sure this is something I haven’t addressed here before. You’ve
heard me say I love Wool Crepe Deluxe and if you look in the right place(s), I’ve
talked about blocking and steaming garments but what happens to a finished
garment that is laundered? It looks like this! Yikes! This is the 1RT raglan in ginger WCD that I made back in October '14, http://knitwords.blogspot.ca/2014/10/a-bird-in-hand.html
Sometimes it’s hard to come up with a new
topic but I‘m sure this is something I haven’t addressed here before. You’ve
heard me say I love Wool Crepe Deluxe and if you look in the right place(s), I’ve
talked about blocking and steaming garments but what happens to a finished
garment that is laundered? It looks like this! Yikes! This is the 1RT raglan in ginger WCD that I made back in October '14, http://knitwords.blogspot.ca/2014/10/a-bird-in-hand.html After filling, turn
off the machine. Swish the things by hand and let soak for 15-20 minutes. If
there were any trouble spots/stains, I pre-treat with straight Eucalan before
submerging. After the soak, turn the washer dial to drain/spin, full-on and let
the machine do the work to take the water out. Eucalan is a no-rinse product,
so that’s all there is to it. Sometimes, I add a little fabric softener in
there too but not a lot, just like a teaspoon, maybe. Then I put all the items
in the dryer, along with a one-yard piece of percale sheeting that I keep
especially for this purpose – it helps to make the sweaters tumble instead of
wadding up on the blades of the dryer and has no lint. Set the dryer to ‘air’
only for about 15 minutes – this will take out the wrinkles and because there
is no heat, no danger of shrinking.
After filling, turn
off the machine. Swish the things by hand and let soak for 15-20 minutes. If
there were any trouble spots/stains, I pre-treat with straight Eucalan before
submerging. After the soak, turn the washer dial to drain/spin, full-on and let
the machine do the work to take the water out. Eucalan is a no-rinse product,
so that’s all there is to it. Sometimes, I add a little fabric softener in
there too but not a lot, just like a teaspoon, maybe. Then I put all the items
in the dryer, along with a one-yard piece of percale sheeting that I keep
especially for this purpose – it helps to make the sweaters tumble instead of
wadding up on the blades of the dryer and has no lint. Set the dryer to ‘air’
only for about 15 minutes – this will take out the wrinkles and because there
is no heat, no danger of shrinking.  Then I take the things out, lay them flat
on towels and let them air dry overnight.
Then I take the things out, lay them flat
on towels and let them air dry overnight. 
 Don’t worry about the side seam - no need to have a rod there, you can
hold/stretch that side with your hand as you are steaming with the other hand.
On the neckline, I just put a few extra pins to hold it in place without stretching
it out. I’m just using my regular steam iron http://knitwords.blogspot.ca/2012/01/out-of-steam.html
and holding it just above the fabric
until I get some steam into the fabric then I actually set it down for a sec to
really steam it. After that section is done, walk away and leave it to cool for
a minute or two. Unpin, move to next
section, blah-blah-blah. For the sleeves, I use the sleeve board and no rods. Good as new!
Don’t worry about the side seam - no need to have a rod there, you can
hold/stretch that side with your hand as you are steaming with the other hand.
On the neckline, I just put a few extra pins to hold it in place without stretching
it out. I’m just using my regular steam iron http://knitwords.blogspot.ca/2012/01/out-of-steam.html
and holding it just above the fabric
until I get some steam into the fabric then I actually set it down for a sec to
really steam it. After that section is done, walk away and leave it to cool for
a minute or two. Unpin, move to next
section, blah-blah-blah. For the sleeves, I use the sleeve board and no rods. Good as new!
 My linen
One-Row-Tuck GirlFriend Hoodie is done,
awaiting the arrival of the zipper - I did order it from zipperstop.com and it
should be here, maybe even before Christmas! I ordered two - a nylon one that was a #3 lightweight and a #5 metal, brass coloured teeth option and I can decide which one will be best - I have not particularly liked the nylon coil ones but I thought maybe it was time to try one again - the lightweight part caught my eye! and they seemed pretty cheap so what the hay? The hoodie's all finished up, washed and
dried, bands on, ready for the last thing of machine sewing in the zipper. I
opted for slightly narrower hem bands than the original MFH pattern - if you go to 'Just the Flax' (KW#47), I used the same
graded-tension bands, same number of stitches, but I started at T10 and went
down from there by one dot per row for 7 rows and then back up - yes, there is
an extra row (8) on the front side of the band - that helps it to lay flat and
not curl over or under. I made the cuff narrower yet, only 5/6 rows, but again
same number of stitches as the cast-on edge. I used all the same finishing
techniques as the Manfriend Hoodie, with the outside seaming and the same front edge stabilizing for the
zipper installation... I'm so happy with this, I'm looking around to see what
else I can use for another one and, even though it's freaking cold here and
this is supposed to be warm weather wear, I won't be waiting, I'll wear it as
soon as the zipper is in - we do have central heating!
My linen
One-Row-Tuck GirlFriend Hoodie is done,
awaiting the arrival of the zipper - I did order it from zipperstop.com and it
should be here, maybe even before Christmas! I ordered two - a nylon one that was a #3 lightweight and a #5 metal, brass coloured teeth option and I can decide which one will be best - I have not particularly liked the nylon coil ones but I thought maybe it was time to try one again - the lightweight part caught my eye! and they seemed pretty cheap so what the hay? The hoodie's all finished up, washed and
dried, bands on, ready for the last thing of machine sewing in the zipper. I
opted for slightly narrower hem bands than the original MFH pattern - if you go to 'Just the Flax' (KW#47), I used the same
graded-tension bands, same number of stitches, but I started at T10 and went
down from there by one dot per row for 7 rows and then back up - yes, there is
an extra row (8) on the front side of the band - that helps it to lay flat and
not curl over or under. I made the cuff narrower yet, only 5/6 rows, but again
same number of stitches as the cast-on edge. I used all the same finishing
techniques as the Manfriend Hoodie, with the outside seaming and the same front edge stabilizing for the
zipper installation... I'm so happy with this, I'm looking around to see what
else I can use for another one and, even though it's freaking cold here and
this is supposed to be warm weather wear, I won't be waiting, I'll wear it as
soon as the zipper is in - we do have central heating!

 I've been
thinking of you KAL-ing with me (hope springs eternal!)and figured I should add
an extra consideration because this wouldn't be in the original MFH/GFH pattern
as they are knit in stockinette. With the stitch pattern I am using, you may
have noticed the vertical lines - there are actually 3 vertical lines separating
the two reversed diamond-ish motifs. So I centred the pattern so the
three lines run up the centre of the garment because that will look best but I
wanted to remind you of my extra little tweak for patterns with vertical lines.
After the underarm shaping is done for your size, or, actually before it is
done, check and see where the vertical lines are placing in the shaping. Your
finished garment will look much nicer if you can have a line (or two or three) running
up the straight edge of the body after the underarm up to the shoulder (hope
that makes sense). I did change mine - I made the shoulder wider by 2
stitches in order to have two vertical lines at each edge - of course, if you
have chosen a stitch without vertical lines don't worry about this! :-) oh yeah
and because of those three vertical lines, I added an extra stitch on one side,
at the left for the back and will flip the pattern for the fronts and add the
extra stitch at the right...and don't forget the yarn marks every 10 cm....oh, and I found a part cone of WCD leftover from Tobacco Road (KW#53) that is a very close match - instead of the beige linen...
I've been
thinking of you KAL-ing with me (hope springs eternal!)and figured I should add
an extra consideration because this wouldn't be in the original MFH/GFH pattern
as they are knit in stockinette. With the stitch pattern I am using, you may
have noticed the vertical lines - there are actually 3 vertical lines separating
the two reversed diamond-ish motifs. So I centred the pattern so the
three lines run up the centre of the garment because that will look best but I
wanted to remind you of my extra little tweak for patterns with vertical lines.
After the underarm shaping is done for your size, or, actually before it is
done, check and see where the vertical lines are placing in the shaping. Your
finished garment will look much nicer if you can have a line (or two or three) running
up the straight edge of the body after the underarm up to the shoulder (hope
that makes sense). I did change mine - I made the shoulder wider by 2
stitches in order to have two vertical lines at each edge - of course, if you
have chosen a stitch without vertical lines don't worry about this! :-) oh yeah
and because of those three vertical lines, I added an extra stitch on one side,
at the left for the back and will flip the pattern for the fronts and add the
extra stitch at the right...and don't forget the yarn marks every 10 cm....oh, and I found a part cone of WCD leftover from Tobacco Road (KW#53) that is a very close match - instead of the beige linen...

 You may
recall in the past year or more I had become obsessed with hoodies or was it
that stitch pattern? ;-) Anyway, I took a hiatus from both and now I ready to
go again! I want a light, summer-weight hoodie that I can use as a cover-up so
I've inventoried my yarn stash and came up with some options - several
lightweight cottons, linen blends and linen. Now, I don't want to have to
re-design the original - I want to use the same shape file and the basic
techniques, but I don't need to match the gauge exactly because I'll be working
with my knit radar and all I have to do is plug in my new stitches and rows.
BTW, I'm using my Manfriend Hoodie (
http://knitwords.blogspot.ca/2015/06/manfriend-hoodie-pattern.html ) pattern (the girl version because this is for me!) - it is actually the updated
2015 version of Hood's Up. I ruled
out the really fine stuff because it would be too complicated and have to
totally be redesigned. I took the linens and the biggest problem is the amount
required. I did use this yarn twice before - KW#47, Just the Flax (used 460g
for the 4th size) and #49, Linen Spin (410g for 2nd size). Both of those, I
used one of my one-row-tucks knit fairly loosely. Here's the link to one of my
previous posts explaining 1RT: http://knitwords.blogspot.ca/2014/03/1rt-raglan.html
You may
recall in the past year or more I had become obsessed with hoodies or was it
that stitch pattern? ;-) Anyway, I took a hiatus from both and now I ready to
go again! I want a light, summer-weight hoodie that I can use as a cover-up so
I've inventoried my yarn stash and came up with some options - several
lightweight cottons, linen blends and linen. Now, I don't want to have to
re-design the original - I want to use the same shape file and the basic
techniques, but I don't need to match the gauge exactly because I'll be working
with my knit radar and all I have to do is plug in my new stitches and rows.
BTW, I'm using my Manfriend Hoodie (
http://knitwords.blogspot.ca/2015/06/manfriend-hoodie-pattern.html ) pattern (the girl version because this is for me!) - it is actually the updated
2015 version of Hood's Up. I ruled
out the really fine stuff because it would be too complicated and have to
totally be redesigned. I took the linens and the biggest problem is the amount
required. I did use this yarn twice before - KW#47, Just the Flax (used 460g
for the 4th size) and #49, Linen Spin (410g for 2nd size). Both of those, I
used one of my one-row-tucks knit fairly loosely. Here's the link to one of my
previous posts explaining 1RT: http://knitwords.blogspot.ca/2014/03/1rt-raglan.html When I
was in Dallas last month, one of the really great questions I got was 'how do I
know how much more yarn I will need for swatching, planning etc?' Even though
I've settled on this Linen - it's from Silk City/BTYarns/Knit It Now - 100%
linen, 1750 yds/lb - I have a cone of brown and one of cilantro, each weighing
540g and I have a leftover 240g of the beige. I'm calling it lightweight
because I am knitting it quite loosely - I did one swatch at T9 and another at
T10, washed them and will wait for it to dry before deciding which to go with.
I swatched with the beige, not wanting to waste the good yarn because I will be
lucky (actually, really lucky) to get a hoodie out of one colour. My backup
plan is to use a different colour for the bands - brown with beige bands would
be fine and I have an almost-exact-colour match in Skinny Majesty for the
cilantro linen. So my answer to the question was to use some other yarn to make
sure your stitch pattern is good and then hopefully use another colour leftover
of the same yarn for the actual swatch and also, have a backup plan in case you
still do not have enough (shorter sleeves and optional hood!)
When I
was in Dallas last month, one of the really great questions I got was 'how do I
know how much more yarn I will need for swatching, planning etc?' Even though
I've settled on this Linen - it's from Silk City/BTYarns/Knit It Now - 100%
linen, 1750 yds/lb - I have a cone of brown and one of cilantro, each weighing
540g and I have a leftover 240g of the beige. I'm calling it lightweight
because I am knitting it quite loosely - I did one swatch at T9 and another at
T10, washed them and will wait for it to dry before deciding which to go with.
I swatched with the beige, not wanting to waste the good yarn because I will be
lucky (actually, really lucky) to get a hoodie out of one colour. My backup
plan is to use a different colour for the bands - brown with beige bands would
be fine and I have an almost-exact-colour match in Skinny Majesty for the
cilantro linen. So my answer to the question was to use some other yarn to make
sure your stitch pattern is good and then hopefully use another colour leftover
of the same yarn for the actual swatch and also, have a backup plan in case you
still do not have enough (shorter sleeves and optional hood!) 

