Thursday, March 19, 2020

home alone...

I have been for years, not only working from home, but living alone so it seems like I could give you some pointers – things that I’ve done and work for me whether I’m knitting, writing or just getting by!

1. Get dressed, not just in sweats or yoga pants! Make an effort, like you have a doctor’s appointment or maybe a date (says the girl who's been over-dressed for most every occasion of her life!)! 
2. Do your hair and makeup, even if you are not going anywhere or expecting company – you’ll feel better and that’s the key.
3. Work out – this is important, both for your mental well being but health-wise. Pick something you can and will stick to. I have a little mini home gym set up in my basement, hand weights, yoga mat, a 30-year-old Nordic Trak ski machine and several workout DVDs. Since January I’ve been using 3X3Fit.com. I have the basic set of rings and the 2 short stretch band/bungy cord things and three of her DVDs – not expensive or difficult but good stretching, balance and low/no impact workout. I try to do at least one 35 to 45-minute workout each day and I’m finding it easy and enjoyable. I like doing it about the same time, mid morning, works best for me – leave it till late afternoon and it’s too easy to say, ah! I’ll do it tomorrow…
4. Keep busy – have a quick plan for the day, not written in stone but at least a starting point, especially important when the weather is keeping you indoors. I almost always have a list of things to do and things I want to accomplish, and it makes it easier to fill the day.
5. Plan your meals – it’s easier to stick to a good diet. I always set the table for dinner and use the good stuff, nice serving dishes and tableware.
6. Treat yourself. I like to have fresh flowers, a small bouquet of white/pink alstroemeria are my favourite. They are like little lillies, pretty, inexpensive and always last about two good weeks or more. And if you don’t treat yourself, who will?
7. Be positive! Embrace the exclamation mark! Smile!
8. Stay connected. Face time or group text – that can be fun and last all day - with your social group or family, commiserate and joke!
9. Get outdoors when you can. Have a coffee break in the backyard or walk somewhere in the neighbourhood. I always like to have a destination, so whether it is walking to the post office, bank or library. I’m lucky to live where all these things are within a nice range but if you don’t, drive to a park and walk there!
10. Keep knitting – it is so rewarding to feel that sense of accomplishment, whether you’re making a scarf or just swatching…here’s me, contemplating knitting a tea cozy, NOT! but seriously, doing a little bit each day can relieve anxiety, boredom or whatever it is, you need to take your mind off troubles.

P.S.  Maybe I should explain that last one! My naturopath has me drinking nettle seed tea and she said to brew three cups and drink it through the day – she doesn’t mind it cold and I don’t really either but this morning, I brewed the 3 cups in a 4-cup measuring cup (no, don’t have a tea pot!), covered the top with plastic wrap and then wrapped it all up in a doubled tea towel and as I was unwrapping it for the second cup, still quite warm, the fleeting thought of a knitted tea cozy drifted through my brain. I quickly cancelled it out with the thought, you know you’ve totally lost it when…

Wednesday, March 18, 2020

schemeing vees...

While planning out my sleeveless top, my main concern is getting that vee neck shortrowed on every other row – it won’t work otherwise. In other words, the width of the neck is going to be dependant on the depth of the vee – you have to decrease at least one stitch on every other row (the basic rule of shortrowing), and the best way to figure it is to work backward, from the shoulder down the number of rows you need for the number of stitches, times two.
It dawns on me that my Thunder Bay Poncho has a vee neck that I could practise this technique on! I knew there was a reason I was putting it on hold! ha! is that an intentional pun or what? ;)
Now, you know I’m gonna cheat my way through this project! No swatching – I have plenty of those to choose from as well as schematics and written patterns. The most recent one I think was a black tank that I did to go with a black lace remake that I did - OMG, getting a little yada, yada, yada! there, sorry!
What I should say is I did a black tank top to go with that lacy cardigan from way back  https://knitwords.blogspot.com/2011/07/cross-knitting.html and it is one of my go-to wearables, the black twinset, I mean, so I’m basically just going to remake that, without the lace motif, but change the colours and the neckline. More on this later!
Oh and if anyone wants that skin print stitch pattern, I’m offering it up free of charge! just email me (knitwords@shaw.ca) – it’s a DAK file, so you’ll need to have DAK…
Other coping mechanisms for this social distancing thing – I love to cook and bake but have been avoiding that hobby for some time due to dieting but I’m back to bread and muffin making – giving them away to anyone who’s maybe a bit deprived and needs a little cheering up!
My latest ‘new-to-me’ book author - Linwood Barclay – totally loving his easy-read suspense style. Keeps you guessing to the end! They haven’t closed my local library yet!

Monday, March 16, 2020

retro patterns...

I want to make a tank top or shell – what do we call them anymore? If you google ‘tank top’ it seems to be a man’s sleeveless shirt. What is a shell? Is there a new term for it, just a plain, thin, sleeveless top to wear under a jacket or cardigan? I know a cami is more minimal, with narrow little straps.
Anyway, I want a shell to go under The Skinny. Gone are the days of the deep vee or wide scoop neckline for me, I like to be totally covered up so I’m looking at a crew or jewel neckline or possibly a very shallow vee. It comes to mind that in the past I’ve made tops like this with a vee on one ‘front’ and maybe a scoop on the other front and because it's knit, therefore stretchy and no bust darts, it can be worn either way
depending on how one feels that day – or, how about you spill something and get a stain – just take your arms out, rotate it and no biggie! ;)
Looking through some old issues of Knitwords, I found this one, Seeing Red, (Knitwords #13 – OMG! from Summer 2000! Who is that girl?) where I made one front in white with a wide scoop neck, trimmed the neck and sleeves with a narrow stockinette hem in red and then the other front, in red, had a vee neck and showed all red if that was the side chosen for the front that day.
I’m looking at a new version of that application – I have leftovers of tobacco brown and sand dune Wool Crepe Deluxe, same colours as in The Skinny so I’m thinking crew neck in the tan and a high vee using tobacco and, pushing the envelope, I’m going to see if the vee ‘front’ can be completed with that shortrowing decrease hack that I came up with a while back for the slanted slope on pockets…
https://knitwords.blogspot.com/2018/02/decreasing-hack.html
I have used it on several pocket applications and it seems to lay nice and flat, especially in WCD with no extra finishing needed. Perfect for a thin, no-bulk T-shirt without sleeves…


Sunday, March 15, 2020

keep calm...

and knit on.
Sadly, we’ve cancelled the seminar in Pigeon Forge. Thanks to Margie, Myra, Eloise and all the ladies! I will miss everyone and the excitement of it all, but the current health concerns have become too serious to ignore. And the health and wellness of all is much more important than a bit of machine knitting – the good news, we are re-scheduling for next year!
The other good news is that as machine knitters we have the perfect escape! Get those machines going, take your mind off the world issues! I plan to and I’ll keep you posted, with plenty of inspiration and maybe a tip or two!
Just have to put the buttons on The Skinny and I’ll get a good photo to show off! In the meantime, finishing up that Thunder Bay Poncho in the tweedknit ‘good stuff’ which I was sort of ignoring in all the drama, and planning a shell/tank to go with The Skinny!
Stay safe and healthy!

Thursday, March 12, 2020

winging it...

I did, very confidently, make a swatch of that tubular band and the vertical buttonhole – it looks beautiful! Darned in some more ends and went to bed. Almost to sleep and it’s bugging me that the attaching of this band won’t be the same cakewalk as the last few times I’ve used it – I need to make the button band AND the buttonhole band, launder everything and then attach the bands using the linker or, hand-stitching them, hopefully invisibly. The bands are mercerised cotton and even though that’s supposed to mean they won’t shrink, I know from experience that is a myth with this yarn, and the issue will be the length and the attaching. The fairisle in alpaca goes softer with laundering and there will be some issues with the edges rolling in!
I finally fell asleep, promising myself to think up alternatives, something in a nice, horizontal band that is attached on the machine, stitch-wise, before everything is washed.
1. 6 empty ns evenly spaced
I made a sample of the band from Granville and though it worked and went on the old swatch okay I thought it was maybe a bit too busy looking.
How about a circular horizontal band – no problem but did I ever manage to get buttonholes in that?

 
BUTTON BAND Hold edge up to needle bed, stretching slightly (for fairisle), to determine needle required - Or
2. ns out so the yarn will loop over
measure from sample attached to your swatch. Right end of machine is neckline end of button band.
Swing H5, set up for FNR, end ns on RB. Cast on WY. Knit several rows, end CAR. Set to circular. T4/4, ravel cord, K2R. Move CAL. Bring ns all out. This will cancel the circular setting and make a zigzag row.
MC, T2/2, K1R. RC000. In circular, T4/6, K2R; T5/7, K2R; T6/8, K2R; T7/9, K2R, RC008.
Knit to RC022. Swing P, transfer sts DOWN to RB.
All ns out of work on MB. T0/8, K1R. This knits a row on the rib bed only and makes single stitches out of the transferred ones. It also forms a nice purl stitch ridge on the outside of the band which makes a nest definition between the band and the fairisle fabric! Knit side facing, hang garment from bottom of hem to top of yoke – don’t forget to catch in front edge of pocket before hanging outside layer! Transfer band sts UP and pull through closed edge. Manually knit very loose row and chain off.
3. loops on all empty ns, MB row

BHOLE BAND
                                           B D F
  . . . l l l l l l l l l l l l l l l l l l l l l . . .
 . . . l l l l l l l l l l l l l l l l l l l l l l . . .
                                         A C E G

As above (but flipped – neck will be left end on this one – space buttonholes accordingly!), to RC012,  making 3-stitch hole (for 19mm/3/4-inch button- 6 empty ns, 3 on each bed) evenly spaced beginning at left end (corresponds with neck when made and attached as above) as follows:
4. ravel cord to hold down loops
Cast off A, B, C, D, E, F in the following manner. Move B to A, cast off A (put B in hook, A behind latch, push needle back to knit A off), return stitch to B. Move C to B and cast off B, return stitch to C. Move D to C, cast off C and return stitch to D. Move E to D, cast off D and return stitch to E. Move E to F, cast off E and return stitch to F. Move F to G, cast off F and return stitch to G. Make sure you don’t catch any stitches on the gate pegs/sinker posts when doing this (see photo 1). Repeat for all buttonholes. Bring empty needles out, K1R, (See #2), (CAL) still in circular – watch this, because of the circular, the needles brought out will cancel the circular setting and knit and you only want that happening on the buttonhole needles (see #3).
On Ribber only, using double eye tool, pick loop off needle, one at a time, rotate tool 180 degrees and put back on needle.. This will wrap stitch back on. Here’s the really tricky part – to prevent loops from jumping off main bed, (see #4) lay a ravel cord over the whole thing and secure below. Bring the wrapped needles out on RB only, to make sure that they knit on next row. K1R (CAR). Repeat the twisting of stitches on main bed and bring out wrapped ns on MB only (#5). K1R. Remove ravel cord. Continue as for button band!

5. ravel cord still under loops for MB row
My second attempt on the circular band and I got it! OMG! I thought I was clever before! Big Head Alert! Wish I had a magazine to put this in! At least I wrote it down for myself! If I hurry, I can get this finished up to go to Tennessee!

Tuesday, March 10, 2020

not to bore you entirely...

It’s probably too late for that, but I rehung the deformed Back, guessed at the row, got lucky and it looks fine on a quick walk-by! I’m going to live with it. After all I won’t be seeing it!
Did the pockets (stabilized each side of slit opening with a chained edge, made the pocket lining and hand stitched it in place on inside of Front), made the collar, finished off the cuff edges with an ewrap (Band Practise, #14, ewrap added to open sts), knit the yokes, attached them, etc.
Now it’s down to buttons and the front bands. Of course, I don’t have 5 to 6 suitable buttons but before hitting the fabric store to check out their stock, I go through and at least get a feel for the size and colour that I think will work best.
Along the way I’ve been evaluating the front band options in my mind. Current favourite is the tubular bands with vertical slit buttonholes from Geezer Chic, Knitwords #50 (also in the ABZ! Alter it! Button It! Zip It! /yellow book, #24, Bar Tacked Vertical Buttonhole on Tubular Band). Guess a swatch or two might help…

Tuesday, March 3, 2020

in the pocket...

Did I mention I also just happened to have almost the exact shade of WCD for the pocket lining – it’s lighter/thinner so doesn’t add too much extra thickness for the single-layer pocket.
Funny, the colour name of the three different beige/tan yarns: the WCD is ‘sand dune’, the mercerised cotton is ‘khaki’ and the alpaca is ‘camel’.
I set the deformed Back aside to think about. My options are re-knit the whole thing if I have enough yarn  after the fronts are done (likely); redraft and rip it back to the point of the mistake and cast it off and make the back yoke deeper to reflect (possible); or rip back, rehang, reprogram and hope for the best – worth a try and I’d have more bragging rights!

begin pocket slit shortrow ravel cord
On to the fronts. I’ve decided on an inside-patch pocket set into a vertical slit. This will mean knitting to the bottom of the pocket opening (in pattern with DAK, bless his little heart!); putting one portion in hold, knitting the depth of the slit, holding this side; putting the first held side back in work, re-reading the row and knitting this side up to match the other, blah-blah-blah…for a little recap of the MAO-approved shortrow method, check this link for photos and how-to in lace [https://knitwords.blogspot.com/2017/01/life-lessons.html] Also plug ‘shortrow ravel’ into the search box at the top left of the page for other instances.
shortrow using garter bar to hold sts
Practise a few deep breaths, jump in and get to the bottom of the slit, no problem. Because I don’t want to be passing the carriage over and over the held side, possibly damaging the yarn of the held row, I’m using the ravel cord method of shortrowing, bringing the stitches back to A position on the ravel cord  so there are no needles sticking out but you need to make sure the held stitches remain back in A. I find out quite quickly this new carriage has a zero-tolerance policy for this and suffice it to say, I did manage to get the first side of 26 rows knit with only six instances of severe profanity, while considering ways to revise my plan for the second front. I’m not at the abandon-ship level of frustration yet!
successful slit opening for pocket
For the second side of the slit, I put the first side out of work by taking it off on the short section of garter bar and roll it over on itself and clamp it to keep the stitches from falling off – works successfully and Bob’s your uncle! One Front done! I did briefly contemplate making the second front in two pieces – the slit opening for the pocket is a vertical line and I could just seam the two pieces above and below, leaving the same slit for the pocket, but what the heck? What is life without a little adversity?
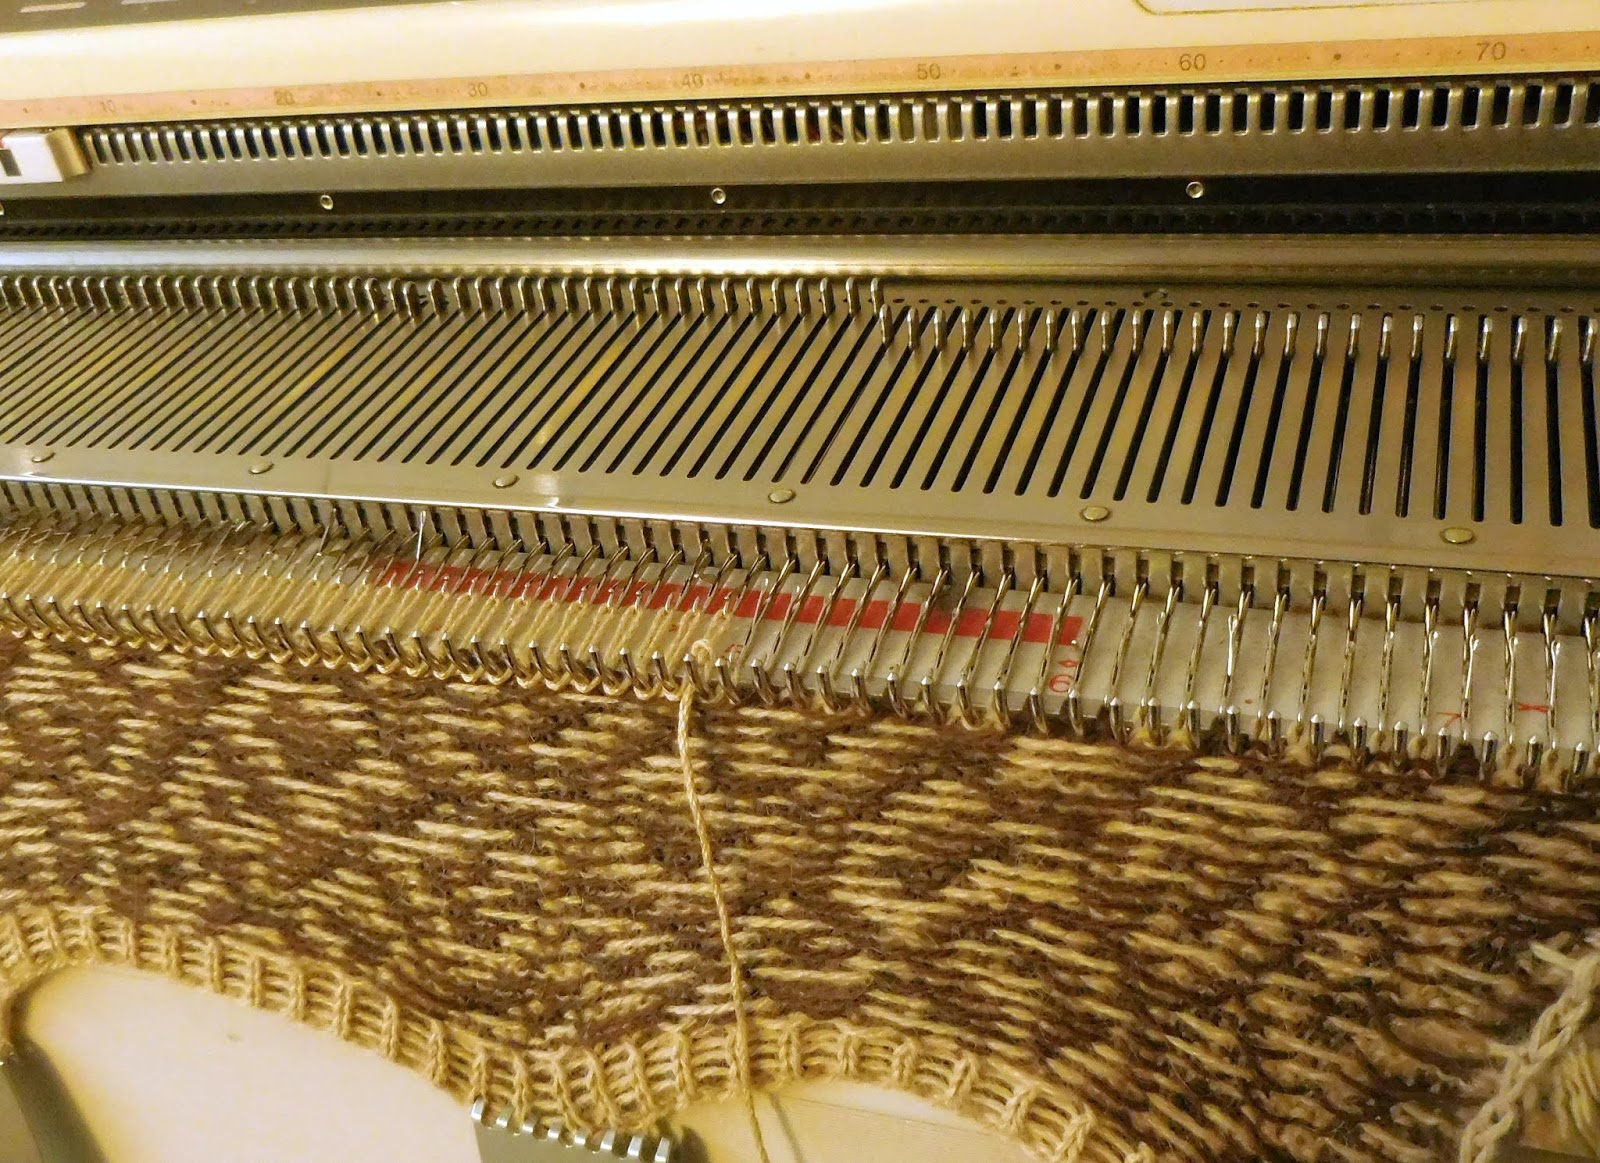
I just thought of the perfect name for this thing – The Skin Game! or maybe just The Skinny!